
Desserts
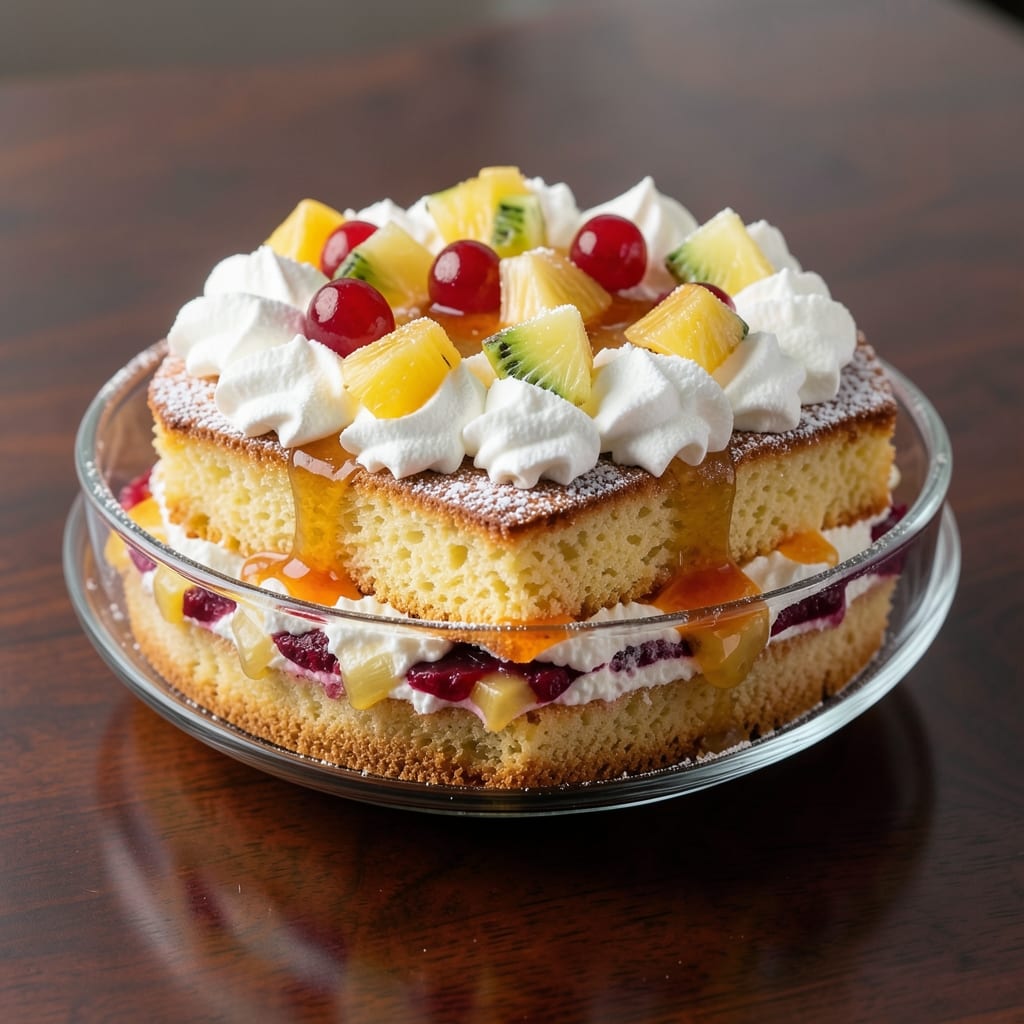
This ambrosia cake recipe with pineapple delivers layers of tropical magic without a single bake—just rich cake, syrupy sweetness, and creamy textures that melt together. The secret lies in soaking store-bought pound cake in pineapple juice until every bite feels drenched in flavor, then building layers with whipped cream, fresh fruit, and maraschino cherries for that classic ambrosia look. I perfected this version after years of testing, ensuring the cake stays moist while the cream stays light and fluffy between chilled layers.
The no-bake approach makes this dessert surprisingly simple—no oven required, just assembly and patience. Start with a sturdy cake base (pound or sponge works best), then alternate layers of cake, pineapple juice syrup, and whipped cream. Each layer gets chilled briefly to set properly, preventing a soggy mess. Fresh pineapple chunks add brightness, while toasted coconut on top brings that signature tropical crunch.
What you end up with is a showstopper dessert that looks elegant but comes together in under 30 minutes of active work (plus chilling time). The contrast of creamy, juicy, and crunchy elements makes every forkful exciting, and the maraschino cherries add a nostalgic touch. This is the kind of dessert that feels special enough for company but easy enough for a weeknight treat.
Perfect for summer gatherings, potlucks, or when you want a crowd-pleasing dessert without the fuss. The key to success is letting the cake soak properly and chilling between layers—trust me, it’s worth the wait for that perfect texture. Let’s build this tropical masterpiece!
Ingredients for ambrosia cake recipe pineapple
Tropical flavors and no-bake magic—just these 11 ingredients transform into a showstopper dessert.
| Ingredient | Amount | Notes |
|---|---|---|
| Store-Bought Pound Cake 🍰 | 1 whole | Vanilla or yellow cake, 10-12 oz |
| Canned Pineapple Juice 🍍 | 1 ½ cups | With pulp, unsweetened preferred |
| Heavy Whipping Cream 🥛 | 2 cups | Cold for best whipping |
| Granulated Sugar 🍚 | ½ cup | For pineapple syrup |
| Fresh Pineapple Chunks 🍍 | 2 cups | Diced, small pieces |
| Maraschino Cherries 🍒 | 1 package | Sliced, drained (12 oz) |
| Sweetened Flaked Coconut 🥥 | 1 cup | Toasted for crunch |
| Vanilla Extract 🌿 | 1 tsp | Pure, high-quality |
| Unsalted Butter 🧈 | 2 tbsp | For toasted coconut |
| Powdered Sugar 🍚 | 2 tbsp | For whipped cream |
| Lemon Juice 🍋 | 1 tbsp | Freshly squeezed |
The pound cake is your base, so grab a sturdy box—Betty Crocker or Duncan Hines work perfectly. I always check the weight on the box to ensure it’s around 10-12 oz; lighter cakes can get soggy. Fresh pineapple is ideal, but canned chunks in juice save time and add that sweet-tart punch. For the pineapple juice, Del Monte or Dole brands are reliable, but unsweetened is key—you’ll sweeten it yourself. The whipped cream needs to be cold, so take it out of the fridge just before whipping. And trust me, toasted coconut makes all the difference—it’s worth the extra 5 minutes.
No fresh pineapple? Canned chunks in juice work perfectly—just drain well. Running short on maraschino cherries? Red food coloring + sugar syrup gets you close, though nothing beats the real deal. The syrup can be made ahead and stored in the fridge for up to 1 week. For the whipped cream, if you’re nervous about over-whipping, use a hand mixer instead of a stand mixer. And if you’re feeling fancy, swap the flaked coconut for toasted coconut flakes—they’re easier to toast evenly. The lemon juice brightens everything, so don’t skip it, even if it’s just a splash.
This dessert is all about patience—let the cake soak for at least 15 minutes per layer, and chill between assemblies for 30 minutes to set properly. The whipped cream can be made up to 2 hours ahead and stored in the fridge. For the toasted coconut, spread it on a baking sheet with butter, toast at 350°F for 5-7 minutes, then cool completely. The whole cake keeps well in the fridge for 3-4 days, though it’s best enjoyed fresh. And if you’re serving a crowd, double the coconut—it disappears fast!
Why You'll Love This Recipe
- No-Bake Magic: I swear by this trick—just soak the pound cake in pineapple juice while you whip the cream and fold in those fresh chunks. No oven, no fuss, just layers of flavor that taste like a tropical vacation.
- Creamy-Tropical Bliss: That first bite? The cake’s buttery crunch gives way to whipped cream so light it melts, all wrapped in pineapple’s tangy sweetness. Honestly, it’s the kind of dessert that makes you close your eyes.
- Party in a Bowl: Serve it at brunch with coffee, slice it for potlucks, or pack individual portions for lunchboxes. The pineapple juice keeps it moist for days, so it’s my go-to when I need something reliable and crowd-pleasing.
- Budget-Friendly Luxury: Pound cake and canned juice? Check. Heavy cream and sugar? Basic pantry staples. Fresh pineapple’s the only splurge, but it stretches to feed six for under $10. Delicious without breaking the bank.
Step-by-step instructions for tropical layers with no-bake magic
This no-bake ambrosia cake comes together effortlessly with layers of creamy, fruity goodness.
Prepare the Pineapple Syrup
In a medium saucepan, combine the 1.5 cups canned pineapple juice and 0.5 cup granulated sugar. Bring to a boil over medium-high heat, stirring just until the sugar dissolves completely. You'll see the mixture bubble vigorously and turn slightly translucent.
Once boiling, reduce heat to medium-low and let it simmer for 10-12 minutes until slightly thickened. The syrup should coat the back of a spoon but still be pourable—not syrupy like maple syrup. Remove from heat and stir in the 1 tablespoon lemon juice and 1 teaspoon vanilla extract. Let this cool completely before using—about 15 minutes. The aroma will fill your kitchen with tropical sweetness.
Assemble the Cake Layers
Slice the whole store-bought pound cake horizontally into three equal layers. You'll want each layer to be about 1-inch thick—this ensures even distribution of the filling. Place the bottom layer in your serving dish or cake pan.
Spread ⅓ of the cooled pineapple syrup evenly over the cake layer, letting it soak in completely. This step is crucial—it prevents a soggy bottom and creates that perfect ambrosia texture. Repeat with the middle and top layers, reserving a small amount of syrup for drizzling later.
Create the Tropical Filling Mixture
In a large bowl, combine the 2 cups fresh pineapple chunks and 1 package sliced maraschino cherries. Drain any excess liquid from the cherries first—you want the filling to be thick, not watery. Add 1 cup sweetened flaked coconut and toss gently to distribute evenly.
Now, in a separate bowl, whip the 2 cups heavy whipping cream until soft peaks form. Add the 2 tablespoons powdered sugar and continue whipping until stiff peaks form—this should take about 3-4 minutes. Fold the whipped cream into the pineapple-coconut mixture using a spatula, being careful not to overmix. The filling should be light and airy with visible fruit pieces throughout.
Layer and Chill for Perfect Texture
Spread half of the tropical filling mixture evenly over the top cake layer. Gently press down with a spatula to help it settle. Add the remaining filling, then carefully place the final cake layer on top. Press down lightly to ensure even distribution.
Transfer the assembled cake to the refrigerator and chill for at least 4 hours, or preferably overnight. This chilling time is essential—it allows all the flavors to meld together and the cake to develop that perfect ambrosia texture. The longer it chills, the better the layers will hold their shape when sliced.
Toast the Coconut and Finish
While the cake chills, toast the remaining 1 cup sweetened flaked coconut in a dry skillet over medium heat. Stir constantly for 3-4 minutes until it turns a golden brown color and smells nutty. Remove from heat immediately and add the 2 tablespoons unsalted butter—it will melt into the coconut, adding extra richness.
Once the cake has chilled completely, drizzle the reserved pineapple syrup over the top in an even zigzag pattern. Sprinkle the toasted coconut evenly over the entire surface. Serve chilled slices straight from the refrigerator for that perfect no-bake ambrosia experience—creamy, fruity, and bursting with tropical flavors in every bite.
Pro Tips For Making Ambrosia Cake Recipe Pineapple
- Chill the Cake First: Cold pound cake soaks up syrups like a sponge instead of turning into a soggy mess. Pop it in the fridge for 30 minutes before layering—trust me, your cake won’t collapse on you. ---
- Drain Pineapple Juice: That thick, sticky canned pineapple juice? Drain it into a separate bowl first. Mixing it straight from the can just makes your layers glue together—save the juice for the syrup instead. ---
- Whip Cream to Stiff Peaks: Soft peaks = sad cake. Heavy cream needs to hold its shape like frosting, or it’ll sink into the layers. Use a chilled bowl and beat until it leaves clean trails when you lift the whisk. ---
- Toast the Pineapple Chunks: Fresh pineapple chunks taste better when they’re warm. Toss them in a dry pan for 2–3 minutes until caramelized—it adds depth that raw chunks miss. (Yes, even if you’re in a hurry.)
Best sauces and condiments for this recipe
Caramelized Pineapple Sauce
Elevate your ambrosia cake with a caramelized pineapple sauce that adds depth and richness. Cook 1 cup fresh pineapple chunks with 2 tbsp brown sugar and 1 tsp lime juice in a skillet over medium heat for 8-10 minutes until syrupy. Reduce to a sauce consistency, then drizzle over the chilled cake layers. The caramelized notes balance the sweetness perfectly. 🍍
Coconut Whipped Cream
Swap the standard whipped cream for a coconut whipped cream that complements the tropical theme. Whip 2 cups heavy whipping cream with 2 tbsp powdered sugar and 1 tsp toasted coconut extract (or ½ tsp coconut flavoring) until stiff peaks form. Fold into the filling for a nutty, creamy twist that pairs beautifully with pineapple. This adds a subtle coconut aroma that ties everything together. 🥥
Lime-Cream Cheese Glaze
A lime-cream cheese glaze adds tangy brightness and a silky finish. Mix 4 oz cream cheese, ½ cup powdered sugar, 2 tbsp lime juice, and 1 tsp vanilla extract until smooth. Drizzle over the top layer before adding the toasted coconut. The glaze cuts through the sweetness and adds a restaurant-quality touch. Serve immediately for the best texture. 💛
Spiced Rum Syrup
For an adult-friendly twist, infuse the pineapple syrup with spiced rum. Simmer 1.5 cups pineapple juice, ½ cup sugar, and 2 tbsp dark rum for 10 minutes until reduced. Cool and use as the soaking syrup for the cake layers. The rum adds warmth and complexity that pairs wonderfully with the tropical flavors. Perfect for special occasions! 🍹
Mango Purée Swap
Swap the pineapple for a mango purée in the filling for a vibrant variation. Blend 2 cups ripe mango chunks with 1 tbsp lime juice until smooth, then fold into the whipped cream mixture. The mango adds a smoother, fruitier texture while keeping the same creamy structure. Garnish with toasted coconut and maraschino cherries for a colorful twist. 🌈
Nutrition facts
Frequently asked questions
Can I use fresh pineapple instead of canned in the syrup?
Yes, but you'll need to adjust the method. Blend 2 cups fresh pineapple chunks with 1.5 cups water to extract the juice, then strain through a fine-mesh sieve. Use this fresh juice in place of canned pineapple juice, but reduce the sugar to ¼ cup since fresh pineapple is naturally sweeter. Simmer for 8-10 minutes to concentrate the flavors. The texture will be slightly lighter but still delicious!
Why does my cake get soggy when assembled?
Soggy layers usually happen from two things: insufficient soaking time or skipping the chilling step. Let each cake layer soak in syrup for at least 15 minutes before adding filling, and chill the assembled cake for 4+ hours (overnight is best). The syrup needs time to fully saturate the cake without making it too wet. Also, make sure your whipped cream isn't too runny—it should hold its shape when piped.
What's the best way to make this dessert ahead of time?
This ambrosia cake actually tastes better the next day! Assemble it completely (including the coconut topping) and refrigerate for 24 hours before serving. The flavors meld beautifully, and the coconut topping stays perfectly crisp. For make-ahead prep, you can even prepare the pineapple syrup and whipped cream 1 day ahead, storing them separately in the fridge. Just assemble when ready to serve.
Can I make this without maraschino cherries?
If you can't find maraschino cherries, try these alternatives: red food coloring + sugar syrup (mix 1 tsp red gel food coloring with 2 tbsp water and 2 tbsp sugar), or use strawberry purée (blend ½ cup strawberries and strain). For a simpler option, just omit them—the pineapple and coconut will still shine. The cherries add visual appeal but aren't essential to the flavor.
How do I keep the whipped cream from deflating?
Whipped cream deflates when exposed to heat or overmixed. Always use cold cream and bowls, and whip just until stiff peaks form (about 3-4 minutes with a hand mixer). Fold it gently into the fruit mixture, and assemble the cake quickly. If you need to prep ahead, store the whipped cream in an airtight container with plastic wrap pressed directly on the surface to prevent air exposure. Keep it chilled until ready to use.