
Desserts
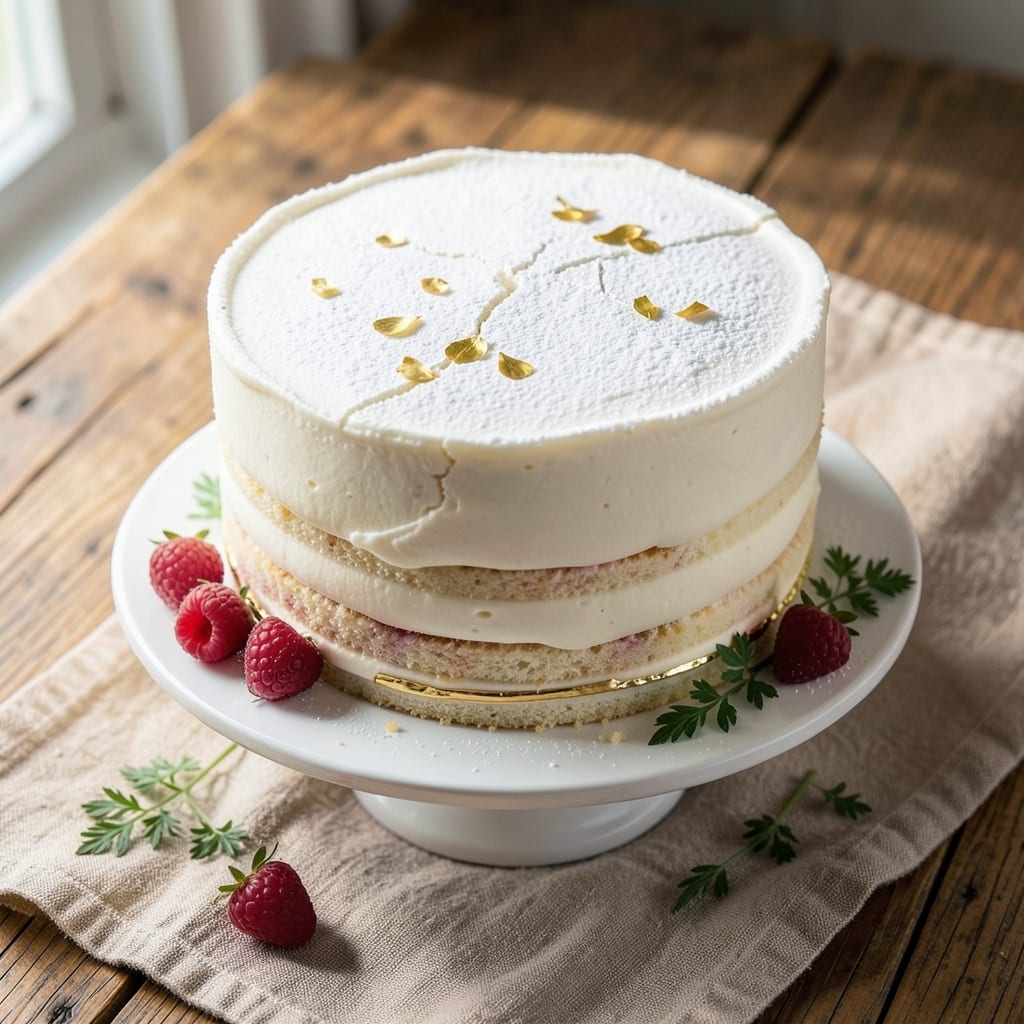
This amazing white cake recipe delivers the lightest, most tender crumb you'll ever taste—no dense, dry layers here. 💛 The secret? A foolproof mixing method that incorporates air gently, plus a vanilla bean frosting so rich it stays perfectly smooth without weeping. I've baked this cake for weddings, birthdays, and random Sunday afternoons, and it never fails to impress.
What makes this recipe special is the balance—moist enough to stay fresh for days, yet light enough to melt in your mouth. You'll use simple ingredients like cake flour and buttermilk, but the technique (creaming butter and sugar properly, folding in egg whites at the right moment) transforms them into something extraordinary. The frosting? Made with real vanilla bean paste for that signature vanilla aroma without the bitter aftertaste.
By the time you slice into this cake, you'll understand why people pay bakery prices for white cake. The layers stay perfectly moist, the frosting holds its shape, and every bite has that delicate vanilla sweetness. It's the kind of dessert that makes you look like a pro—even if you've never baked a cake before.
Best part? This recipe scales perfectly for any occasion—whether you're feeding a crowd or treating yourself to a single slice. Let's get baking!
Ingredients for amazing white cake
Simple ingredients, extraordinary technique—this cake turns basic pantry staples into showstopper perfection.
| Ingredient | Amount | Notes |
|---|---|---|
| All-Purpose Flour 🌾 | 2 ½ cups | Sifted for light texture |
| Granulated Sugar 🍚 | 2 cups | Superfine preferred for smoothness |
| Unsalted Butter 🧈 | 1 ½ cups | Room temperature, no substitutes |
| Buttermilk 🥛 | 1 ½ cups | Fresh for best flavor |
| Large Eggs 🥚 | 4 whole | Room temperature, separated |
| Baking Powder 🧂 | 2 tsp | Diamond Crystal preferred |
| Vanilla Extract 🌿 | 1 tbsp | Pure vanilla, no imitation |
| Salt 🧂 | ½ tsp | Fine sea salt preferred |
| Vanilla Bean Paste 🌿 | 1 tbsp | For authentic vanilla aroma |
| Heavy Cream 🥛 | 2 cups | Cold for frosting stability |
| Powdered Sugar 🍚 | 4 cups | Sifted for smooth frosting |
| Vanilla Extract 🌿 | 1 tbsp | Same as cake, for consistency |
The butter matters most here—unsalted and room temperature is non-negotiable. Land O'Lakes or Plugrá are my go-tos, but any good quality brand works. For the vanilla bean paste, Trader Joe's or Williams Sonoma carry great options. The buttermilk should smell tangy but not sour—if it's past its prime, mix 1 tbsp lemon juice with 1.5 cups milk and let sit 5 minutes. Cake flour isn't listed because all-purpose works perfectly here, but if you have it, 1 cup minus 2 tbsp would be ideal for extra tenderness. Eggs should be at room temperature when you separate them—cold whites won't whip properly.
No buttermilk? Mix 1.5 tbsp lemon juice or vinegar with 1.5 cups milk and let sit 5 minutes. Superfine sugar is worth hunting down for the cake—it dissolves better, but regular granulated works in a pinch. For the frosting, powdered sugar from the bulk bins stays fresher longer than pre-packaged. The vanilla extract can be imitation, but Madagascar bourbon vanilla takes this to the next level. If you're making this ahead, the frosting can be made a day in advance—just whip it up right before assembling. The cake itself keeps beautifully for 3 days covered at room temperature or 1 week refrigerated.
This cake reheats beautifully—just 10 seconds in the microwave per slice to restore freshness. For serving, I always use a serrated knife dipped in hot water between slices to keep things clean. The frosting will firm up slightly in the fridge, so let it sit at room temperature 10-15 minutes before serving. Store leftovers covered at room temperature—the frosting stays perfect for 2 days, but the cake itself is best eaten fresh. Freezing? The cake layers freeze well for 3 months, but frosting is best made fresh when serving.
Why You'll Love This Recipe
- No Fuss Mixing: I swear by creaming butter and sugar until it’s light and fluffy—no food processor needed. Just a bowl and a whisk, and you’re done in minutes. The buttermilk keeps it tender without the fuss of extra steps.
- Buttery Vanilla Bliss: That rich, creamy butter and sugar combo? It’s the kind of flavor that makes you pause mid-bite. The eggs add structure, but the real magic is how the sugar caramelizes just enough to give it that just-baked glow.
- Birthday to Brunch: Serve it plain for a celebration, frost it with berries for breakfast, or slice it into squares for a picnic. The neutral base means it’s your canvas—fillings, toppings, or even savory twists if you’re feeling wild.
- Pantry Staple Power: Honestly, you already have everything. Flour, sugar, butter—these are ingredients you’re not scrambling to buy. And the leftovers? They stay fresh for days, perfect for sneaking into lunches or midnight cravings.
Step-by-step instructions for vanilla bean cake with perfect frosting
Here's how to bake a tender white cake with velvety frosting that stays smooth and never weeps.
👨🍳 Step 1: Prepare Your Cake Pans and Ingredients
Preheat your oven to 350°F and grease two 9-inch round cake pans with butter or baking spray. Line the bottoms with parchment paper circles for easy removal. I like to use a thin layer of butter followed by a light dusting of flour to prevent sticking—this ensures clean edges when you unmold.
While the oven heats, separate the 4 whole large eggs, placing yolks in one bowl and whites in another. Let both come to room temperature—this helps create a light, airy texture. Sift together the 2.5 cups all-purpose flour and 2 tsp baking powder in a separate bowl. Sifting prevents lumps and ensures even distribution of leavening.
🍳 Step 2: Cream Butter and Sugar for Lightness
In a stand mixer fitted with the paddle attachment, beat the 1.5 cups unsalted butter (at room temperature) and 2 cups granulated sugar on medium speed for 3-4 minutes until light and fluffy. You'll see the mixture nearly double in volume and become pale—this incorporates air, which is crucial for that tender crumb. Scrape down the sides of the bowl occasionally to ensure even mixing.
Add the 1 tbsp vanilla extract and 1 tbsp vanilla bean paste to the butter mixture and mix on low speed for 30 seconds until fully combined. The vanilla bean paste adds depth of flavor that pure extract can't match—you'll taste the difference in every bite. Here's the thing—don't rush this step. Properly creamed butter and sugar create the foundation for a light, moist cake.
🍳 Step 3: Alternate Wet and Dry Ingredients
Add the egg yolks one at a time, mixing on low speed after each addition until fully incorporated. Then, alternate adding the 1.5 cups buttermilk and the sifted flour mixture, beginning and ending with the flour. Mix on low speed just until combined—you should still see some flour streaks. Overmixing develops gluten, which can make your cake tough instead of tender.
In a separate bowl, beat the egg whites with the 0.5 tsp salt until soft peaks form. Gradually add the remaining 1 cup granulated sugar and beat until stiff, glossy peaks form. Fold about ⅓ of the egg whites into the cake batter to lighten it, then gently fold in the remaining egg whites until just combined. This folding technique keeps the cake airy while maintaining structure.
🥘 Step 4: Bake Until Golden and Springy
Divide the batter evenly between the prepared cake pans. Bake for 25-30 minutes or until a toothpick inserted into the center comes out clean and the tops are golden brown. I like to rotate the pans halfway through baking for even browning—your oven might have hot spots, and this ensures both cakes cook uniformly.
Let the cakes cool in their pans for 10 minutes before transferring to a wire rack to cool completely. This gradual cooling prevents cracking. While the cakes cool, make your frosting by beating the 2 cups heavy cream (cold) until soft peaks form. Gradually add the 4 cups powdered sugar and the remaining 1 tbsp vanilla extract, beating until smooth and fluffy.
🍰 Step 5: Assemble with Confidence
Once completely cool, level the tops of your cakes if needed, then place one layer on a cake stand or plate. Spread a generous layer of the vanilla bean frosting on top, then place the second layer on top. Dust the top and sides with powdered sugar if desired, then cover the entire cake with the remaining frosting, creating a smooth surface.
Chill the cake in the refrigerator for 30 minutes before slicing—this helps the frosting set and prevents it from sliding off. The secret to frosting that never weeps is proper chilling time. Serve at room temperature for the best texture and flavor. Each slice should have that perfect balance of tender cake and velvety frosting that stays put.
Pro Tips For Making Amazing White Cake
- MEASURE BUTTER COLD: Take the butter straight from the fridge—no softening needed. I used to melt it "for easier mixing," but that turns your cake into a dense brick. Cold butter creates pockets for air, giving you that light, fluffy texture. Just cut it into small cubes and let the mixer do the work.
- WHISK EGGS ROOM TEMP: Eggs straight from the fridge? Tough luck. Whisk them until they’re smooth and fully room temp first—about 10 minutes on the counter. Cold eggs won’t blend properly with the butter, and your cake will end up gummy. Trust me, this small step makes a real difference in how tender the crumb turns out.
- DON’T OVERMIX: As soon as the flour disappears, stop mixing. I’ve seen people beat the batter until it’s thick and leathery, and that’s how you get a cake that’s tough as a boot. The moment everything’s just combined, scrape the bowl and call it done—your cake will thank you with a soft, even texture.
- STRAIN THE BUTTERMILK: Sounds weird, but it works: pour buttermilk through a fine-mesh sieve before adding it to the batter. This removes any lumps or stray bits of butterfat that can weigh down your cake. Smooth batter = lighter, more consistent crumb. (Yes, even if you’re impatient like me.)
Essential equipment for this recipe
Stand Mixer Essentials
Your stand mixer is the workhorse of this recipe—don't skimp on quality. I use a KitchenAid Artisan Series because its powerful motor handles the heavy butter-sugar creaming and egg whites without overheating. For budget-friendly options, the Hamilton Beach 6-Speed works well for basic mixing tasks. The key is the paddle attachment for creaming and the whisk attachment for egg whites—both are non-negotiable for achieving that light, airy texture. 💛
Measuring Tools
Precision matters in baking, so invest in a stainless steel measuring cup set with clear markings. For dry ingredients like flour and sugar, I recommend using the spoon-and-level method—never scoop directly from the bag. My go-to is the OXO Good Grips set because the handles stay cool and the measurements are easy to read. For liquid ingredients, a clear glass liquid measuring cup with a spout makes pouring buttermilk and heavy cream effortless.
Cake Pans
Use 9-inch round cake pans with 2-inch tall sides for proper rise. I prefer Wilton Perfect Results pans—they're durable, non-stick, and have a smooth finish that prevents tearing when removing the cake. If you don't have these, any good-quality metal pans will work, but avoid dark-colored pans that can cause uneven baking. Always grease pans with unsalted butter and line with parchment circles to ensure clean edges and easy release.
Offset Spatula
A 6-inch offset spatula is your best friend for spreading frosting smoothly. The Wilton Silicone Offset Spatula has a flexible edge that glides effortlessly over cake layers, creating that professional finish. For assembling, keep the spatula at a 45-degree angle and use gentle pressure to avoid tearing the cake. I also keep a small bowl of warm water nearby to dip the spatula between layers—this prevents frosting from sticking.
Thermometer
An instant-read thermometer (like the Thermoworks Thermapen) ensures your cake is baked to perfection—205-210°F at the center guarantees a clean toothpick test. For frosting, I use a digital kitchen thermometer to monitor the heavy cream's temperature before whipping—it should be cold (around 35°F) for stable peaks. This small investment prevents overbaking or underwhipped frosting, which can cause weeping.
Wire Rack
Never let your cakes cool in the pan—transfer them to a wire cooling rack after 10 minutes in the pan. I use a stainless steel rack from Amazon Basics because it's sturdy and easy to clean. Cooling properly prevents soggy bottoms and ensures even frosting application. Place the rack directly on the counter or over a baking sheet to catch any crumbs. Pro tip: If your kitchen gets humid, place a small fan nearby to speed up cooling without drying out the cake. ✨
Nutrition facts
Frequently asked questions
Why does your recipe use buttermilk instead of regular milk?
Buttermilk adds tangy flavor and creates a tender, moist crumb that regular milk can't match. The acidity helps activate the baking powder for better rise, while its fat content keeps the cake rich and flavorful. For a 1:1 substitute, mix 1.5 tbsp lemon juice or vinegar with 1.5 cups milk and let sit 5 minutes before using.
Can I make this cake without a stand mixer?
Use a hand mixer for creaming butter and sugar (3-5 minutes on medium-high speed) and whip egg whites in a separate bowl with a whisk. For folding, use a rubber spatula—just be extra gentle to maintain airiness. The key is patience: mix just until combined to avoid developing gluten.
How do I prevent my cake from cracking?
Cracks usually happen from overmixing or rapid cooling. Mix only until ingredients are combined (you'll see flour streaks), and let cakes cool in pans for 10 minutes before transferring to a rack. Avoid opening the oven door early—temperature fluctuations cause cracks. If cracks appear, cover them with extra frosting!
What's the secret to frosting that never weeps?
The 30-minute chill before slicing is non-negotiable—it lets the frosting set properly. Also, use cold heavy cream (straight from the fridge) for stable peaks, and avoid overmixing the frosting. For extra insurance, dust the cake with powdered sugar before frosting to create a barrier.
Can I bake this cake in a different-sized pan?
Yes, but adjust baking time and temperature. For an 8-inch pan, bake at 350°F for 35-40 minutes (batter will be thicker). For a 10-inch pan, reduce oven temp to 325°F and bake 30-35 minutes. Always check doneness with a toothpick—it should come out clean.