
Desserts
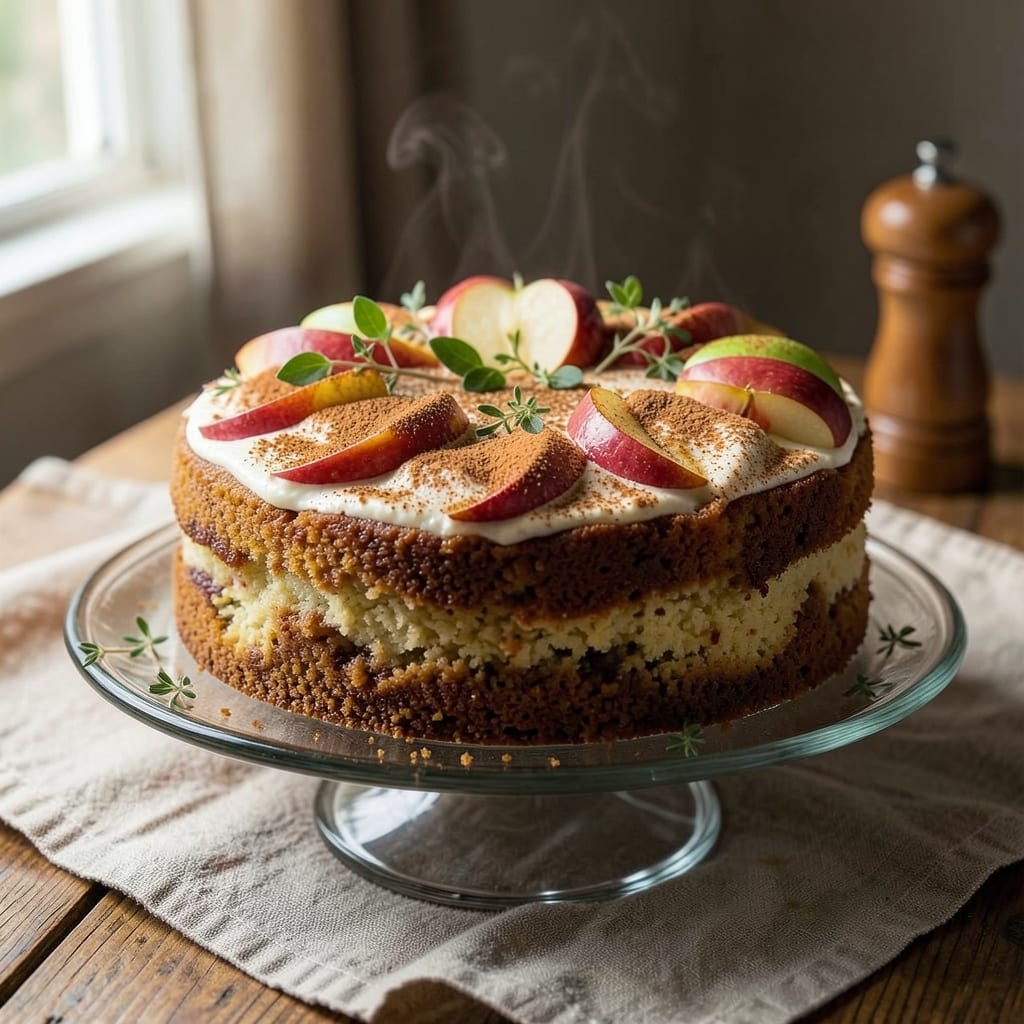
This all-in-one apple cake recipe transforms simple pantry staples into layers of spiced apple perfection with almost no mixing required. 🌟 The secret lies in combining dry ingredients and wet ingredients in the same bowl, then folding in tender apple slices—no separate batter prep needed. I developed this version after years of baking apple cakes that either turned out too dense or required too much effort, and this method delivers foolproof results every time.
The beauty of this recipe is its simplicity: just six core ingredients (plus apples) create a moist, flavorful cake with tender layers of spiced fruit. You’ll bake it in a single pan, making it perfect for small batches or special occasions without the fuss. The warm cinnamon and nutmeg flavors complement the natural sweetness of the apples, while a touch of vanilla adds depth that makes this cake taste like a bakery masterpiece.
What you’ll end up with is a golden, slightly domed cake with a tender crumb and juicy apple layers that stay moist even after cooling. The spice notes linger with each bite, creating a balance between sweet and warm that’s impossible to resist. This cake is ideal for brunch, dessert, or even as a cozy afternoon treat—no one will guess it required minimal effort.
Serve it warm with a scoop of vanilla ice cream or dusted with powdered sugar for an elegant finish. The best part? You can prepare the cake in under 30 minutes and have it ready for guests in less than an hour. Let’s get baking!
Ingredients for all in one apple cake
Six core ingredients plus apples create this foolproof spiced apple cake with layers of tender fruit.
| Ingredient | Amount | Notes |
|---|---|---|
| All-Purpose Flour 🌾 | 2 cups | Sifted for even texture |
| Granulated Sugar 🍚 | 1 ½ cups | White or light brown |
| Unsalted Butter 🧈 | 1 cup | Cold, cubed for easier mixing |
| Large Eggs 🥚 | 2 whole | Room temperature preferred |
| Vanilla Extract 🌸 | 1 tbsp | Pure extract for authentic flavor |
| Ground Cinnamon 🌿 | 2 tsp | Freshly ground preferred |
| Ground Nutmeg 🌿 | ½ tsp | Freshly grated for depth |
| Salt 🧂 | ½ tsp | Kosher or sea salt |
| Apples 🍎 | 4 medium | Honeycrisp or Granny Smith, peeled |
| Powdered Sugar 🍚 | ¼ cup | For dusting finished cake |
The apples are non-negotiable—Honeycrisp or Granny Smith deliver the best balance of sweet and tart. Local farmers markets often have perfect apples for baking, but the grocery store produce section works too. Look for firm apples with no bruises, as they'll hold their shape better during baking. If you can't find Honeycrisp, Fuji or Gala are solid substitutes. Peeled or unpeeled? I always peel mine for a cleaner texture, but leaving the skin on adds nice color and a little extra fiber.
No vanilla extract? Vanilla bean paste works perfectly—just use half the amount. Running low on cinnamon? Substitute pumpkin pie spice at the same quantity, though you'll lose some of that pure cinnamon warmth. The butter should be cold when measuring—microwave it for 20 seconds if it's too soft. For a lighter cake, you can reduce the sugar by 2 tablespoons and add 1 extra tablespoon of applesauce, but don't skip the powdered sugar on top—that's where the magic happens. If you're short on apples, dried apple pieces soaked in warm water work in a pinch, though fresh is always better.
This cake keeps beautifully—3 days at room temperature covered loosely with plastic, or 1 week refrigerated in an airtight container. For longer storage, wrap tightly in plastic and freeze for up to 3 months. The best part? It actually tastes better the second day as the flavors meld. I always bake this in an 8-inch round pan for perfect single servings, but a 9x13-inch pan works too if you're feeding a crowd. Just reduce the baking time by about 10 minutes. And trust me—warm cake with vanilla ice cream is the only way to eat this.
Why You'll Love This Recipe
- No Mixing Madness: I swear by this one-bowl method—just toss everything in the same bowl, stir until the butter’s almost gone, then fold in the apples. No stand mixer, no extra bowls, just elbow grease and 10 minutes of your life.
- Sweet Buttery Magic: That butter-to-sugar ratio? It’s the secret. Creamed just until it’s almost fluffy, then the apples soak up all the richness while the vanilla ties it together. Honestly, the first slice makes me question why I ever bought store-bought cake.
- Brunch to Dessert Star: Serve it warm with a scoop of vanilla ice cream for dinner, or slice it cold for a Monday morning office picnic. My kids beg for it after school snacks, and my husband’s coworkers keep asking for the recipe—it’s that good.
- Leftovers That Last: A full 9x13 pan yields 16 servings, and it stays moist for days. I’ll be real: I often bake two pans and freeze one. The sugar keeps it from drying out, and reheating a slice in the microwave? Pure comfort food gold.
Step-by-step instructions for all-in-one apple cake
This method delivers tender layers with minimal mixing—perfect for beginners and busy bakers.
👨🍳 Step 1: Prepare the Apples and Mix Dry Ingredients
Peel, core, and slice the 4 medium apples into ¼-inch thick rounds. Toss them with 1 tablespoon vanilla extract—this keeps them moist while adding subtle depth. In a large bowl, whisk together the 2 cups all-purpose flour, 1.5 cups granulated sugar, 2 teaspoons ground cinnamon, ½ teaspoon ground nutmeg, and ½ teaspoon salt. I sift the flour first to prevent lumps, which ensures a lighter cake texture.
This step is where the magic starts—the spices and sugar create a fragrant base that will infuse every bite. The vanilla in the apples pairs beautifully with the warm spices, giving you that classic apple cake aroma. Keep the bowl ready for the next step—we'll add everything at once for minimal mixing.
🍳 Step 2: Cut in Cold Butter for Flaky Layers
Add the 1 cup cold, cubed unsalted butter to the dry ingredients. Using a pastry cutter or your fingers, work the butter into the flour mixture until it resembles coarse crumbs with pea-sized butter pieces. This texture is crucial—overworking will create tough cake, while underworking leaves cold butter spots. I press the butter pieces between my fingers to break them down just enough to coat the flour evenly.
The cold butter creates steam during baking, which gives this cake its signature tender crumb. Don't be tempted to use softened butter—it'll melt into the flour instead of creating those beautiful layers. If your kitchen is warm, chill the butter for 10 minutes before starting this step.
🥘 Step 3: Add Eggs and Apples for Perfect Moisture
Make a well in the center of the dry mixture and add the 2 whole large eggs. Using a rubber spatula, gently fold the eggs into the flour until just combined—you should still see streaks of flour. Add the prepared apples and their juices, folding them in until evenly distributed. The batter will look shaggy, but that's perfect for this all-in-one method.
Here's the thing—this cake relies on the apples' moisture to create steam during baking, which keeps the crumb tender. If your apples are particularly juicy, you might have a slightly wet batter. That's okay! The extra moisture will evaporate during baking, leaving you with a moist cake rather than a dry one.
🔥 Step 4: Bake in Two Layers for Even Cooking
Preheat your oven to 350°F and grease two 8-inch round cake pans. Divide the batter evenly between the pans, pressing down gently to remove any air bubbles. Bake for 30-35 minutes until a toothpick inserted in the center comes out clean and the edges are golden brown. I rotate the pans halfway through baking for even color.
Don't overbake—this cake continues cooking slightly as it cools. The apples will release their juices during baking, so you might see some liquid pooling in the pans. That's normal! The cake will absorb it as it cools. Let the cakes cool in their pans for 10 minutes before transferring to a wire rack to cool completely.
🍽️ Step 5: Assemble and Dust with Powdered Sugar
Once completely cool, place one cake layer on a serving plate. Spread a thin layer of applesauce (made from any leftover apple slices) or vanilla glaze if you prefer. Top with the second layer and dust generously with ¼ cup powdered sugar for that classic finish. For extra flair, arrange any reserved apple slices decoratively around the edges.
The powdered sugar isn't just for looks—it adds a delicate sweetness that balances the warm spices. Serve slices warm with vanilla ice cream or whipped cream for the ultimate apple cake experience. This cake keeps well at room temperature for 3 days or can be frozen for up to 3 months—just thaw at room temperature before serving.
Pro Tips For Making All In One Apple Cake
- MEASURE BUTTER COLD: Take the unsalted butter straight from the fridge—no softening needed. I learned this the hard way after greasy, dense cakes. Cut it into chunks and let the mixer do the work; the butter should resist creaming at first, then slowly emulsify into pale, fluffy ribbons. If it melts too fast, your cake might turn out heavy.
- WHISK EGGS ROOM TEMP: Let those large eggs sit out for 30 minutes before adding them to the batter. Cold eggs can cause the butter to seize up and create pockets of air that won’t incorporate properly. I skip this when I’m rushed, but the difference in texture is noticeable—smoother, lighter crumb every time.
- FOLD DRY INGREDIENTS GENTLY: Once you add the flour and sugar mix, resist the urge to overmix. Use a spatula to fold just until combined—lumps are fine. Overmixing develops gluten, which makes the cake tough. I used to think "fully combined" meant smooth, but this cake thrives on a slightly rustic texture.
- BAKE UNTIL GOLDEN, NOT DONE: Pull the cake from the oven when the top is deep golden brown, not just set. A toothpick should come out with a few moist crumbs, not completely clean. I’ve overbaked too many cakes, and they end up dry and sad—this one’s forgiving, but don’t wait for the timer to buzz.
Make-ahead tips for all in one apple cake
Prep Ahead Strategy
Start by prepping the apples the night before—peel, core, and slice them into ¼-inch rounds and store in a bowl with 1 tablespoon lemon juice to prevent browning. This keeps them fresh and ready to fold into the batter the next day. I find this step saves 20 minutes of morning prep time while ensuring the apples stay crisp. 🍎
Batter Prep Timeline
Mix the dry ingredients (flour, sugar, spices) and cold butter up to 24 hours ahead, then store in an airtight container. When ready to bake, simply add the eggs and apples. This shortcut works because the spices and butter blend well overnight, creating a fragrant base ready for the final mix. Just bring the dry mixture to room temperature before adding wet ingredients.
Freezer-Friendly Assembly
Bake the two cake layers as directed, then cool completely before assembling. Wrap each layer individually in plastic wrap and place them in a freezer bag. When ready to serve, thaw at room temperature for 2 hours, then assemble with powdered sugar. This method preserves the cake's moisture and texture perfectly for up to 3 months in the freezer.
Make-Ahead Serving Ideas
Pre-slice the cake and store layers between parchment paper in an airtight container. Reheat individual slices in a 350°F oven for 5-7 minutes or microwave for 20 seconds. Serve warm with pre-portioned ice cream or whipped cream for a quick dessert solution. I love keeping pre-sliced cake in the fridge for spontaneous treats—just pop it in the oven and enjoy!
Batch Baking Tips
Double the recipe and bake four layers at once in two 9x13-inch pans. Cool completely, then stack two layers per cake board for easy transport. Wrap the assembled cakes in plastic and store at room temperature for 5 days. This approach is perfect for potlucks or family gatherings—just slice and serve without extra prep.
Flavor Boost Prep
Make a simple vanilla glaze ahead of time by mixing ½ cup powdered sugar, 2 tablespoons milk, and ½ teaspoon vanilla extract. Store in a small jar in the fridge. When assembling, brush between layers for extra moisture and sweetness. This glaze keeps for 1 week***, making it a great make-ahead addition that elevates every slice. 🌟
Nutrition facts
Frequently asked questions
Can I use this recipe with just one cake pan?
Yes! If you only have one 8-inch round pan, bake the entire batter for 40-45 minutes instead of dividing it. Press the batter firmly into the pan and cover loosely with foil if the top browns too quickly. The texture will be slightly denser but still delicious. For a single-serving option, consider using a 6-inch pan and reduce baking time to 25-30 minutes.
What if my apples are too tart?
Add 1-2 tablespoons of brown sugar to the dry ingredients or toss the sliced apples with 1 teaspoon honey before folding them into the batter. Tart apples like Granny Smith work beautifully—they balance the spices perfectly! For extra sweetness, sprinkle a bit of powdered sugar on top after baking.
Why does my cake look dense?
Overmixing the batter or using warm butter are the most common causes. Always keep the butter cold and work it into the flour until it resembles coarse crumbs (not a smooth dough). Also, avoid overbaking—your cake is done when a toothpick comes out clean. If it's still dense, try reducing the flour by 2 tablespoons next time for a lighter texture.
Can I substitute applesauce for fresh apples?
Yes, but with adjustments! Use 1 cup unsweetened applesauce and reduce the wet ingredients by 2 tablespoons (either applesauce or milk). The cake will be less moist but still flavorful. For best results, add ½ teaspoon extra cinnamon to compensate for the lost apple texture. This works well if you're short on time or fresh fruit.
How do I make this gluten-free?
Replace the all-purpose flour with a 1:1 gluten-free baking flour blend (like Bob's Red Mill) and add ½ teaspoon xanthan gum if your blend doesn't include it. You may also need to increase the sugar by 1 tablespoon and the liquid by 2 tablespoons for proper texture. Test with a small batch first, as gluten-free baked goods can vary in density.