
Desserts
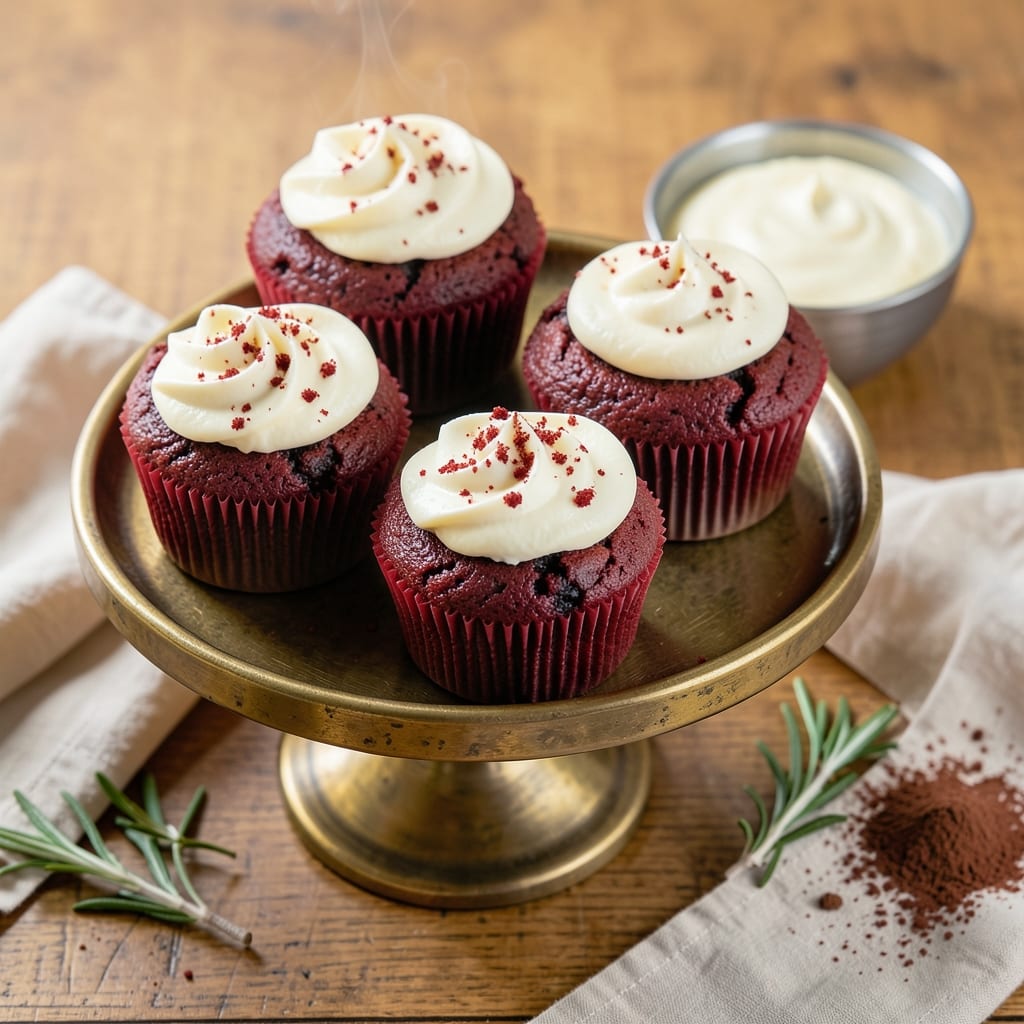
This amazing red velvet cupcake recipe delivers the perfect balance of tender, moist crumb and velvety cream cheese frosting—every bite is a celebration in your mouth. 💛 The secret lies in the cocoa powder and buttermilk working together to create that signature deep red hue and rich flavor without tasting like chocolate cake.
What makes these cupcakes truly special is their foolproof moisture—no dry crumbs here. The recipe includes a few extra tricks, like using sour cream in the batter and baking them just until a toothpick comes out with a few moist crumbs (not wet batter). This ensures they stay soft and delicious for hours after baking.
The cream cheese frosting is where the magic happens—smooth, tangy, and perfectly sweet, it contrasts beautifully with the slightly cocoa-kissed cake. Once you try these, you'll never go back to store-bought red velvet again. They're ideal for birthdays, holidays, or just because you deserve a little indulgence.
Ready to bake? These cupcakes are easier than you think, with simple ingredients and a straightforward process. Let's get started on creating your perfect batch—your taste buds will thank you!
Ingredients for amazing red velvet cupcake
Twelve simple ingredients transform into velvety red velvet cupcakes with perfect moisture and rich cocoa flavor.
| Ingredient | Amount | Notes |
|---|---|---|
| All-Purpose Flour 🌾 | 2 ½ cups | Sifted for light texture |
| Granulated Sugar 🍚 | 2 cups | White or light brown |
| Unsweetened Cocoa Powder 🍫 | ½ cup | Dutch-processed preferred |
| Buttermilk 🥛 | 1 cup | Fresh or cultured |
| Vegetable Oil 🫒 | ½ cup | Light or canola oil |
| Large Eggs 🥚 | 2 whole | Room temperature preferred |
| Red Food Coloring 🎨 | ½ tsp | Liquid or gel form |
| White Vinegar 🍶 | 1 tbsp | For buttermilk substitute |
| Baking Soda 🧂 | 1 tsp | Freshly measured |
| Salt 🧂 | ½ tsp | Kosher or sea salt |
| Vanilla Extract 🌸 | 2 tsp | Pure vanilla preferred |
| Sour Cream 🥛 | ½ cup | Full-fat for moisture |
| Cream Cheese 🧀 | 8 oz | Room temperature |
| Powdered Sugar 🍚 | 3 cups | For frosting |
| Heavy Whipping Cream 🥛 | 1 cup | Cold for whipping |
The cocoa powder and buttermilk are non-negotiable for that signature red velvet flavor—Hershey's Special Dark or Valrhona cocoa gives the best depth. Grab buttermilk from the dairy section (it’s usually near the milk), or mix 1 cup milk + 1 tbsp vinegar and let it sit for 5 minutes. The sour cream adds moisture without altering the flavor, so full-fat works best. For the frosting, Philadelphia cream cheese is my go-to—it whips up smoother than store brands. If you’re making these for a crowd, buy the 8-pack at Costco to save time.
No buttermilk? Milk + vinegar is the classic swap, but plain yogurt works too. Running low on cocoa? Substitute with 1/4 cup less flour + 1/4 cup Dutch-process cocoa for the same rich flavor. The red food coloring can be tricky—gel form mixes better than liquid and won’t alter the texture. For the frosting, if you’re short on cream cheese, add 1 tbsp powdered sugar at a time until it reaches the right consistency. And trust me, the vanilla extract matters—imitation stuff will make your frosting taste off. If you’re feeling fancy, add a pinch of salt to the frosting for balance.
Batter keeps for 2 days in the fridge, covered—just let it sit at room temp for 30 minutes before baking. The frosting can be made 1 day ahead and stored in the fridge; whip it again briefly before using. For extra fluffiness, chill the frosting 30 minutes before piping. These cupcakes are best served at room temperature, so pull them out of the fridge 1 hour before your party. The frosting will soften slightly, making it easier to pipe. Store unfrosted cupcakes in an airtight container for 3 days, or freeze for 3 months—just thaw overnight in the fridge.
Why You'll Love This Recipe
- No Mixer Needed: I swear by this recipe because it only requires a bowl and a whisk—no fancy equipment, no stress. The buttermilk and oil blend so smoothly, you’ll wonder why you ever bothered with electric mixers.
- Velvet Magic: That perfect balance of cocoa powder and sugar? It’s like a hug in your mouth—rich but not overpowering, with just enough tang from the buttermilk to keep it interesting. Honestly, the first bite makes me forget I’m baking.
- Party in a Cup: These cupcakes are my go-to for birthdays, potlucks, or even a lazy Sunday afternoon. Frost them with cream cheese or just dust with powdered sugar—no rules, just fun. (Yes, even on a Tuesday night.)
- Budget-Friendly Batch: Five dollars and 20 minutes later, you’ve got a dozen cupcakes that taste like they cost twice as much. The pantry staples here won’t break the bank, and leftovers? They disappear faster than I can say “second helping.”
Step-by-step instructions for red velvet cupcakes with cream cheese frosting
Here's how to bake velvety red velvet cupcakes with rich, moist crumb and fluffy cream cheese frosting.
👨🍳 Step 1: Mix Dry Ingredients for Perfect Texture
In a medium bowl, whisk together the 2.5 cups all-purpose flour, 0.5 cup unsweetened cocoa powder, 1 tsp baking soda, and 0.5 tsp salt. Sift the mixture through a fine-mesh sieve directly into a large mixing bowl to aerate the flour and prevent dense cupcakes. I tap the sifter gently against the bowl to ensure even distribution of the cocoa powder throughout the flour.
This step creates the signature velvety texture of red velvet cupcakes. The cocoa powder needs to be evenly incorporated so each bite has that perfect balance of chocolate flavor without being too intense. Set this dry mixture aside while you prepare the wet ingredients.
👨🍳 Step 2: Combine Wet Ingredients for Smooth Batter
In the large bowl with the dry ingredients, add the 2 cups granulated sugar, 0.5 cup vegetable oil, 2 whole large eggs (room temperature if possible), 2 tsp vanilla extract, 1 cup buttermilk, and 0.5 tsp red food coloring. Mix on low speed with an electric mixer for 30 seconds just to combine everything.
Here's the thing—don't overmix. You want to see small streaks of flour remaining in the batter. The buttermilk and sour cream we'll add next will create that signature moist texture. If you mix too much, you'll develop gluten and end up with tough cupcakes instead of tender ones.
Add the 0.5 cup sour cream and 1 tbsp white vinegar to the wet ingredients. Mix on low speed for another 30 seconds until just combined. The vinegar reacts with the baking soda to create lift, while the sour cream adds that signature moistness. The batter should be thick but pourable—like a heavy cake batter.
🍳 Step 3: Fold and Bake for Perfectly Moist Cupcakes
Gradually add the dry ingredients to the wet ingredients, mixing on low speed just until combined. Scrape down the sides of the bowl with a rubber spatula to ensure even mixing. The batter will be thick and vibrant red—this is what you want for those beautiful cupcakes.
Divide the batter evenly among 12 lined cupcake pans (fill each liner about two-thirds full). Bake in a preheated 350°F oven for 18-22 minutes, or until a toothpick inserted into the center comes out with just a few moist crumbs (not wet batter). I check at the 18-minute mark—if the tops look set but the centers still jiggle slightly, that's perfect.
Don't overbake! These cupcakes dry out quickly once cooled. Let them cool in the pan for 5 minutes, then transfer to a wire rack to cool completely before frosting. The cooling process is crucial—it allows the cupcakes to set properly so the frosting doesn't slide off.
🥘 Step 4: Make Cream Cheese Frosting for Ultimate Richness
While the cupcakes cool, beat the 8 oz cream cheese and 3 cups powdered sugar together in a large bowl using an electric mixer on medium speed until smooth and creamy. Scrape down the sides of the bowl as needed to ensure even mixing. The frosting should be thick but spreadable—almost like a thick whipped cream consistency.
In a separate bowl, whip the 1 cup heavy whipping cream (chilled) to stiff peaks. Gently fold the whipped cream into the cream cheese mixture until fully combined. This creates that signature light, airy texture that balances the rich cupcakes. Taste and adjust sweetness if needed—you can add more powdered sugar if desired, but these are already sweet enough.
🍽️ Step 5: Frost and Decorate for Showstopping Cupcakes
Pipe or spread the frosting onto the completely cooled cupcakes. I like to use a piping bag with a star tip for a classic swirl effect, but a simple butter knife works too. The frosting should cover the entire cupcake, creating a smooth base for any additional decorations.
For extra flair, you can add sprinkles, chocolate shavings, or a dollop of whipped cream on top. These cupcakes are amazing on their own, but a little extra decoration makes them perfect for special occasions. Serve immediately or store in an airtight container in the refrigerator for up to 3 days—though they won't last that long!
Pro Tips For Making Amazing Red Velvet Cupcake
- Sift That Cocoa: I learned this the hard way—lumpy cocoa powder ruins the texture. Use a fine-mesh sieve to dust the cocoa over the dry ingredients instead of dumping it in. This keeps your cupcakes light and prevents those dreaded dry pockets. ---
- Whisk the Buttermilk: Don’t just pour cold buttermilk into your batter—give it a quick whisk first. It mixes smoother and distributes the tang evenly, which is half the battle for that perfect red velvet flavor. (Yes, even if you’re impatient like me.) ---
- Fill Cups Right: Overfilling cupcake liners is a rookie move. Fill them only two-thirds full—the batter rises, and you don’t want overflow (or sad, flat tops). Use a spoon to level them off for consistency. ---
- Skip the Extra Oil: The recipe calls for vegetable oil, and that’s enough. Adding more makes the cupcakes greasy, not moist. Trust the formula—it’s already balanced for tender crumb without the heaviness. (I know, I know, but trust the process.)
Dietary considerations for this amazing red velvet cupcake
Gluten-Free Adaptations
For a gluten-free version, substitute the 2.5 cups all-purpose flour with a 1:1 gluten-free baking flour blend like King Arthur Measure for Measure or Bob's Red Mill. Add ½ tsp xanthan gum to improve texture, as gluten-free flours lack natural binding properties. Keep all other ingredients the same, but expect slightly denser cupcakes—bake for 2-3 minutes longer at 350°F to ensure doneness. 🌾
Dairy-Free Options
Replace the buttermilk with unsweetened almond milk mixed with 1 tbsp lemon juice (let sit for 5 minutes). For the frosting, swap the cream cheese for dairy-free cream cheese like Kite Hill or Violife, and use coconut cream (chilled overnight) instead of heavy whipping cream. The texture will be slightly lighter but still delicious.
Lower Sugar Swaps
Reduce the 2 cups granulated sugar to 1.5 cups and add ¼ cup unsweetened applesauce to maintain moisture. For the frosting, use ½ cup powdered sugar less and sweeten with 1-2 tbsp maple syrup or monk fruit sweetener to taste. The cupcakes will still be rich but with fewer refined sugars.
Vegan-Friendly Frosting
Skip the cream cheese and heavy cream in the frosting, and instead blend 8 oz vegan cream cheese (like Miyoko's) with 2.5 cups powdered sugar and ½ cup coconut cream. Whip until smooth, then fold in 1 tsp vanilla extract for depth. This version keeps the tangy, creamy texture without dairy—just as satisfying! 🥛
Nut-Free Considerations
Check all ingredients for hidden nut traces, especially the cocoa powder and vanilla extract. Use certified nut-free brands like Hershey's Special Dark or Ghirardelli for cocoa. For vanilla, opt for pure extract (like McCormick) or almond-free brands. The sour cream and frosting ingredients are typically nut-free, but always verify labels.
Allergen-Friendly Tips
If avoiding eggs, replace them with 2 tbsp ground flaxseed + 6 tbsp water (let sit for 5 minutes to gel). For the frosting, ensure the powdered sugar is processed in a dedicated facility if you have severe allergies. Always bake in a clean workspace** and use separate utensils to prevent cross-contamination. These adjustments keep the magic of red velvet alive for everyone! 💛
Nutrition facts
Frequently asked questions
Why does my red velvet batter look too thin?
The batter should be thick but pourable. If it's too thin, you likely overmixed or didn't add enough flour. Red velvet batter is naturally thick from the cocoa powder and buttermilk—if it's runny, fold in 1-2 tbsp more flour until it reaches a consistency similar to heavy cake batter. The key is mixing just until combined!
Can I make these cupcakes without buttermilk?
Mix 1 cup milk + 1 tbsp white vinegar and let it sit for 5 minutes to curdle. This DIY buttermilk works perfectly. For a dairy-free version, use unsweetened almond milk + 1 tbsp lemon juice instead. The tangy acidity is what creates that signature moisture.
How do I get the perfect cream cheese frosting consistency?
For a smooth frosting, make sure your cream cheese is room temperature (soft but not melted). Beat it with powdered sugar until completely smooth, then whip the heavy cream separately to stiff peaks before gently folding it in. If it's too thick, add 1 tsp milk at a time; if too thin, chill for 10 minutes before piping.
Why did my cupcakes crack on top?
Cracking usually happens from overmixing or baking at too high a temperature. Use a 350°F oven and bake until a toothpick comes out with moist crumbs (not wet batter). Also, avoid opening the oven door during baking. For extra insurance, let the cupcakes cool in the pan for 5 minutes before transferring to a rack.
Can I make these ahead of time?
Yes! Bake the cupcakes 1 day ahead and store them unfrosted in an airtight container at room temperature. Frost them just before serving. The frosting can be made 1 day ahead and stored in the fridge—rewhip briefly before using. For best texture, bring cupcakes to room temperature before frosting.