
Desserts
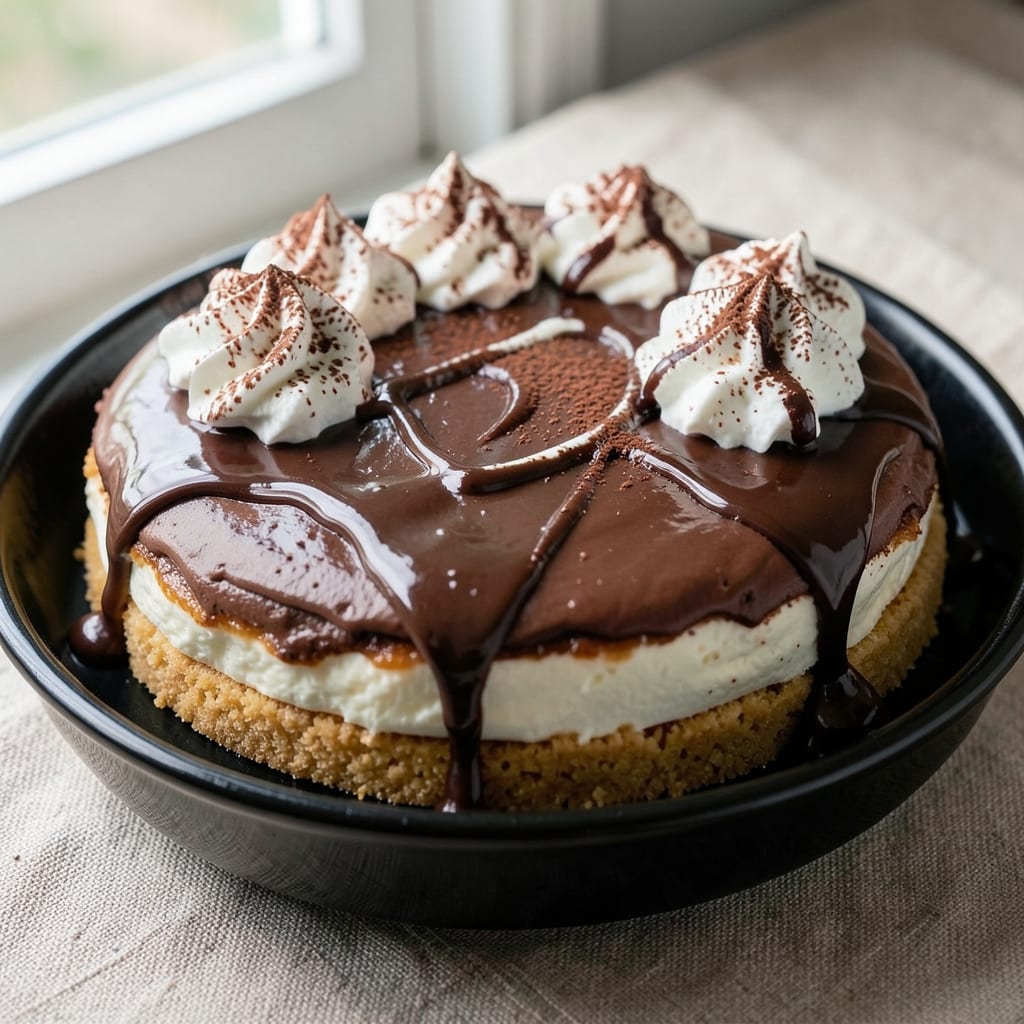
This amazing chocolate cheesecake recipe delivers the perfect balance of silky swirls and a crispy graham cracker crust—every bite is pure indulgence. 💛 I've perfected this recipe over years of baking, ensuring no cracks and that creamy, melt-in-your-mouth texture you crave. The secret? A water bath for smoothness and a touch of cornstarch to keep it luscious.
What sets this recipe apart is the rich chocolate filling—deep, velvety, and packed with cocoa flavor—while the graham crust adds a satisfying crunch. You'll love how the swirls stay intact, creating that restaurant-quality look and taste. It’s foolproof, so even beginners can nail it without stress.
By the time you serve this cheesecake, your guests will be blown away by the silky swirls and the perfect texture—no graininess, no cracks, just pure decadence. The chocolate ganache topping adds that extra wow factor, making it the showstopper dessert everyone will ask for seconds of.
Perfect for special occasions or when you just need a treat, this recipe makes two 9-inch cheesecakes—so you can enjoy leftovers (if they last that long!). Let’s get baking—your taste buds will thank you.
Ingredients for amazing chocolate cheesecake
Twelve ingredients transform into two showstopping chocolate cheesecakes with swirls that stay perfect!
| Ingredient | Amount | Notes |
|---|---|---|
| Graham Cracker Crumbs 🍪 | 2 ½ cups | Finely crushed, no large pieces |
| Unsalted Butter 🧈 | ¾ cup | Cold, cubed for crust |
| Granulated Sugar 🍚 | ½ cup | For crust sweetness |
| Large Eggs 🥚 | 4 whole | Room temperature preferred |
| Heavy Whipping Cream 🥛 | 1 cup | Full-fat for richness |
| Sour Cream 🍶 | ½ cup | Full-fat for creaminess |
| Cream Cheese 🧀 | 16 oz | Room temperature, full-fat |
| Granulated Sugar 🍚 | 1 ½ cups | For filling sweetness |
| Cocoa Powder 🍫 | ½ cup | Dutch-processed for smoothness |
| Cornstarch 🌾 | 2 tbsp | For silky texture |
| Vanilla Extract 🌿 | 2 tsp | Pure vanilla for aroma |
| Salt 🧂 | ½ tsp | Fine sea salt |
| Dark Chocolate Bars 🍫 | 8 oz | 70% cocoa for ganache |
| Heavy Whipping Cream 🥛 | ½ cup | For ganache topping |
The graham cracker crust is where it all begins—Honey Maid graham crackers from the grocery store are ideal, but any sturdy graham works. Crush them finely (a food processor saves time) and mix with cold butter and sugar until it resembles wet sand. Press firmly into your springform pans—don’t skip this step, or your crust will crumble. For the filling, room-temperature cream cheese is non-negotiable—it blends smoother and creates that velvety texture. I always grab Philadelphia brand from the store, but any full-fat cream cheese works. The cocoa powder? Dutch-processed makes all the difference—it’s smoother and less bitter than natural cocoa.
No graham crackers? Digestive biscuits or vanilla wafers work in a pinch—just crush them extra fine. Running short on heavy cream? Full-fat Greek yogurt can replace half the amount in the filling, though the texture will be slightly denser. For the ganache, 70% dark chocolate is my go-to—Lindt or Ghirardelli bars melt beautifully. Need a shortcut? Use chocolate chips instead of bars, but add an extra tablespoon of cream to help them melt smoothly. The cornstarch is your secret weapon—it keeps the filling silky and prevents cracks, even when you’re not a baking pro. And if you’re worried about the water bath, don’t be—it’s the key to that restaurant-quality texture.
Prep the crust first—press it into pans and chill for at least 30 minutes while you make the filling. The filling itself can be made a day ahead and stored in the fridge, covered tightly. The ganache? Make it fresh—it sets up beautifully in 10 minutes at room temperature. Once assembled, your cheesecakes need 4 hours in the fridge to set properly before serving. They’ll keep for up to 5 days in the fridge, though I’ve never had any leftovers that long. For a showstopper presentation, dust with cocoa powder or add chocolate shavings on top—trust me, it’s worth the extra minute!
Why You'll Love This Recipe
- No-Fuss Layers: I swear by this crust—just melt butter with graham crumbs, press it in, and boom, done. No rolling, no stress, just that perfect buttery crunch that actually holds.
- Rich Without Effort: The eggs and sugar blend into something silky, while the whipped cream lightens it just enough to avoid that dense, heavy feeling. Honestly, it tastes like a bakery slice but with half the work.
- Party-Proof Any Day: This holds up for birthdays, potlucks, or even a lazy Sunday—slice it, serve it, and no one will guess it took less than an hour. (Yes, even on a Tuesday night.)
- Leftovers That Don’t Suck: The texture stays creamy for days, and the crust doesn’t turn soggy. I’ve had it cold, room temp, or even warmed with a drizzle—still crave-worthy. Budget-friendly too, since you’re not using specialty ingredients.
Step-by-step instructions for silky swirls and crispy graham crust
Let's create the perfect chocolate cheesecake with a buttery graham crust and velvety swirls.
👨🍳 Step 1: Build the Ultimate Graham Crust
Preheat your oven to 350°F and prepare a 9-inch springform pan by lining the bottom with parchment paper. In a large bowl, combine the 2.5 cups graham cracker crumbs, 0.5 cup granulated sugar, and 0.5 tsp salt. Mix well to distribute the sweetness evenly—this prevents dry spots in your crust.
Cut the 0.75 cup unsalted butter into small cubes and add to the dry mixture. Use your fingers or a fork to work the butter into the crumbs until the texture resembles wet sand. Press the mixture firmly into the bottom of your prepared pan, creating an even layer. Here's the thing—don't skip pressing it down well. A properly compacted crust ensures it won't crumble when you slice later.
Bake the crust for 10 minutes until the edges are light golden brown. Let it cool completely while you prepare the filling—this prevents the crust from getting soggy when you add the warm cheesecake mixture.
🍳 Step 2: Create the Perfect Chocolate Filling
In a large mixing bowl, beat the 16 oz cream cheese and 1.5 cups granulated sugar together on medium speed until completely smooth. I like to use a hand mixer for this step—it ensures there are no lumps in the cream cheese. Add the 4 whole large eggs, one at a time, mixing just until each is incorporated.
Now for the chocolate magic: Sift in the 0.5 cup cocoa powder and 2 tbsp cornstarch together to avoid clumping. Add the 2 tsp vanilla extract and mix until everything is perfectly combined. The batter should be thick but pourable—if it's too thick, you can add 1-2 tablespoons of heavy whipping cream to loosen it slightly.
Pour the chocolate mixture over the cooled crust, spreading it evenly. Here's where the swirls happen: Use a rubber spatula to create gentle swirls in the batter. Don't overdo it—just a few elegant patterns will look stunning when sliced. Tap the pan gently on the counter to release any air bubbles that might have formed.
🔥 Step 3: Bake to Silky Perfection
Place your cheesecake in the preheated oven and bake for 50-55 minutes. The center should still have a slight wobble when you gently shake the pan—this indicates it's perfectly set but still moist inside. You'll know it's done when the edges are set and the top looks just slightly underbaked.
I always do a water bath for my cheesecakes—it creates that ultra-smooth texture. If you're using one, wrap the springform pan tightly in heavy-duty aluminum foil before baking to prevent water from seeping in. For a water bath, place the pan in a larger roasting pan filled with 1 inch of hot water.
Remove the cheesecake from the oven and let it cool in the pan for 1 hour. Then, run a thin knife around the edge to loosen it from the pan. Chill in the refrigerator for at least 6 hours or overnight—this is crucial for developing that perfect texture.
🍫 Step 4: Prepare the Chocolate Ganache Topping
While your cheesecake chills, prepare the ganache. Chop the 8 oz dark chocolate bars into small pieces and place them in a heatproof bowl. Pour the 0.5 cup heavy whipping cream over the chocolate and let it sit for 2 minutes to soften slightly.
Place the bowl over a pot of simmering water (double boiler method) and stir gently until the chocolate melts completely. Remove from heat and let it cool slightly—it should be thick enough to coat the back of a spoon but still pourable. Here's the trick: If it thickens too much, gently reheat it for 10-15 seconds in the microwave to restore the perfect consistency.
Once your cheesecake is completely chilled, spread the ganache evenly over the top using an offset spatula. For extra visual appeal, you can use a fork to create decorative patterns. Let the ganache set for 30 minutes at room temperature before slicing—this gives it time to firm up slightly.
🍽️ Step 5: Serve with Confidence
Run a hot knife through the springform pan to ensure clean slices. Cut into 12 even pieces and serve immediately. The contrast of the crispy graham crust, silky chocolate filling, and glossy ganache topping is what makes this cheesecake truly amazing.
Each bite should deliver that perfect combination of textures—creamy filling, buttery crust, and rich chocolate ganache. Serve with fresh berries or a dollop of whipped cream for an extra touch of elegance. This cheesecake keeps well in the refrigerator for up to 5 days, though I doubt it will last that long!
Pro Tips For Making Amazing Chocolate Cheesecake
- Preheat Like a Boss: Fire up your oven to 325°F (163°C) no earlier than 15 minutes before baking—this ensures the crust gets set without burning while the center stays creamy. I learned this the hard way when my first batch had a sad, overcooked bottom crust while the middle was still jiggly. ---
- Toast the Crumbs: Mix the graham cracker crumbs with melted butter until they’re actually moist but not soupy—then spread the crust in the pan and press down hard with a glass or measuring cup for an even, dense base. Skipping this step means a crumbly, weak crust that won’t hold up to slicing. ---
- Whip Cream Cold: Chill the heavy whipping cream in the fridge for at least 30 minutes before whipping—it whips faster and holds its volume better. I was skeptical until I tried it; now, my cheesecake filling stays silky instead of separating or turning grainy. ---
- Water Bath or Bust: Wrap the entire springform pan in double-layered foil before placing it in the water bath—this prevents leaks and ensures the foil stays submerged. No foil? Use a deep baking dish with hot water halfway up the pan sides—this keeps the center from cracking while baking.
Serving suggestions for this recipe
Garnish Game-Changers
Fresh raspberries or blackberries add a vibrant pop of color and bright acidity that cuts through the richness. Arrange them in a circular pattern around the ganache for a restaurant-worthy presentation. I like to use organic berries from Costco—they stay fresh longer and hold their shape beautifully. 💫
Whipped Cream Magic
Lightly sweetened whipped cream elevates this dessert to new heights. Whip 1 cup heavy whipping cream with 2 tablespoons powdered sugar and 1 teaspoon vanilla extract until soft peaks form. Dollop it on each slice just before serving—it adds a cloud-like texture that contrasts perfectly with the dense cheesecake. Use a star tip for artistic flair!
Chocolate Decorating
Melt 4 ounces dark chocolate with 1 tablespoon coconut oil for a glossy drizzle. Use a squeeze bottle to create elegant zigzags across the ganache or pipe small rosettes around the edge. For extra crunch, sprinkle toasted coconut flakes or crushed pretzels on top before the chocolate sets. This adds a sophisticated touch that feels luxurious. ✨
Berry Compote Twist
Simmer 1 cup mixed berries with 2 tablespoons sugar and 1 teaspoon lemon juice for 5 minutes until thickened. Strain and cool, then drizzle over individual slices. The tangy-sweet compote balances the richness and adds a professional finishing touch. I find strawberries and blueberries work best for this technique.
Edible Flowers
Add a touch of elegance with edible flowers like violets or pansies—they bring a delicate floral note that pairs surprisingly well with chocolate. Place one flower on top of each slice or scatter them around the plate. For best results, use store-bought edible flowers from specialty shops—they're safe and stunning. 🌸
Spiced Whipped Cream
For a sophisticated twist, infuse your whipped cream with ½ teaspoon cinnamon or a pinch of cardamom. Heat the cream with the spice for 2 minutes, then chill before whipping. The warm spices complement the chocolate beautifully and add a cozy, aromatic dimension. This works especially well for fall or winter gatherings.
Nutrition facts
Frequently asked questions
Why does my chocolate cheesecake crack?
Cracking happens when the cheesecake bakes too quickly or cools unevenly. The fix? Always use a water bath (baking pan with hot water) and avoid opening the oven door during baking. Let it cool gradually in the pan for 1 hour before refrigerating. Also, room-temperature ingredients blend smoother—never use cold cream cheese!
Can I make this cheesecake ahead of time?
This recipe is perfect for prepping. The filling can be made 24 hours ahead and stored in the fridge. Assemble the cheesecake a day before serving—it needs 6 hours to set properly. The ganache should be made fresh 30 minutes before serving for the best texture.
What's the best way to store leftovers?
Wrap individual slices tightly in plastic wrap and store in an airtight container. Keep in the fridge for up to 5 days. For longer storage, freeze slices (without ganache) for 2 months
How do I adjust the recipe for a smaller pan?
For a 6-inch pan, reduce all ingredients by half (including crust). The baking time stays the same (50-55 minutes), but check for doneness earlier since smaller pans heat faster. Line the pan with parchment paper to prevent sticking—this is especially important for chocolate desserts.
Can I substitute cream cheese with something else?
Not recommended for this recipe, but if you're in a pinch, you can use mascarpone cheese (mix with 2 tbsp sour cream per 8 oz). For a lighter version, replace 4 oz cream cheese with Greek yogurt, but expect a slightly denser texture. The cornstarch in this recipe helps maintain creaminess, so don't skip it!