
Desserts
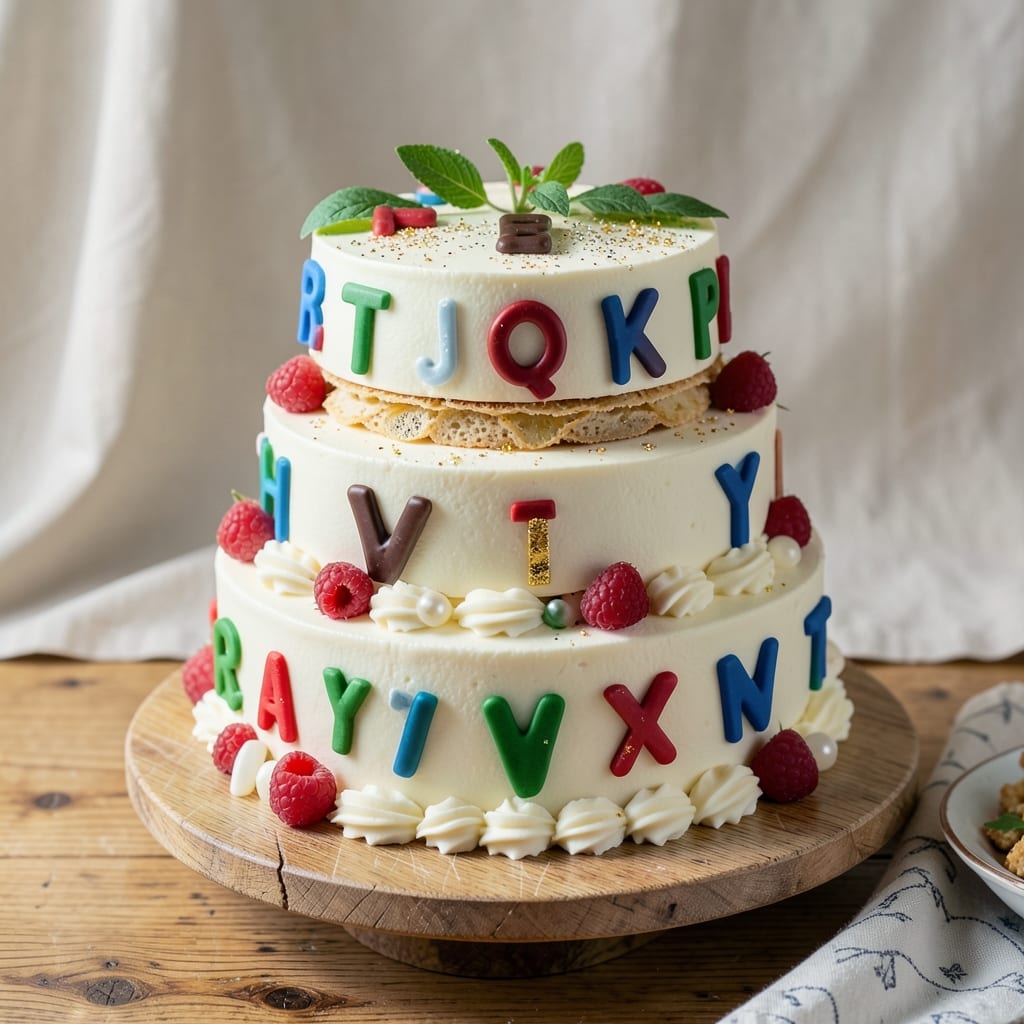
This alphabet cake recipe transforms baking day into a learning adventure for kids—where every slice spells out fun. 💛 The secret lies in a simple vanilla sponge base that stays moist enough to hold edible letter decorations without crumbling, while a smooth vanilla buttercream frosting creates the perfect canvas for creativity. I developed this recipe after watching my nephew struggle with alphabet recognition, and it became his favorite way to practice letters while enjoying dessert.
The cake itself is straightforward: a one-bowl mix with basic pantry staples that bakes in 25 minutes at 350°F, yielding layers tender enough to hold fondant or store-bought letters. The real magic happens in the assembly—whether you're using pre-made alphabet cutouts or shaping your own from fondant, the frosting's slight stickiness ensures letters stay in place. This method works equally well for birthdays, classroom celebrations, or quiet afternoons where learning meets sweetness.
What makes this recipe special is its versatility—you can customize it for any letter theme, from A to Z or even names. The frosting's neutral flavor lets the colorful letters shine, while the cake's subtle vanilla taste keeps it universally appealing. For parents and teachers, it's a dessert that doubles as an educational tool; for bakers, it's a project that delivers restaurant-quality presentation with minimal effort.
Once decorated, the cake becomes a showstopper that kids will beg to assemble themselves. The key to success is patience during the frosting stage—let it set slightly before placing letters to prevent smudging. Serve at room temperature for the best texture, and watch little faces light up when they recognize their own letters in every bite. Here's how to make it happen!
Ingredients for alphabet cake
Basic pantry staples meet creative fun in this kid-friendly alphabet cake adventure.
| Ingredient | Amount | Notes |
|---|---|---|
| All-Purpose Flour 🌾 | 1 ½ cups | Sifted for light texture |
| Granulated Sugar 🍚 | 1 ½ cups | Standard white sugar |
| Unsalted Butter 🧈 | 1 cup | Softened to room temp |
| Large Eggs 🥚 | 2 whole | Room temperature preferred |
| Vanilla Extract 🌿 | 2 tsp | Pure vanilla extract |
| Baking Powder 🧂 | 1 ½ tsp | Diamond Crystal preferred |
| Salt 🧂 | ½ tsp | Fine sea salt |
| Milk 🥛 | ½ cup | Whole milk preferred |
| Vanilla Buttercream Frosting 🧁 | 2 cups | Store-bought or homemade |
| Edible Letter Decorations 📚 | 1 package | Store-bought or homemade |
| Vanilla Fondant 🎨 | 1 lb | For custom letters (optional) |
| Food Coloring 🎨 | 1 tsp | Gel for vibrant colors |
The flour is where the magic starts—King Arthur or Bob's Red Mill brands give you that perfect light crumb. Diamond Crystal baking powder is key here; it's double-acting, so it works twice the lift. If you're using store-bought fondant, grab a pre-colored package from Wilton or Michael's Crafts—saves time and ensures vibrant colors. For the butter, Land O'Lakes or Plugrá are reliable choices, but any good-quality unsalted butter will work. The vanilla extract? Nielsen-Massey is my go-to for that rich, authentic flavor—it's worth the small splurge for this recipe.
No baking powder? Baking soda plus cream of tartar works at a 1:2 ratio, but measure carefully. Short on milk? Evaporated milk or even water keeps the cake moist, though the texture will be slightly denser. For the frosting, Betty Crocker's homemade-style is a lifesaver if you're short on time, but homemade buttercream (just butter, powdered sugar, and milk) gives you that restaurant-quality finish. If you're making custom letters, Wilton's letter cutters are a game-changer—no more struggling with fondant shapes. And for food coloring, gel colors are your best friend; they won't alter the frosting's consistency like liquid dyes might.
Store the dry ingredients (flour, sugar, baking powder) in airtight containers for up to 6 months. Once mixed, the cake batter keeps in the fridge for 2 days—just whisk before baking. The frosting? 3-4 days in the fridge, but bring it to room temperature before decorating to prevent melting. Fondant letters can be pre-made and stored in a sealed container for 2 weeks—perfect for classroom parties. For the best presentation, let the cake cool completely before frosting, then refrigerate for 10 minutes before adding letters to help them stick. This cake is a showstopper that keeps for 3 days at room temperature once decorated.
Why You'll Love This Recipe
- No Mixer Needed: I swear by this recipe when my mixer’s on the fritz—just cream the butter and sugar by hand (or use a fork in a bowl), then fold in the eggs and vanilla. The batter’s so forgiving that even if you overmix, the crumb stays tender. Honestly, it’s the kind of cake that makes me feel like a baking pro without the fuss.
- Buttery-Vanilla Bliss: That classic combo of warm butter and real vanilla extract? It’s the secret weapon here. The cake isn’t sweet enough to be cloying, but rich enough to satisfy—like a hug from your grandma’s kitchen. (Yes, even on a Tuesday night.)
- Kid-Approved Fun: Between us, alphabet cakes are the only ones my kids will actually eat for breakfast and dessert. The letters let them "decorate" with sprinkles or frosting, and the simple vanilla base means you can swap fillings (jam, cream cheese, or even Nutella) without stress. It’s the one cake that doubles as a craft project.
- Budget-Friendly Baking: Flour, sugar, butter, eggs, vanilla—these are pantry staples that won’t break the bank. A single batch yields 8–12 slices, so leftovers last days (if they survive that long). I’ll be real: this is my go-to for potlucks or last-minute gifts because it’s reliable, cheap, and always a hit.
Step-by-step instructions for creating edible alphabet cake letters
Let's bake the perfect cake base first—this is where all the magic begins.
👨🍳 Step 1: Mix Cake Batter for Perfect Texture
Preheat your oven to 350°F and grease a 9x13-inch baking pan. In a large mixing bowl, combine the 1.5 cups All-Purpose Flour, 1.5 cups Granulated Sugar, 1.5 tsp Baking Powder, and 0.5 tsp Salt. Whisk until evenly distributed—this ensures no lumps in your final cake.
In a separate bowl, cream together the 1 cup Unsalted Butter (softened to room temperature) and the 2 whole Large Eggs until light and fluffy. This step is crucial for creating that signature tender crumb. Gradually add the dry ingredients to the wet, mixing on low speed until just combined. Real talk: Don't overmix—you want a smooth batter, not a tough cake.
Finally, stir in the 0.5 cup Milk and 2 tsp Vanilla Extract until fully incorporated. Pour the batter into your prepared pan and spread it evenly. Bake for 25-30 minutes until a toothpick inserted in the center comes out clean. Let the cake cool completely before proceeding—this prevents crumbling when you slice.
🔪 Step 2: Cut Cake into Letter Shapes
Once the cake is completely cool, place it on a cutting board and use a serrated knife to carefully cut out your alphabet letters. I like to start with the largest letters like A, B, and C, then work my way to smaller ones. Dip your knife in hot water between cuts to ensure clean, precise edges—this prevents the cake from tearing.
Here's the thing—you don't need perfect letters right away. These will be covered in frosting and fondant, so slight imperfections will be hidden. For best results, cut each letter about ½-inch thick. Place them on a wire rack to keep them dry while you prepare the frosting.
🥘 Step 3: Create Custom Letter Decorations with Fondant
Roll out the 1 lb Vanilla Fondant on a lightly floured surface to about ¼-inch thickness. Use alphabet cookie cutters to create your letter shapes. If you don't have cookie cutters, carefully cut letters freehand with a sharp knife—it's more challenging but gives a personal touch.
For colored letters, divide the fondant into portions and knead in 1 tsp Food Coloring (use gel coloring for vibrant results) until evenly distributed. Roll out each colored portion separately and cut letters. Place them on parchment paper to prevent sticking while you work.
🍳 Step 4: Frost Cake Letters Professionally
Spread 1 cup Vanilla Buttercream Frosting evenly over each cake letter using an offset spatula. I press the frosting on firmly to create a smooth base for the fondant. For extra stability, chill the frosted letters in the freezer for 10 minutes—this helps the frosting set and makes the fondant adhere better.
Remove the letters from the freezer and carefully place a fondant letter on top of each frosted cake letter. Use a small amount of water on a clean paintbrush to gently adhere the fondant to the frosting. Press down lightly and smooth any air bubbles with your fingertips. For a polished look, I like to use a small rolling pin to gently press the fondant edges.
🎨 Step 5: Add Final Touches and Decorate
Once all letters are frosted and decorated, let them set at room temperature for 30 minutes. This gives the frosting time to firm up and ensures your decorations stay in place. For extra flair, use the 1 package Edible Letter Decorations to spell out words or names on a separate cake board.
Arrange your alphabet letters on a serving platter to create a fun, educational display. You can spell out names, simple words, or even create a full alphabet line. The contrast between the cake base and fondant letters makes this project visually stunning while keeping it edible and delicious. Serve immediately for the best texture and presentation!
Pro Tips For Making Alphabet Cake
- Weigh Your Butter: I learned this the hard way—measuring butter by volume leads to dry, crumbly alphabet cake. Use a kitchen scale for 225g (1 cup) of softened butter. Packed butter releases more moisture, and the scale guarantees consistency every time.
- Mix Dry Ingredients First: Skip the urge to toss everything in at once. Whisk flour, sugar, and baking powder together before adding wet ingredients. This prevents lumps and ensures even distribution of leavening, so your cake rises smoothly and doesn’t sink in the middle.
- Room-Temp Eggs Matter: Cold eggs from the fridge can curdle when mixed with warm butter, leaving streaks in your batter. Let eggs sit in warm water for 5 minutes before cracking—just enough to bring them to room temperature without over-softening.
- Bake Until Slightly Under: The cake will look set before it actually is. Pull it out when the edges spring back but the center still jiggles slightly—about 2-3 minutes early. It’ll firm up as it cools, and overbaking turns alphabet cake dense and dry.
Pro cooking tips for perfect results
Cake Layer Tricks
For a more professional look, bake two thin layers instead of one thick sheet. Use a 9x13-inch pan and spread batter to ½-inch thickness—this creates cleaner letter cuts and prevents crumbling. Bake at 325°F for 15-18 minutes per layer. Let them cool completely before stacking with frosting to avoid soggy results. This method also gives you more flexibility when cutting letters of varying sizes. 💡
Fondant Adhesion Secrets
Store-bought fondant often struggles to stick to frosting. My secret? Brush the cake letters with a thin layer of egg white before applying fondant—it acts as a natural glue. For homemade fondant, knead in ½ tsp corn syrup per pound to improve flexibility and adhesion. If letters still won't stick, chill the frosted cake for 20 minutes in the freezer before decorating. 🎨
Letter Size Strategy
Plan your letter sizes based on the alphabet you're creating. For a full A-Z display, use 2-inch tall letters for most, with 3-inch letters for vowels (A, E, I, O, U) to balance visual weight. Cut larger letters first—they're easier to handle when frosted. For names, use 3-4 inch letters for the first letter and 2-inch letters for the rest. This creates natural hierarchy in your design. ✨
Frosting Consistency
Buttercream should be thick enough to hold its shape but spreadable with a spatula. If yours is too soft, chill it for 15 minutes before using. For extra stability, mix in 1 tbsp powdered sugar per cup of frosting to increase stiffness. This prevents fondant from sliding off during transport or display. I like to use a Kitchenaid stand mixer on medium speed to whip frosting to perfect consistency. 🥄
Time-Saving Shortcuts
Skip homemade fondant by using pre-colored Wilton letter cutouts—they're ready in minutes. For the cake base, make a double batch and freeze half for later use. Pre-cut letter shapes from parchment paper to trace onto your cake, saving time during the cutting stage. If you're short on time, use store-bought alphabet cookies as edible decorations instead of cake letters. 💪
Troubleshooting Tips
If your cake crumbles when cutting, it was likely underbaked. Always check with a toothpick before removing from the oven. Fondant cracking? Knead in ½ tsp shortening per pound to improve elasticity. Letters sticking together? Dust with powdered sugar between layers. For uneven frosting, use a bench scraper to create clean edges before adding fondant. 🔥
Nutrition facts
Frequently asked questions
Can I make this alphabet cake without fondant?
Use store-bought edible letter decorations made from rice paper or wafer paper instead. These stick directly to the frosting without needing fondant. For a simpler approach, spell words with colorful sprinkles or mini marshmallows on top of the frosted cake letters.
How do I prevent the cake from crumbling when cutting letters?
Let the cake cool completely before cutting—this prevents crumbling. Dip your knife in hot water between cuts for cleaner edges. If the cake still crumbles, it may have been underbaked. Always check with a toothpick before removing from the oven.
Can I use this recipe for a themed birthday cake?
Yes! Spell out the birthday child's name or theme (e.g., "Superhero Training Camp") using the cake letters. For extra flair, add small fondant or candy decorations to each letter. Use contrasting colors for the frosting to make the letters pop.
What's the best way to store leftover alphabet letters?
Keep frosted letters in an airtight container at room temperature for up to 3 days. For longer storage, refrigerate for 5 days or freeze for 1 month. Thaw at room temperature before serving. Fondant letters can be stored separately in a sealed container for 2 weeks.
How do I make the frosting stick better to the cake?
Chill the frosted cake letters in the freezer for 10 minutes before adding fondant or letters. Brush the frosting with a thin layer of egg white for extra adhesion. For store-bought letters, press them firmly onto the frosting and let set for 30 minutes before serving.