
Desserts
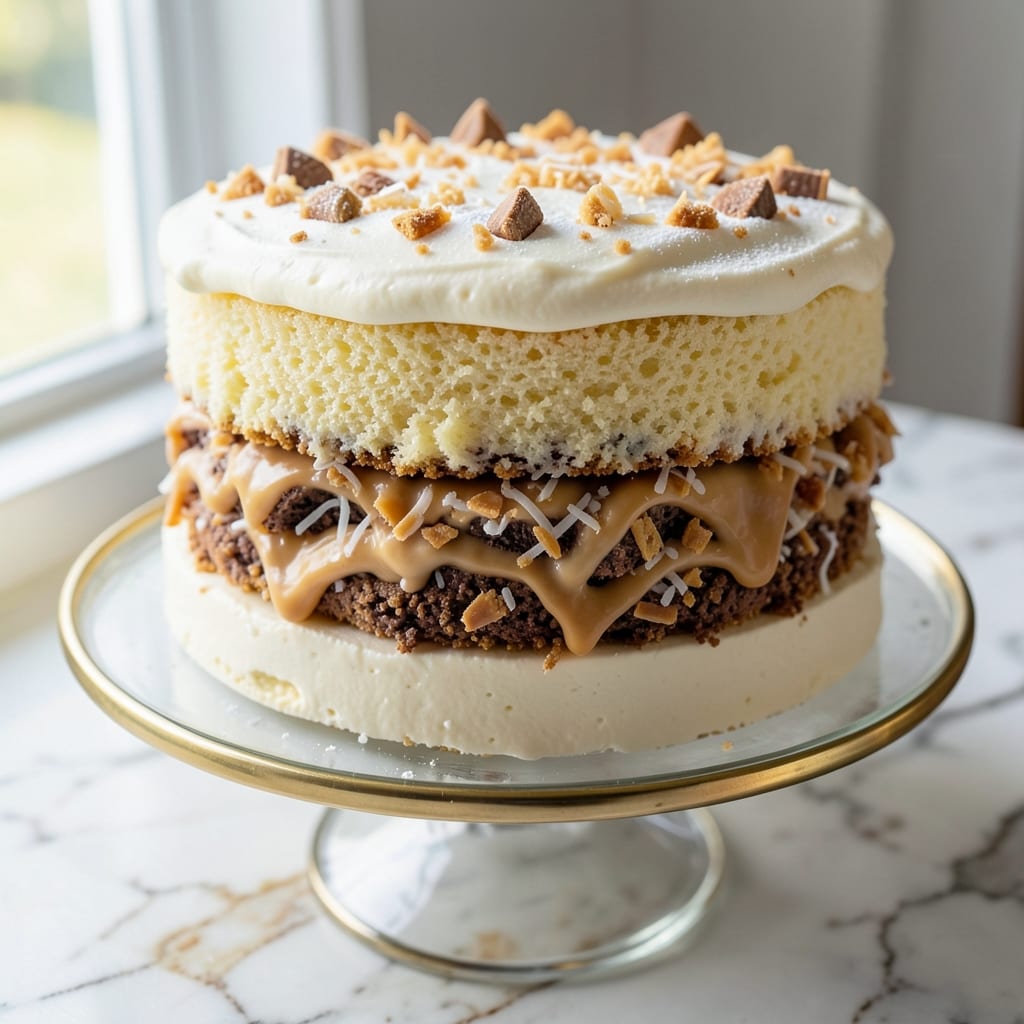
This Almond Joy cake filling recipe transforms your desserts into a tropical paradise with its creamy coconut-vanilla swirl and crunchy Almond Joy bits. 🌴 The secret lies in balancing toasted coconut, crushed Almond Joy bars, and a velvety condensed milk base—creating a filling that's rich, moist, and packed with nostalgic flavor. Perfect for cake rolls, layered cakes, or cupcakes, this recipe delivers restaurant-quality results without the fuss.
The magic happens when you toast the coconut until golden and aromatic, then mix it with crushed Almond Joy bars for that signature crunch and sweetness. A simple blend of condensed milk, butter, and a touch of vanilla extract creates the creamy foundation, while a stabilizer like gelatin ensures the filling holds its shape—no soggy surprises here. This isn't just a filling; it's an experience that turns ordinary desserts into showstoppers.
What you’ll end up with is a luscious, swirl-worthy filling that’s creamy yet sturdy, with pockets of crunch and bursts of coconut flavor in every bite. The toasted coconut adds depth, while the Almond Joy bits deliver that unmistakable caramelized sweetness. Whether you’re filling a vanilla sponge cake, a pound cake, or even cupcakes, this recipe guarantees a dessert that tastes like a vacation in every forkful.
Store leftovers in the refrigerator for up to 5 days, or freeze for longer shelf life—though with flavors this irresistible, it won’t last that long. Pair it with a light sponge cake for contrast or a denser pound cake for extra richness. Here’s how to make it happen!
Ingredients for almond joy cake filling
Pantry staples plus a few tropical touches to make this filling unforgettable.
| Ingredient | Amount | Notes |
|---|---|---|
| Almond Joy Bars 🍫 | 12 oz | Crushed into small pieces |
| Unsweetened Shredded Coconut 🥥 | 1 ½ cups | Toasted until golden |
| Sweetened Condensed Milk 🥛 | 1 can (14 oz) | Standard grocery brand |
| Unsalted Butter 🧈 | ½ cup | Softened but not melted |
| Pure Vanilla Extract 🌿 | 1 tbsp | High-quality preferred |
| Granulated Sugar 🍚 | ¼ cup | For extra sweetness |
| Powdered Sugar 🍚 | ¼ cup | For dusting and swirl |
| Unflavored Gelatin 🍬 | 1 ½ tsp | Bloomed in 3 tbsp cold water |
| Heavy Whipping Cream 🥛 | ½ cup | Chilled for whipping |
| Vanilla Cake Crumbs 🍰 | 1 cup | From stale vanilla cake |
| Toasted Coconut Oil 🫒 | 2 tbsp | For extra coconut flavor |
The Almond Joy bars are the star, so grab a family-size bag—the ones at Walmart or Target are perfect. Toast the coconut until it smells like a beach vacation, not just a dry flake. Trader Joe's has the best shredded coconut (unsweetened, of course), but any brand works if it's fresh. For the cake crumbs, I always use stale vanilla cake—toss in a few extra if you're really craving that nostalgic texture. The gelatin might be the trickiest part, but Knox brand is foolproof if you're new to it.
No Almond Joy bars? Crushed caramel candies or even toffee bits work in a pinch. Sweetened condensed milk hard to find? Substitute with 1 cup heavy cream + 1 cup sugar, but it won't be quite the same. The gelatin can be swapped for 1 tsp agar powder if you're vegan, but the texture will be firmer. Toasted coconut too much work? Use 1 cup sweetened flakes—just skip the extra toasting step. And if you're short on cake crumbs, crushed vanilla wafers are a sneaky shortcut.
This filling keeps for 5 days in the fridge, sealed tight in an airtight container. For longer storage, freeze it in portions—3 months max. The gelatin helps it hold its shape, so don't skip it if you're layering cakes. If you make extra, use it within a week for the best texture. Pro tip: Dust with powdered sugar before serving—makes it look restaurant-fancy.
Why You'll Love This Recipe
- No Chopping Needed: I swear by this—just chop the Almond Joy bars into chunks (or buy pre-chopped if you’re really lazy) and toss them in. No measuring cups, no stress, just melt and mix. The condensed milk does all the heavy lifting.
- Taste Like Childhood: That perfect balance of coconut, macadamia, and caramelized sugar? It’s the filling I grew up sneaking from my mom’s cake pans. The vanilla extract ties it all together—warm, creamy, and impossible to resist.
- Fridge-Friendly Magic: Make a big batch and stash it for weeks. Spread it between cake layers, dollop on ice cream, or just eat it straight from the spoon. Honestly, I’ve had it last in my fridge for months—and it’s still delicious.
- Budget Luxury: Sweetened condensed milk and shredded coconut are cheap staples, but this filling tastes like a bakery treat. Between us, I’ve used this to jazz up store-bought pound cake or even vanilla wafers—no one ever guesses it’s not homemade.
Step-by-step instructions for Almond Joy cake filling
Here's how to create that dreamy, toasted coconut-vanilla swirl filling that'll make your cake unforgettable.
👨🍳 Step 1: Crush Almond Joy Bars and Toast the Coconut
Start by crushing the 12 oz Almond Joy Bars into small, even pieces using a food processor or strong plastic bag with a rolling pin. You want chunks that'll melt beautifully but still be recognizable. In a dry skillet over medium heat, toast the 1.5 cups unsweetened shredded coconut for 3-4 minutes, stirring constantly until it turns a gorgeous golden brown and smells heavenly. Watch it closely—it burns fast!
While the coconut toasts, mix the 1.5 tsp unflavored gelatin with 3 tbsp cold water in a small bowl. Let it bloom for 5 minutes until it thickens slightly. This gelatin will give your filling that perfect, creamy texture that holds its shape. Set it aside—you'll use it in the next step.
🍳 Step 2: Make the Coconut-Covered Base
In a medium saucepan, combine the 1 can (14 oz) sweetened condensed milk, 0.5 cup softened unsalted butter, 2 tbsp toasted coconut oil, and the bloomed gelatin mixture. Heat over medium-low heat, stirring constantly with a silicone spatula, until everything melts together completely—about 5-7 minutes. You'll see the mixture thicken slightly as it warms.
Remove from heat and stir in the 1 tbsp pure vanilla extract and 0.25 cup granulated sugar. Let it cool for 10 minutes while you prepare the cake crumbs. This cooling step is crucial—if it's too hot, the gelatin won't set properly in your filling. The mixture should be thick but still pourable when you're ready to use it.
🥘 Step 3: Create the Vanilla Swirl Layer
In a separate bowl, whip the 0.5 cup heavy whipping cream until it forms soft peaks. Gently fold in the 1 cup vanilla cake crumbs using a spatula until just combined—don't overmix or you'll crush the cake pieces. In another small bowl, mix the 0.25 cup powdered sugar with 2 tbsp toasted coconut to create your decorative topping.
Here's where the magic happens: spread half of the coconut-milk mixture onto your cake layers, then dollop spoonfuls of the vanilla cream mixture across the top. Use a knife to swirl the cream into the coconut layer, creating those beautiful marbled patterns. The contrast of creamy vanilla and rich coconut will make your filling pop!
🔥 Step 4: Assemble and Chill for Perfect Texture
Assemble your cake by layering the filling between cake layers, then spreading the remaining coconut mixture on top. Sprinkle the powdered sugar-coconut mixture evenly across the surface for that classic Almond Joy look. Here's the thing—don't rush the chilling! Place the cake in the refrigerator for at least 4 hours, preferably overnight. This gives the gelatin time to fully set and creates that perfect, sliceable texture.
When you're ready to serve, let the cake sit at room temperature for 15-20 minutes before slicing. The filling should hold its shape when cut but still be creamy and rich. If it's too firm, let it sit another 10 minutes—patience pays off with this recipe. Each bite should deliver that perfect balance of toasted coconut, creamy vanilla, and chocolatey Almond Joy chunks!
Pro Tips For Making Almond Joy Cake Filling
- CHOP SMALL, MELT FASTER: Almond Joy bars are stubborn—chop them into ¼-inch chunks (not crumbles) so they soften evenly in the condensed milk. I used to toss them in whole, and half the time they’d stay chewy instead of blending into that creamy texture. A sharp knife does this in under 2 minutes. ---
- TOAST COCONUT UNTIL GOLD: Dry-toast your shredded coconut in a 350°F oven for 5 minutes before mixing—it crisps just enough to add texture without turning the filling grainy. Skipping this means soggy coconut that ruins the whole vibe. (Yes, even if you’re impatient like me.) ---
- LOW AND SLOW FOR CREAMY: Simmer the filling on medium-low heat (not boiling) to prevent scorching the condensed milk or separating the butter. I learned this the hard way after one batch turned into a sticky disaster. Stir often—it’s the only way to guarantee smoothness. ---
- SALT THE BUTTER: Add a pinch of salt to the melted butter before mixing—it balances the sweetness of the condensed milk and Almond Joy. Trust me, the filling tastes flat without it. (Your taste buds will notice the difference immediately.)
Common mistakes when making perfect results
Over-Mixing the Cream
When whipping the heavy cream for the vanilla swirl layer, it's easy to overbeat it into stiff peaks—this is a classic mistake that can turn your filling grainy instead of silky. I've seen this happen when using electric beaters, so I recommend using a hand mixer on low speed and stopping just as the cream begins to hold soft peaks. Overmixing incorporates too much air, which can cause the filling to separate or become lumpy when combined with the coconut mixture. 🥛
Skipping the Gelatin Bloom
The gelatin is what gives this filling its perfect texture—it holds the layers together without making them soggy. If you skip blooming the gelatin in cold water for those crucial 5 minutes, it won't dissolve properly, leading to a filling that's either too runny or has visible gelatin clumps. I always set a timer and let it sit undisturbed; this step truly makes the difference between a professional result and a disappointment. 🍬
Uneven Cake Layers
One of the biggest frustrations with layered cakes is uneven layers that cause filling to ooze out the sides. To avoid this, level your cake layers perfectly with a serrated knife before spreading the filling. I use a cake leveler to ensure each layer is even—this prevents the filling from leaking out when you slice into it. If your layers are too thick, trim them down to about 1 inch for best results. 🍰
Not Toasting the Coconut
The toasted coconut is what gives this filling its depth of flavor and that irresistible aroma. If you skip toasting or only toast it lightly, your filling will taste flat and lack the rich, nutty complexity that makes it special. I recommend toasting the coconut in a dry skillet over medium heat until it's golden brown and smells amazing—about 3-4 minutes. Watch it closely, as it can burn quickly! 🥥
Rushing the Chill Time
Patience is key with this filling—rushing the 4-hour chilling time (or worse, skipping it entirely) will result in a filling that's too soft and collapses when sliced. The gelatin needs time to fully set, which creates that perfect sliceable texture. I always let my cakes chill overnight when possible, as this gives the flavors time to meld together beautifully. Trust me, the wait is worth it! ⏰
Using Sweetened Coconut
While it might seem like a shortcut, using sweetened shredded coconut instead of unsweetened can throw off the balance of flavors in your filling. The sweetened version adds extra sugar that competes with the condensed milk and Almond Joy bars, making the filling taste overly sweet. Stick with unsweetened coconut and toast it yourself—it's worth the extra step for that perfect flavor profile. 🍚
Nutrition facts
Frequently asked questions
Can I make this filling without gelatin?
You can try using 1 tsp agar powder instead of gelatin for a vegan option, but the texture will be firmer and less creamy. For best results, stick with gelatin—it creates that perfect sliceable, cloud-like consistency that holds its shape beautifully. If you're avoiding gelatin for dietary reasons, consider using 1 cup whipped cream mixed with 2 tbsp cornstarch as a thickener, but the filling may be slightly softer.
What's the best cake to pair with this filling?
A light vanilla sponge cake works perfectly with this filling, as its delicate texture contrasts beautifully with the rich coconut and Almond Joy flavors. For extra indulgence, try a pound cake or even vanilla cupcakes—their denser structure holds up well to the creamy filling. Avoid overly moist cakes like carrot or chocolate, as they can make the filling soggy.
How do I store leftover filling?
Store leftovers in an airtight container in the refrigerator for up to 5 days. For longer storage, freeze the filling in portions for up to 3 months. When reheating, microwave for 10-15 seconds to soften it slightly—it'll still be creamy but firm enough to spread. Avoid freezing if you plan to use it within a week, as the texture can become grainy.
Can I make this filling without Almond Joy bars?
If you can't find Almond Joy bars, use crushed caramel candies, toffee bits, or even mini chocolate chips in a pinch. For a coconut-only version, add 1 cup toasted coconut flakes to boost the flavor. The key is keeping the crunchy element—it balances the creamy filling beautifully. Just adjust the sweetness by tasting as you go.
Why does my filling look too thick or too thin?
If your filling is too thick, it likely didn't cool enough before mixing—try reheating it gently and stirring until smooth. For a thinner consistency, whisk in 1-2 tbsp heavy cream gradually. The ideal texture should be thick enough to hold its shape when spread but still creamy enough to swirl. If using gelatin, ensure it bloomed properly—this is the most common cause of texture issues!