
Desserts
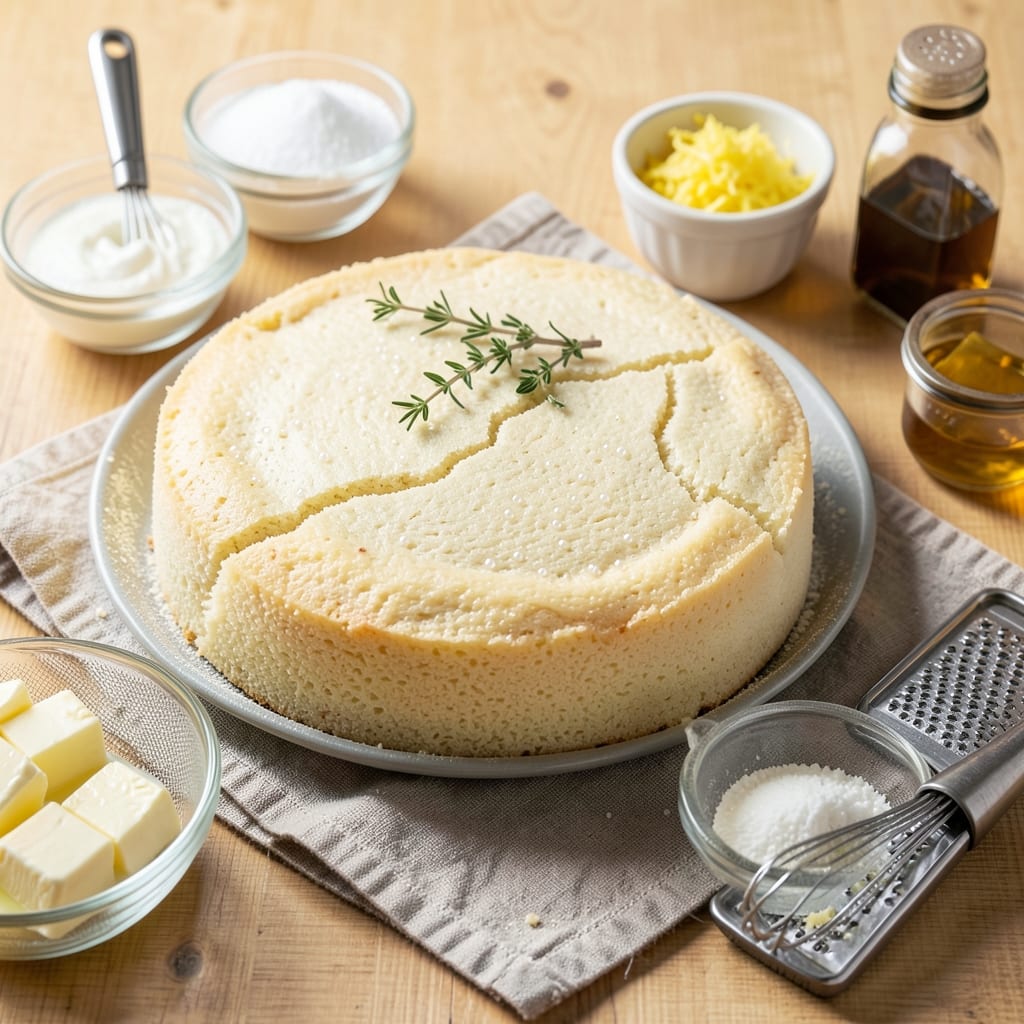
This almond flour sponge cake delivers the perfect balance of gluten-free lightness and rich texture without sacrificing moisture or structure. The secret lies in properly blending the almond flour with eggs and sugar to create air pockets that expand beautifully in the oven. I developed this recipe after struggling to find a gluten-free sponge that didn't turn dense or dry—this version stays tender and airy, with just the right crumb.
The beauty of almond flour is its ability to create naturally moist cakes without relying on dairy or heavy fats. We'll use whipped egg whites for lift, which is key to achieving that signature sponge cake texture. A touch of vanilla and lemon zest adds brightness, while a light dusting of powdered sugar at the end gives it that elegant finish. The cake bakes in just 30 minutes at 350°F, making it ideal for special occasions or everyday treats.
What makes this recipe truly special is how it satisfies both dietary needs and dessert cravings. The almond flour provides a subtle nutty flavor and rich texture, while the egg whites create that signature lightness. You'll end up with a cake that's gluten-free but still indulgent—perfect for those who avoid wheat but never want to compromise on taste or texture.
Serve this cake with fresh berries, a dollop of whipped cream, or a light dusting of powdered sugar for an elegant dessert that feels special but comes together effortlessly. The recipe also works beautifully with chocolate swirls or orange glaze if you want to customize it further. Let's get baking!
Ingredients for almond flour sponge cake
Eight ingredients transform into a gluten-free sponge cake with restaurant-quality lightness.
| Ingredient | Amount | Notes |
|---|---|---|
| Almond Flour 🌰 | 2 ½ cups | Finely ground, unsweetened |
| Large Eggs 🥚 | 6 whole | Room temperature preferred |
| Granulated Sugar 🍚 | 1 ½ cups | Superfine preferred for smooth texture |
| Unsalted Butter 🧈 | ½ cup | Softened, not melted |
| Vanilla Extract 🌿 | 1 tbsp | Pure, high-quality extract |
| Lemon Zest 🍋 | 1 tbsp | Freshly grated from organic lemon |
| Powdered Sugar 🍚 | ½ cup | For dusting, sifted |
| Baking Powder 🌶️ | ½ tsp | Aluminum-free preferred |
| Salt 🧂 | ¼ tsp | Fine sea salt |
| Almond Extract 🌰 | ½ tsp | For subtle almond aroma |
| Heavy Cream 🥛 | ¼ cup | Optional, for extra moisture |
Almond flour is the star here—Bob's Red Mill or Anthony's Goods are my go-tos for consistency. The finer the grind, the lighter your cake will be. Eggs should be at room temperature (pop them in warm water for 10 minutes if they're cold), and organic pastured eggs add extra richness. Sugar matters too: superfine dissolves faster, but regular granulated works if you pulse it in a food processor. For the butter, Plugrá is my top pick—it's European-style and has a higher fat content, which gives that perfect tender crumb. If you can't find it, Land O'Lakes or Kerrygold are solid backups.
No almond extract? Double the vanilla and add a pinch of cinnamon for warmth. Running short on almond flour? Substitute half with tapioca starch for structure, but expect a slightly denser texture. The lemon zest can be omitted if you prefer, but it brightens the whole cake—organic lemons have more flavor than conventional. For a dairy-free version, swap the heavy cream for full-fat coconut milk (use the thick part only). The powdered sugar is purely for presentation, but if you're feeling fancy, sift it through a fine-mesh strainer for that spa-like finish.
This cake stays fresh for 4 days at room temperature, wrapped tightly in plastic. For longer storage, slice and freeze portions for up to 3 months—they thaw beautifully. The secret to reheating? A quick 10-second zap in the microwave with a damp paper towel over the top. I always bake two cakes at once—one for serving, one for freezing. The vanilla and almond extracts keep for 1 year unopened, so stock up if you love baking. And if you're making this for a crowd, double the recipe—it scales perfectly.
Why You'll Love This Recipe
- No Mixer Needed: I swear by this—just a bowl and a whisk. The almond flour blends like buttercream, and those eggs? They fold in smoother than I expected. Honestly, my stand mixer’s been napping for this one.
- Buttery Vanilla Hug: That butter and vanilla combo? It’s like a warm embrace for your taste buds. The almond flour adds a nutty depth, but the sugar keeps it bright—no chalky aftertaste, just pure, rich satisfaction.
- Crowd-Pleaser Any Day: Birthday? Brunch? Leftovers for lunch? This cake holds its own. Slice it thin for tea sandwiches, or serve it whole with berries—my in-laws still ask for seconds, and they’ve tried everything.
- Budget-Friendly Luxury: Almond flour might sound fancy, but it stretches further than regular flour. One batch feeds six, and the leftovers? I freeze slices for quick breakfasts or snack attacks. Frugal? Yes. Worth it? Absolutely.
Step-by-step instructions for almond flour sponge cake
Here's the method for a perfectly light, gluten-free almond flour sponge that rises beautifully and stays moist.
Prepare Your Mixing Tools and Ingredients
First, gather all your ingredients and tools. Preheat your oven to 350°F and position a rack in the center position. Grease an 8-inch round cake pan or line it with parchment paper for easy removal. I like to use a light coating of butter and then dust with a little almond flour to prevent sticking.
Separate the 6 whole large eggs into two bowls—you'll need 5 egg whites and 1 whole egg for the batter. The egg whites will be whipped separately for maximum volume. Make sure your mixing bowls are completely dry and free of any grease, as even a trace can prevent proper whipping of the egg whites.
Whip Egg Whites and Combine Wet Ingredients
In a clean, grease-free bowl, beat the 5 egg whites with an electric mixer on medium speed until soft peaks form. Gradually increase the speed to high and whip until the egg whites form stiff, glossy peaks that hold their shape when the whisk is lifted. This should take about 3-5 minutes—don't rush this step, as properly whipped egg whites are the secret to a light, airy sponge.
In a separate large bowl, combine the 1 whole egg, 1.5 cups granulated sugar, 0.5 cup softened unsalted butter, 1 tbsp vanilla extract, 1 tbsp lemon zest, 0.5 tsp almond extract, 0.25 tsp salt, and 0.5 tsp baking powder. Using a hand mixer, beat on medium-high speed for 3-4 minutes until the mixture is pale, thick, and nearly tripled in volume. You'll notice the sugar dissolves completely and the mixture becomes smooth and creamy.
Gently Fold in Almond Flour and Egg Whites
Using a rubber spatula, gently fold in the 2.5 cups almond flour in three additions, mixing just until combined after each addition. Be careful not to overmix—the almond flour can make the batter dense if worked too vigorously. The mixture should be smooth but still slightly lumpy, which is normal for almond flour batters.
In a separate bowl, gently fold one-third of the whipped egg whites into the batter to lighten it. Then, using a spatula, carefully fold in the remaining egg whites in two more additions, being very gentle to maintain as much air as possible. The batter should be thick but still pourable. If you're using the 0.25 cup heavy cream, fold it in now for extra moisture. The final batter should be smooth and slightly shiny, with no streaks of flour.
Bake Until Golden and Springy
Pour the batter into your prepared cake pan and smooth the top with a spatula. Tap the pan gently on the counter a few times to release any air bubbles. Bake in the preheated oven for 35-40 minutes, or until the top is golden brown and a toothpick inserted in the center comes out clean. The cake should also spring back slightly when pressed gently in the center.
If the top browns too quickly before the cake is fully baked, loosely cover it with aluminum foil. Almond flour cakes can brown faster than traditional flour cakes, so keep an eye on it during the last 10 minutes of baking. The cake is done when it pulls away slightly from the edges of the pan and feels firm to the touch.
Cool and Dust with Powdered Sugar
Remove the cake from the oven and let it cool in the pan for 10 minutes. Then, carefully transfer it to a wire rack to cool completely. While the cake cools, sift the 0.5 cup powdered sugar over a fine-mesh sieve to remove any lumps. Once the cake is completely cool, dust the top generously with the powdered sugar for a beautiful finish.
This cake is best served at room temperature, so if you're making it ahead, cover it loosely with plastic wrap and store at room temperature for up to 3 days. For extra flavor, you can drizzle with a simple glaze made from powdered sugar and a little lemon juice or almond extract. Enjoy your light, gluten-free almond flour sponge cake with fresh berries or a dollop of whipped cream.
Pro Tips For Making Almond Flour Sponge Cake
- WHISK EGGS COLD: Start with eggs straight from the fridge—room temperature eggs trap too much air and can make your batter collapse. I used to rush this step and end up with a dense, flat cake that looked more like a pancake than a sponge. Give them 10 minutes in the fridge before cracking, then whisk slowly at first to avoid incorporating excess air (almond flour batter is trickier than wheat flour).
- SIFT ALMOND FLOUR FIRST: Almond flour clumps like a stubborn toddler refusing to share. Sift it through a fine-mesh sieve before mixing—this lightens the texture and ensures even distribution. I learned this the hard way when my first batch turned out gummy and uneven. Do this even if your recipe doesn’t call for it; trust me, your cake will thank you.
- UNDERBAKE SLIGHTLY: Almond flour cakes finish cooking after they’re out of the oven—seriously, they’ll keep rising while cooling. Pull yours out when the center is just set (a toothpick should come out with a few moist crumbs, not wet batter). I used to overbake them to "make sure they’re done," and they’d turn dry and rubbery. Let them sit 5 minutes before slicing.
- MELT BUTTER GENTLY: Don’t nuke your butter in the microwave—it’ll scald and turn greasy, ruining the delicate balance of your batter. Melt it in a bowl over simmering water (double boiler) until just liquid, then let it cool to room temp before mixing. I was skeptical until I tried it: the cake became tender instead of greasy, and the crumb stayed light. Worth the extra 5 minutes.
Essential equipment for this dish
Mixing Essentials
You'll need a stand mixer or hand mixer with a whisk attachment for whipping egg whites properly. I recommend the KitchenAid Artisan Series for its powerful motor—it whips egg whites to stiff peaks in half the time of cheaper models. For measuring, a digital kitchen scale is ideal for ingredients like almond flour, but if you prefer cups, use a fine-mesh sifter to avoid clumps. A rubber spatula (I use OXO Good Grips) is essential for gently folding ingredients without deflating air bubbles. 🥄
Baking Tools
An 8-inch round cake pan is perfect for this recipe, but I prefer light-colored metal pans—they distribute heat more evenly than dark pans. Line the bottom with parchment paper for easy removal, or grease with coconut oil (it has a higher smoke point than butter). A toothpick is your best tool for checking doneness, but also test by gently pressing the center—it should spring back slightly. For extra precision, an oven thermometer ensures your oven isn't running hot or cold. 🌡️
Cooling and Finishing
A wire cooling rack is a must-have for this cake—it prevents sogginess by allowing air to circulate underneath. For dusting powdered sugar, a fine-mesh sieve (like Norpro) creates a smooth, professional finish. If you're making a glaze, a small saucepan for heating sugar mixtures and a pastry brush for applying it evenly come in handy. Store leftovers in an airtight container with parchment paper between layers to maintain freshness. ✨
Budget-Friendly Swaps
No stand mixer? A hand mixer works fine—just whip the egg whites in a deep, narrow bowl for better stability. Skip the scale? Use a spoon or butter knife to level off almond flour in your measuring cups. For butter, margarine (like Country Crock) works in a pinch, though it lacks the richness. A pastry brush can replace a rubber spatula if you're folding wet ingredients by hand. These swaps keep the recipe accessible without sacrificing quality. 💪
Nutrition facts
Frequently asked questions
Why does my almond flour cake turn out dense instead of light?
Overmixing the batter or under-whipping the egg whites are the most common culprits. The key is to fold the egg whites gently in three additions—don't stir vigorously. Also, ensure your almond flour is finely ground (not coarse) and that you're using room-temperature eggs. If your cake still feels dense, try adding 1 tablespoon of baking powder for extra lift.
Can I make this recipe without eggs?
Yes, but the texture will differ significantly. For a vegan version, use 6 tablespoons aquafaba (chickpea brine) whipped to stiff peaks, plus 1 tablespoon apple cider vinegar and 1 tablespoon sugar to mimic egg whites. Replace the whole egg with 2 tablespoons ground flaxseed + 6 tablespoons water (let sit for 5 minutes). The cake will be more delicate—expect a shorter shelf life.
How do I prevent cracks in the top of my almond flour sponge?
Cracks usually mean the cake baked too long or the oven was too hot. For this recipe, check doneness at 30 minutes—the cake should pull away slightly from the pan edges. If it browns too quickly, tent with foil. Also, avoid opening the oven door during baking. For extra insurance, bake at 325°F instead of 350°F if your kitchen runs hot.
What's the best way to store leftovers?
Wrap the cake tightly in plastic wrap and store at room temperature for up to 4 days. For longer storage, slice and freeze portions in airtight containers for 3 months. Thaw overnight in the fridge—never microwave from frozen. To revive stale slices, warm for 10 seconds in the microwave with a damp paper towel over the top.
Can I add chocolate or fruit to this recipe?
For chocolate, fold in ½ cup melted dark chocolate with the wet ingredients. For fruit, gently press ½ cup chopped strawberries or raspberries into the batter before baking. For a marbled effect, divide the batter, mix melted chocolate into half, then swirl the two batters together in the pan. Just reduce baking time by 2-3 minutes if adding wet ingredients.