
Desserts
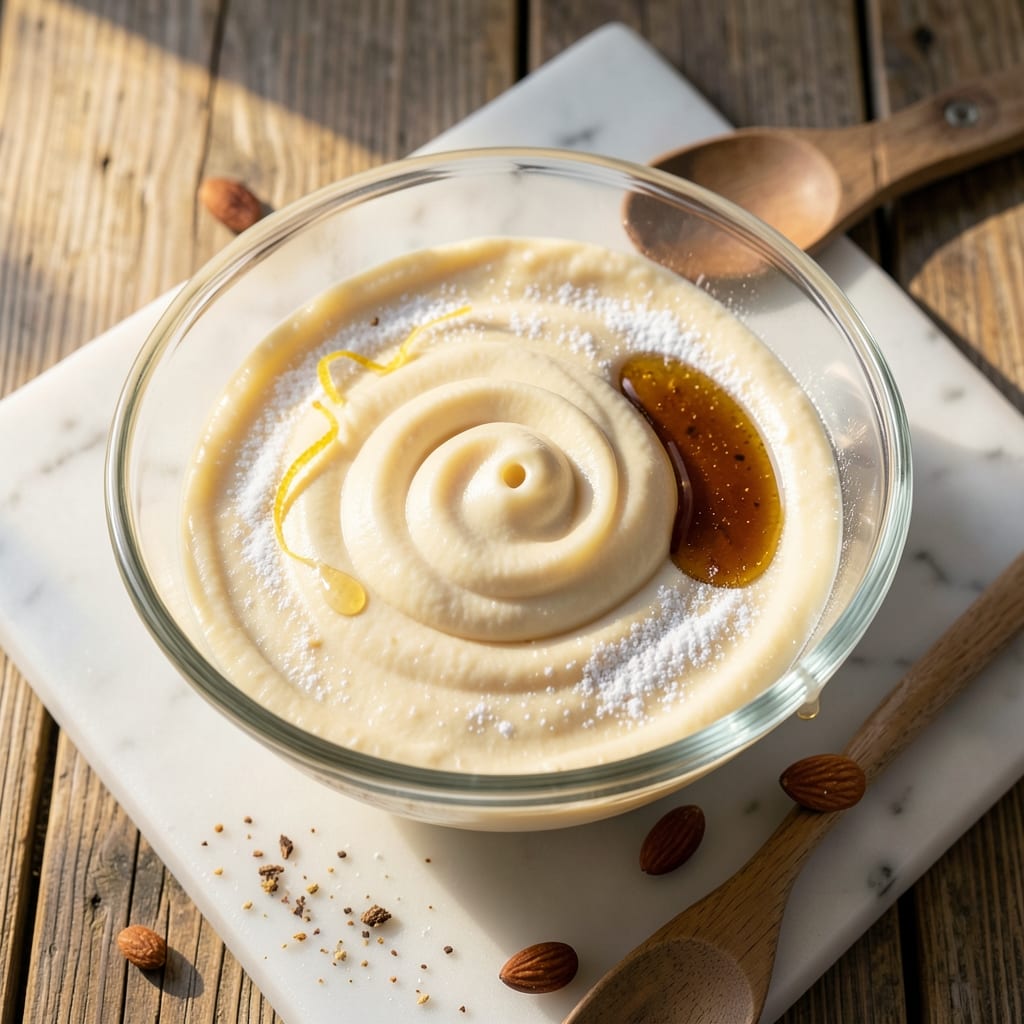
This almond cream cake filling transforms ordinary layers into something extraordinary—where velvety cream meets toasted almond notes and a liqueur whisper adds depth. The secret lies in perfectly tempered butter and ground almonds that create a texture so light it disappears between bites, while a crispy almond crown on top delivers that satisfying crunch. What makes this filling special is its balance: rich enough to stand alone, yet delicate enough to layer without overpowering your cake structure.
The process begins with a silky base of butter, sugar, and eggs, where the almonds are incorporated just enough to add nutty richness without graininess. A touch of vanilla and a splash of liqueur (like amaretto or brandy) elevate the flavor profile, ensuring every swirl tastes intentionally luxurious. The filling is designed to be baked within cake layers, creating those signature golden swirls that make any dessert look professionally crafted.
What you'll achieve is a filling that's impossibly smooth yet substantial, with a crispy almond crown that adds both visual appeal and textural contrast. This isn't just frosting—it's a flavor experience that turns a simple cake into a showstopper. The technique is straightforward, but the result is restaurant-quality, proving that even the most elegant desserts can be achieved at home with the right approach.
Perfect for almond cream slices, layered cakes, or even filled pastries, this filling adapts beautifully to your dessert needs. Whether you're baking for a celebration or simply treating yourself, the combination of creamy texture, nutty depth, and crispy crown ensures every slice is worth savoring. Let's get started on creating this signature element that will elevate your baking game.
Ingredients for almond cream cake filling
Sixteen ingredients blend into a luxurious filling with nutty crunch and liqueur depth.
| Ingredient | Amount | Notes |
|---|---|---|
| Unsalted Butter 🧈 | 1 cup | Softened to room temperature |
| Granulated Sugar 🍚 | 1 ½ cups | Superfine preferred for smoothness |
| Large Eggs 🥚 | 4 whole | Room temperature for best blending |
| Vanilla Extract 🌿 | 1 tbsp | Pure Madagascar preferred |
| Ground Almonds 🌰 | 1 ½ cups | Finely ground, skin-on preferred |
| Almond Liqueur 🍷 | 2 tbsp | Amaretto or brandy substitute |
| All-Purpose Flour 🌾 | ½ cup | Sifted for smooth texture |
| Sliced Almonds 🌰 | ½ cup | Toasted for crispy crown |
| Powdered Sugar 🍚 | ¼ cup | For dusting crown |
| Salt 🧂 | ¼ tsp | Fine sea salt preferred |
| Cornstarch 🌾 | 1 tbsp | For extra smoothness |
The butter and sugar start this off right—European-style butter has more fat for that velvety texture. Trader Joe's or Whole Foods carry the best brands for this. Ground almonds? Skin-on almonds toasted and ground yourself give the most flavor—store-bought works but lacks that fresh toasted note. For the liqueur, amaretto is ideal, but brandy or even a splash of orange liqueur adds complexity. The sliced almonds for the crown? Buy them pre-sliced—toasting them in a dry pan until golden brown (about 5 minutes) makes all the difference for that crispy finish.
No almond liqueur? Orange liqueur or even a splash of vanilla extract plus 1 tsp almond extract gets you close. Short on ground almonds? Almond flour works at the same amount, but it's slightly coarser. The filling can be made ahead—48 hours in advance lets the flavors meld beautifully. For the crown, if you can't find sliced almonds, whole almonds toasted and roughly chopped work in a pinch. The cornstarch is key for that silky texture—don't skip it unless you're okay with a slightly grainier filling. And yes, the extra powdered sugar on the crown is worth it—it keeps the almonds crispy longer.
This filling keeps for 5 days in the fridge, covered tightly. The crown stays crispy for 3 days if stored in an airtight container. For longer storage, freeze the filling for up to 3 months—thaw at room temperature before using. The crown? Freeze it separately and toast again briefly when ready to serve. I always make extra filling—it's perfect for filling cupcakes or swirling into cheesecakes too. Just portion it into small containers so you can grab what you need without thawing the whole batch.
Why You'll Love This Recipe
- Here’s what sold me: it costs next to nothing to make but feels like a gourmet treat. Ground almonds are cheaper than sliced, and you only need a handful for that nutty punch. Plus, the leftovers? They last a week in the fridge, perfect for last-minute desserts or sneaking into oatmeal if you’re feeling wild. (Yes, even on a Tuesday night.)
- Five-Ingredient Magic: I swear by this—just butter, sugar, eggs, vanilla, and almonds. That’s it. No weird substitutions, no hunting for obscure spices. The ground almonds give it that nutty richness without the fuss of chopping whole nuts, and the eggs bind it so smoothly you’ll forget you’re making something from scratch.
- Velvet Smoothness: The moment the filling cools, it transforms into this silky, almost custard-like texture—creamy but not heavy, with just enough bite from the toasted almonds. Honestly, it’s the kind of flavor that makes you pause mid-bite, like, "Wait, is this even dessert?" The vanilla ties everything together without overpowering, and the butter? It’s the secret hero here.
- Layering Champion: Between us, this filling is my go-to for anything layered—cake, cookies, even toasted bread. I’ve used it in trifles, stuffed it into puff pastry for a fancy breakfast, and even dolloped it over warm apple slices for a lazy Sunday. The best part? It keeps its shape when chilled, so no messy fillings sliding around when you’re trying to impress guests.
Step-by-step instructions for almond cream cake filling
Here's how to create a velvety almond cream filling with that perfect liqueur-infused swirl and crispy almond crown.
Cream Butter and Sugar Until Light and Fluffy
In a stand mixer fitted with the paddle attachment, beat the 1 cup unsalted butter (softened to room temperature) and 1.5 cups granulated sugar on medium speed for 3-4 minutes. You're looking for a pale, fluffy mixture that nearly doubles in volume and leaves clean streaks on the bowl. This creaming process incorporates air, which creates that light, airy texture we want in the filling.
I like to scrape down the sides of the bowl every minute or so to ensure everything gets incorporated evenly. If you're using a hand mixer, just be patient—it'll take a bit longer but you'll get there. The sugar should dissolve completely, leaving no grainy texture. This is your foundation, so take your time here.
Add Eggs and Vanilla for a Rich Base
Add the 4 whole large eggs one at a time, mixing on low speed for 30 seconds after each addition until fully incorporated. Then add the 1 tablespoon vanilla extract and mix for another 10 seconds. The mixture will look slightly curdled at first, but don't worry—it'll come together when we add the dry ingredients.
I always use room temperature eggs for this recipe because they blend more smoothly. If your eggs are straight from the fridge, let them sit in warm water for 5 minutes first. The vanilla extract should be pure Madagascar vanilla—it makes a noticeable difference in the final flavor. Mix just until combined to avoid over-developing the gluten in the flour we'll add next.
Combine Dry Ingredients for Smooth Texture
In a separate bowl, whisk together the 0.5 cup all-purpose flour, 1.5 cups ground almonds, 1 tablespoon cornstarch, and 0.25 teaspoon salt. The cornstarch helps create that silky smooth texture we're after. Gradually add this dry mixture to the wet ingredients, mixing on low speed just until combined—you should still see some flour streaks. Over-mixing develops gluten and can make the filling dense.
Here's the thing—ground almonds can be oily, so I like to press them through a fine-mesh sieve before measuring to remove any large pieces. This ensures a completely smooth filling without any gritty texture. Add the 2 tablespoons almond liqueur now and mix for another 10 seconds to distribute that rich, nutty flavor throughout.
Bake and Create the Crispy Almond Crown
Pour the filling into a 9-inch springform pan lined with parchment paper. Arrange the 0.5 cup sliced almonds in a circular pattern on top, slightly overlapping. Sprinkle the 0.25 cup powdered sugar evenly over the almonds to help them crisp up. Bake at 350°F for 25-30 minutes or until the center is just set (a toothpick inserted should come out with a few moist crumbs).
Watch carefully during the last 5 minutes of baking—the almonds should turn golden brown and crispy. If they brown too quickly, tent the pan with foil. The filling should be just set in the center—it'll continue cooking slightly as it cools. This crispy almond crown is what makes this filling special, so don't rush this step.
Cool and Swirl for Perfect Presentation
Let the filling cool completely in the pan—this can take 2-3 hours. The longer it cools, the smoother it becomes. Once cooled, run a knife around the edge to loosen it from the pan. Then, using the same knife, create swirls in the filling by gently twisting it from the center outward. This creates those beautiful liqueur-infused swirls that make this filling so special.
For the crispy almond crown, carefully lift the almonds off the top (they should come up easily if baked properly) and arrange them artistically on top of the swirled filling. Dust with additional powdered sugar if desired. This filling keeps well in the refrigerator for up to 5 days or can be frozen for 3 months—just thaw overnight in the fridge before using.
Pro Tips For Making Almond Cream Cake Filling
- Melt Butter Slowly: I learned this the hard way—dumping cold butter into the sugar mix and ending up with lumps that never dissolved. Instead, melt the butter first (just until it’s liquid, not greasy) and let it cool slightly before adding it to the sugar. This keeps the filling smooth and prevents graininess.
- Toast the Almonds: Ground almonds can taste flat if they’re fresh out of the bag. Lightly toast them in a dry pan over medium heat for 3-4 minutes until fragrant—it deepens their flavor and cuts through the sweetness. (Yes, even if you’re impatient like me.)
- Whip Eggs Room-Temp: Cold eggs from the fridge won’t blend properly, and you’ll end up with a filling that’s more like almond paste than cream. Take the eggs out 15 minutes before using, or better yet, place them in warm water for 5 minutes. The difference in texture is noticeable.
- Strain the Mixture: Ground almonds have a way of clumping, no matter how well you sift them. After mixing everything, strain the filling through a fine-mesh sieve into your bowl. It’s a little extra work, but the result is silky, not gritty—especially if you’re using store-bought ground almonds.
Storing and reheating this almond cream cake filling
Fridge Storage Tips
Store your almond cream filling in an airtight container with parchment paper between layers to prevent sticking. The filling stays fresh for up to 5 days in the refrigerator, but I always recommend using it within 3 days for peak texture. The crispy almond crown stays crunchy for 3 days if kept in a separate container—just press it gently between two sheets of parchment before sealing. 🧊
Freezing for Later Use
For longer storage, freeze the filling in portioned single-serving containers (like silicone molds or small jars) for up to 3 months. Thaw overnight in the fridge before using—never microwave it directly, as this can make the texture grainy. The almond crown freezes separately and should be toasted again briefly after thawing to restore crispness. I like to label containers with dates to track freshness.
Reheating Methods
If you've stored the filling at room temperature (for short-term use), simply let it sit at room temperature for 1-2 hours before serving. For the crispy crown, reheat it in a 350°F oven for 3-5 minutes to restore crispness. Never reheat the filling in the microwave—it'll turn rubbery. The filling is best enjoyed at room temperature, so take it out of the fridge 30 minutes before serving for optimal texture. ⏰
Reviving Texture
If your filling develops a slight sheen or looks slightly separated after refrigeration, don't worry—it's normal. Simply whisk it gently with a hand mixer for 10-15 seconds to restore smoothness. For the crown, if it loses crispness, spread it on a baking sheet and toast at 325°F for 2-3 minutes until golden again. I've found that adding 1 tsp extra powdered sugar to the crown before reheating helps maintain crispness longer.
Make-Ahead Pro Tips
Prepare the filling 24 hours ahead for deeper flavor development—the almond and liqueur notes meld beautifully over time. If making the crown ahead, assemble it just before baking so the almonds stay crisp. For layering in cakes, chill the filling for 1 hour before using to prevent spreading. I always make extra filling—it's perfect for filling cupcakes or swirling into cheesecakes later in the week. 💡
Nutrition facts
Frequently asked questions
Can I make this almond cream filling without liqueur?
The liqueur adds depth, but you can substitute with 1 tsp almond extract plus 1 tbsp vanilla extract for a similar nutty profile. For a fruity twist, try 1 tbsp orange liqueur—just reduce the vanilla to ½ tbsp to balance flavors. The filling will still be delicious, though the aroma won't be as complex.
How do I prevent the filling from being too grainy?
Sift the ground almonds and flour together before mixing to eliminate lumps. Press the almonds through a fine-mesh sieve if possible, and avoid overmixing once the dry ingredients are added. The cornstarch also helps create a silky texture—don't skip it! Chill the filling for 1 hour before baking to prevent spreading and maintain smoothness.
Can I use this filling for cupcakes instead of a cake?
Pipe the filling directly into cupcake liners before baking, then top with the crispy almond crown. For extra drama, swirl it with a toothpick before adding the crown. The filling works beautifully in mini loaf pans too—just reduce baking time to 15-20 minutes at 350°F. The texture stays creamy and the crown adds a stunning finish.
Why did my almond crown turn oily instead of crispy?
Oiliness happens when the almonds weren't toasted enough or the powdered sugar wasn't evenly distributed. Next time, toast the sliced almonds in a dry pan for 5-7 minutes until golden, then sprinkle with powdered sugar while still warm. Bake at 325°F instead of 350°F to prevent over-browning, which can make the crown soft. A quick fix: Re-toast the crown in the oven for 2-3 minutes after baking.
Is this filling gluten-free?
Not traditionally, but you can adapt it! Replace the all-purpose flour with ½ cup gluten-free 1:1 baking flour (like Bob's Red Mill) and add 1 tsp xanthan gum** to maintain structure. The texture will be slightly denser, but still delicious. For the crown, ensure your sliced almonds are certified gluten-free to avoid cross-contamination.