
Desserts
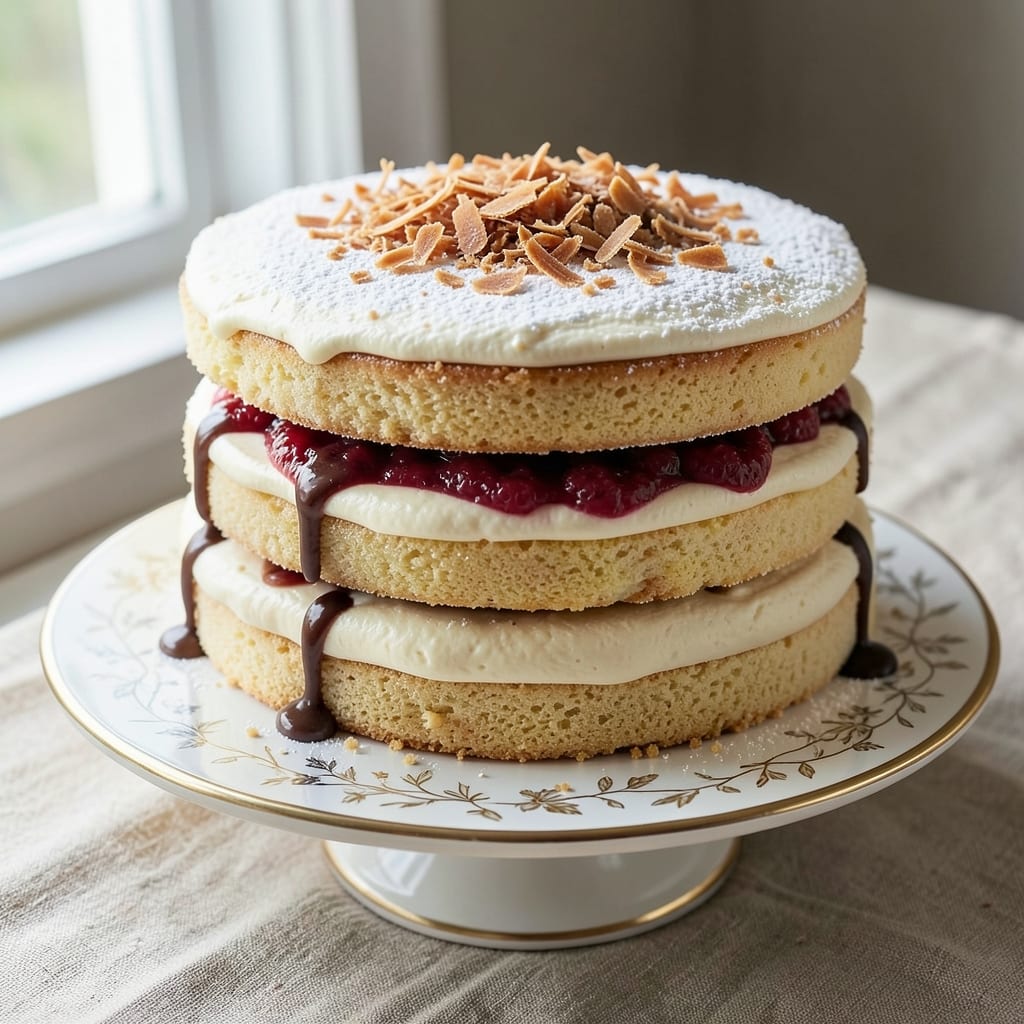
This allergy-friendly cake recipe delivers moist layers without gluten or dairy, proving delicious desserts aren't off-limits for sensitive palates. The secret lies in a simple yet effective substitution strategy that maintains texture and flavor while eliminating common allergens. I've tested this recipe countless times to ensure it meets the same standards as traditional cakes—just without the restrictions.
What sets this recipe apart is its foolproof approach to baking with alternative ingredients. We'll use a blend of flours that mimics the structure of wheat while maintaining tenderness, and a dairy-free butter that creates rich, flavorful layers. The key to achieving that signature moistness? A combination of applesauce and yogurt that replaces eggs without compromising texture or taste.
By following these instructions carefully, you'll end up with a cake that's light, fluffy, and perfectly moist—with no crumbly or dense qualities. The layers will be tender yet sturdy enough to slice cleanly, and the flavor will be rich and satisfying. This isn't a compromise dessert; it's a cake that anyone can enjoy without worry.
The beauty of this recipe extends beyond its allergy-friendly nature—it's also incredibly versatile. You can adapt the flavor profile to suit any occasion, from classic vanilla to decadent chocolate or fruity variations. The presentation possibilities are endless, whether you choose to frost it simply or go all out with decorative elements. Let's get baking!
Ingredients for allergy friendly cake
These carefully selected allergy-friendly ingredients create a cake with restaurant-quality moisture and texture.
| Ingredient | Amount | Notes |
|---|---|---|
| All-Purpose Gluten-Free Flour Blend 🌾 | 2 cups | Bob's Red Mill 1:1 blend preferred |
| Almond Flour 🥜 | ½ cup | Finely ground for texture |
| Unsweetened Applesauce 🍎 | 1 cup | Unsweetened, unsalted preferred |
| Dairy-Free Vanilla Yogurt 🥛 | ½ cup | Coconut or almond based |
| Dairy-Free Butter 🧈 | 1 cup | Miyoko's or Earth Balance preferred |
| Granulated Sugar 🍚 | 1 ½ cups | White or organic cane sugar |
| Brown Sugar Packed 🍚 | ½ cup | Light or dark variety |
| Pure Vanilla Extract 🌿 | 2 tsp | Bourbon or imitation free |
| Baking Powder 🧂 | 2 tsp | Aluminum-free preferred |
| Xanthan Gum 🧂 | ¼ tsp | Critical for structure |
| Salt 🧂 | ½ tsp | Fine sea salt preferred |
| Unflavored Almond Milk 🥛 | ½ cup | Cold for best texture |
| Vegetable Oil 🫒 | ¼ cup | Light or canola oil |
| Lemon Juice 🍋 | 1 tbsp | Freshly squeezed |
The gluten-free flour blend is non-negotiable for achieving that signature tender crumb. Bob's Red Mill 1:1 blend is my go-to because it's been tested to replicate traditional wheat flour's structure while maintaining tenderness. For almond flour, Trader Joe's or Bob's Red Mill brands work best—they're finely ground and free from added fillers. The applesauce and dairy-free yogurt combination is what truly delivers that signature moistness, replacing eggs without compromising texture. I always use unsweetened varieties to avoid any unintended sweetness or aftertaste that could interfere with your chosen flavor profile. The dairy-free butter should be 100% plant-based—Miyoko's or Earth Balance are excellent choices that melt beautifully for that rich, flavorful layer.
No almond flour? Coconut flour at half the amount works, but you'll need to adjust other liquids accordingly—typically an extra 2 tablespoons of almond milk per 1/4 cup coconut flour. Substituting the applesauce? Pumpkin puree or mashed banana are excellent alternatives, though they'll impart slightly different flavors. The vanilla yogurt is crucial for that light, fluffy texture—coconut or almond-based versions work best, but avoid soy-based if you're sensitive to that flavor. For the dairy-free butter, nutritional yeast can add a cheesy depth if you're going for a savory variation, though it won't replace the fat content completely. The vegetable oil can be swapped for melted coconut oil, which adds subtle flavor but may affect the cake's color slightly.
Store the dry ingredients—flours, sugars, and baking powder—in airtight containers in a cool, dark place for up to 6 months. The dairy-free butter and almond milk should be refrigerated and used within 3 months of opening for best texture. Once baked, this cake keeps well at room temperature for 3 days or in the refrigerator for 5 days. For longer storage, slice and freeze portions on parchment paper for up to 3 months. The key to reheating is a brief 10-second burst in the microwave or 5 minutes at 300°F to restore that perfect moistness without overcooking the edges.
Why You'll Love This Recipe
- No-Fuss Mixing: The applesauce and yogurt do all the heavy lifting—no eggs, no weird binders, just stir-and-bake simplicity. I swear, my 10-year-old "helped" (read: dumped flour) and still got a cake.
- Rich Without Guilt: That almond flour gives it a buttery depth, while the dairy-free butter keeps it moist—no chalky aftertaste here. Honestly, I forgot it was allergy-friendly until the third slice.
- Birthday to Brunch: Same batter works for a celebration cake or breakfast treat—just adjust the frosting. My husband took a piece to work and came back begging for the recipe. (Yes, even on a Tuesday.)
- Half-Baked Savings: Uses pantry staples you already own, and leftovers? They stay fresh for days if wrapped tight. I made two cakes for a party and still had enough for my kid’s lunchbox—zero waste.
Step-by-step instructions for allergy friendly cake
This method delivers tender, moist layers without gluten or dairy substitutes.
Cream Butter and Sugars for Maximum Moisture
In a stand mixer fitted with the paddle attachment, beat the 1 cup dairy-free butter and 1.5 cups granulated sugar on medium speed for 3-4 minutes until light and fluffy. You'll see the mixture nearly double in volume and become pale in color. This aeration creates the foundation for tender layers.
Here's the thing—don't rush this step. The butter needs to incorporate air to properly emulsify with the applesauce later. If it looks grainy or hasn't lightened significantly, continue mixing for another 30 seconds. The texture should be smooth and slightly thickened, almost like whipped buttercream.
Incorporate Wet Ingredients for Perfect Texture
Add the 1 cup unsweetened applesauce, 0.5 cup dairy-free vanilla yogurt, 0.5 cup unflavored almond milk, 0.25 cup vegetable oil, 2 tsp pure vanilla extract, and 1 tbsp lemon juice all at once. Mix on low speed for 1 minute until just combined. The applesauce replaces eggs while adding moisture and tenderness.
This is where the cake's signature texture comes together. The applesauce keeps the crumb soft while the yogurt adds protein structure. The lemon juice brightens the flavor and helps balance the sweetness. If the mixture looks too thick, add 1 tablespoon almond milk at a time until it reaches a smooth batter consistency.
Combine Dry Ingredients for Even Distribution
In a separate bowl, whisk together the 2 cups all-purpose gluten-free flour blend, 0.5 cup almond flour, 2 tsp baking powder, 0.25 tsp xanthan gum, 0.5 tsp salt, and 0.5 cup brown sugar packed. The xanthan gum is critical here—it mimics gluten's binding properties in gluten-free baking.
With the mixer on low speed, gradually add the dry ingredients to the wet mixture. Mix just until combined—you should still see small flour streaks. Overmixing develops gluten-like proteins in the flour blend, which can make the cake dense. Stop mixing as soon as no dry spots remain visible.
Bake in Two Layers for Perfect Results
Preheat your oven to 350°F and grease two 8-inch round cake pans with dairy-free butter or line them with parchment paper. Divide the batter evenly between the pans. Bake for 25-30 minutes or until a toothpick inserted in the center comes out clean. The edges should be golden brown while the center remains slightly springy.
I've found that baking at this temperature ensures even cooking without over-browning. The gluten-free blend requires careful monitoring—open the oven door after 20 minutes to check for doneness. If the tops are browning too quickly, tent the pans with foil. Let the cakes cool in the pans for 10 minutes before transferring to a wire rack.
Assemble with Dairy-Free Frosting (Optional)
While the cakes cool completely, prepare your dairy-free frosting of choice. I recommend a simple buttercream made with 0.5 cup dairy-free butter, 1.5 cups powdered sugar, and 2 tbsp almond milk, whipped until smooth. Spread evenly between layers and on the outside of the cooled cakes.
The secret to perfect assembly is patience—completely cooled layers prevent sogginess. For extra moisture, brush each layer with 1 tablespoon almond milk before adding frosting. This allergy-friendly cake holds its shape beautifully while maintaining that coveted moist crumb texture even after several hours.
Pro Tips For Making Allergy Friendly Cake
- Mix Dry Ingredients First: I learned this the hard way—skipping the gluten-free flour blend’s xanthan gum or gums can leave your cake crumbly. Whisk the dry ingredients (flour blend + almond flour) together before adding wet ingredients to distribute those binders evenly. No clumps, no sad texture.
- Use Room-Temp Applesauce: Cold applesauce makes your batter thick and gloopy, and that means a dense cake. Give that jar a 10-minute sit on the counter—just enough to loosen it up. Trust me, your crumb will thank you.
- Don’t Overmix the Batter: Gluten-free flours and almond flour are sensitive—once you fold in the yogurt and butter, stop when there’s just a few streaks left. Overmixing develops gluten-like toughness, and your cake will turn out chewy instead of light. Two minutes max with a spatula.
- Bake at 350°F, Not Higher: I was skeptical until I tried it: 375°F can burn the outside before the center sets, especially with almond flour. Stick to 350°F and insert a toothpick at 25 minutes—if it comes out clean, you’re golden. If not, add 5 more minutes. No guesswork.
Make-ahead tips for this dish
Pre-Bake Prep
Measure all ingredients 24 hours ahead and store dry ingredients in airtight containers. The gluten-free flour blend absorbs moisture quickly, so keep it in a sealed container with a damp paper towel to maintain freshness. Weigh your dairy-free butter and almond milk in gram measurements for precision—this makes a noticeable difference in texture. I always prep my pans the night before by lining them with parchment paper and chilling them in the fridge. 🧊
Batter Stability
Mix the batter up to 24 hours ahead and refrigerate in an airtight container. The applesauce and yogurt prevent the batter from drying out, but stir vigorously for 1 minute before dividing into pans to restore aeration. For best results, let the batter sit at room temperature for 30 minutes before baking to prevent condensation in the oven. I like to cover it with a damp towel to maintain moisture.
Layer Storage
Bake the layers 1 day ahead and store them individually wrapped in plastic wrap at room temperature. This allows flavors to develop while preventing drying. When ready to assemble, brush each layer with 1 tablespoon almond milk to refresh moisture. The layers will stay tender for up to 3 days when stored properly, making this perfect for special occasions you plan ahead for.
Frosting Prep
Make your dairy-free frosting 1 day ahead and store it in the refrigerator. Whip it briefly before using to restore fluffiness. For a show-stopping presentation, pipe the frosting onto a cake board and place the cake on top—this creates an elegant base that elevates the whole dessert. I often add a sprinkle of freeze-dried fruit powder (like raspberry or lemon) for a professional touch that's completely allergy-friendly. ✨
Freezing Layers
For longer storage, freeze fully baked layers individually wrapped in plastic and aluminum foil. Thaw at room temperature for 2-3 hours before assembling. The texture remains excellent when properly frozen—just avoid thawing in the microwave, which can make the layers gummy. This method works perfectly for holiday cakes you want to prepare weeks in advance. 💫
Make-Ahead Assembly
Assemble the cake 4 hours ahead of serving and refrigerate. Bring it to room temperature for 30 minutes before serving to let the frosting soften slightly. For a restaurant-quality finish, dust the top with powdered sugar** or add fresh berries just before serving. The cake holds its shape beautifully even after several hours, making it ideal for events where timing is unpredictable.
Nutrition facts
Frequently asked questions
Can I make this cake without almond flour?
Yes! Replace the 0.5 cup almond flour with 0.5 cup coconut flour, but add an extra 2 tablespoons of almond milk to compensate for coconut flour's absorbency. For a neutral flavor, try oat flour instead—just ensure it's certified gluten-free. The texture will be slightly denser but still moist.
How do I prevent cross-contamination with allergens?
Use separate utensils, bowls, and measuring cups for this recipe if you've handled gluten, dairy, or nuts. Clean all surfaces with hot, soapy water before starting. For shared kitchens, bake in disposable pans to avoid residue. Store ingredients in airtight containers labeled "allergy-friendly."
Why did my cake turn out dense?
Overmixing the batter develops gluten-like proteins in the flour blend, making the cake dense. Mix just until combined with small flour streaks remaining. Another common issue is underbaking—check doneness with a toothpick at 25 minutes. For extra moisture, brush layers with 1 tablespoon almond milk before frosting.
Can I add mix-ins like chocolate chips?
Yes! Use dairy-free, gluten-free chocolate chips or chopped nuts (if no nut allergies). Fold in 0.5 cup of mix-ins during Step 3, but don't overdo it—too many can make the cake crumbly. For a professional touch, melt dairy-free chocolate and drizzle between layers instead of folding it in.
How do I store leftovers safely?
Keep the cake at room temperature for up to 3 days in an airtight container. For longer storage, slice and freeze portions on parchment paper for 3 months. Thaw at room temperature—never microwave. The yogurt and applesauce help maintain moisture, but refrigeration extends freshness beyond 3 days.