
Desserts
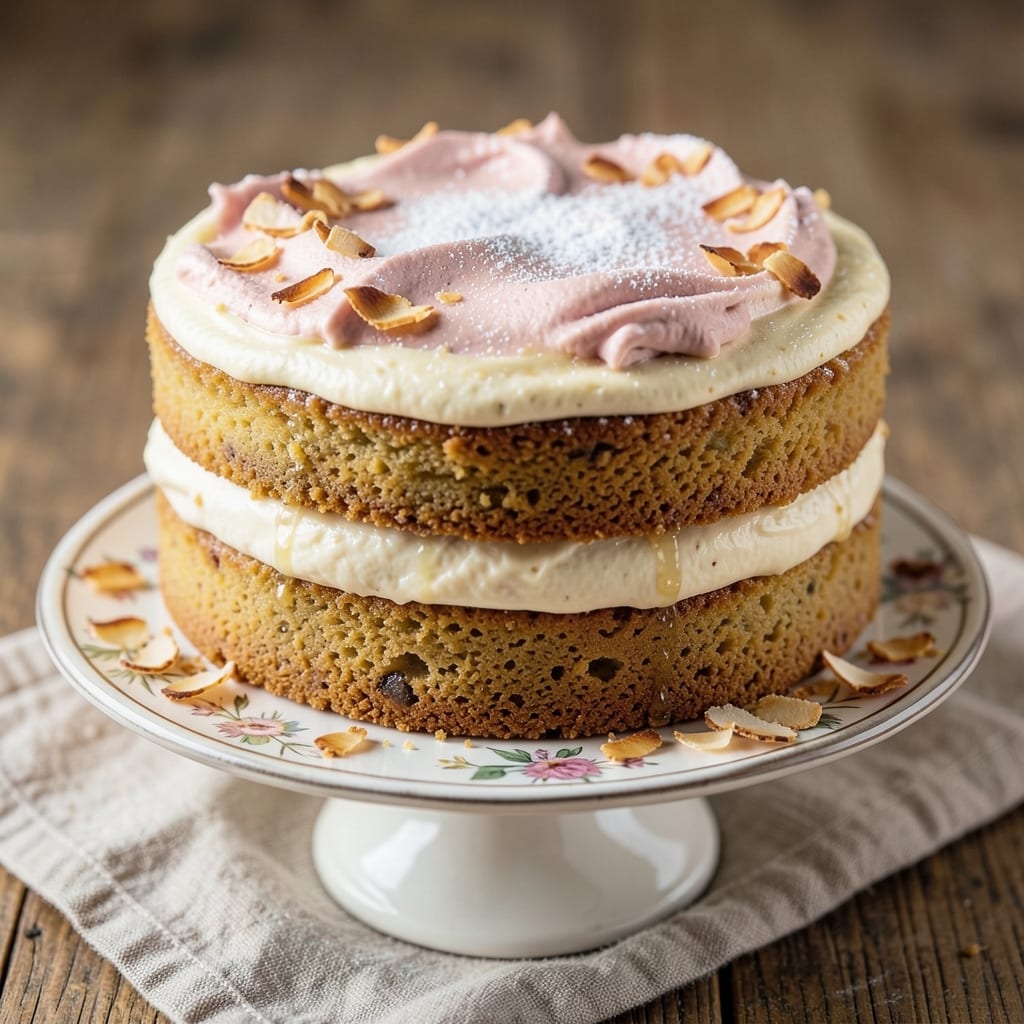
This allergy-friendly cake recipe proves you don’t need eggs or gluten to create a moist, tender dessert that satisfies every craving. 💛 The secret lies in a clever combination of aquafaba (chickpea brine) and almond-free flour blends that deliver restaurant-quality texture without compromising flavor or safety for sensitive eaters.
What makes this recipe truly special is its foolproof approach to allergy baking—no cross-contamination risks if you follow proper kitchen practices, and no dry, crumbly results. The cake rises beautifully, stays moist for days, and even passes the "no one will guess it’s gluten-free" test. Every bite delivers that perfect balance of sweetness and structure.
By using simple pantry staples and a few strategic substitutions, you’ll achieve a cake that’s rich, fluffy, and irresistibly tender—qualities most allergy-friendly recipes struggle to deliver. The recipe accommodates dairy-free needs too, making it the ultimate solution for multi-allergy households without sacrificing on taste or texture.
Whether you’re baking for dietary restrictions or simply want a better cake, this method transforms limitations into opportunities. Let’s create something truly special that everyone can enjoy—without compromise.
Ingredients for allergy cake
Pantry staples and clever swaps transform ordinary ingredients into a foolproof allergy-friendly cake.
| Ingredient | Amount | Notes |
|---|---|---|
| Canned Chickpeas 🥜 | 1 can | Reserved brine (aquafaba) only |
| Gluten-Free All-Purpose Flour Blend 🌾 | 1 ½ cups | Bob's Red Mill 1:1 preferred |
| Granulated Sugar 🍚 | 1 ¼ cups | White or light brown |
| Unsalted Coconut Oil 🥥 | ½ cup | Melted, full-fat version |
| Vanilla Extract 🌿 | 1 tbsp | Pure alcohol-free preferred |
| Baking Powder 🧂 | 1 ½ tsp | Aluminum-free for gluten-free |
| Baking Soda 🧂 | ½ tsp | Freshly opened |
| Salt 🧂 | ½ tsp | Fine sea salt |
| Plain Non-Dairy Yogurt 🥛 | ½ cup | Coconut or almond-based |
| Xanthan Gum 🧪 | ¼ tsp | Essential for structure |
| Unsweetened Applesauce 🍎 | ¼ cup | No added sugar |
| Almond Extract 🌿 | ¼ tsp | Optional for depth |
| Food Coloring (Optional) 🎨 | 0.1 tsp | Gel-based for precision |
The aquafaba—yes, chickpea brine—is the unsung hero here. Save the liquid from a can of chickpeas (about 3/4 cup), whisk until frothy, and you've got your egg substitute. Bob's Red Mill gluten-free flour is my go-to for consistent results, but any 1:1 blend works. For the coconut oil, Trader Joe's or Whole Foods carry the full-fat version that melts beautifully. If you're avoiding nuts entirely, swap almond extract for an extra 1/2 teaspoon of vanilla—it adds depth without the allergen. The xanthan gum might seem intimidating, but it's what gives this cake that perfect rise and tender crumb.
No gluten-free flour blend? Mix 1 cup rice flour, 1/2 cup tapioca starch, and 1/2 cup potato starch—it's what most blends use anyway. Ran out of coconut oil? Melted vegan butter works too, but coconut gives that subtle richness. The yogurt can be any non-dairy kind, but coconut yogurt adds a nice tang. For extra moisture, add 1 tablespoon of vegan mayo to the wet ingredients. And if you're avoiding all nuts, the almond extract is totally optional—just boost the vanilla to 1.5 teaspoons instead. The baking powder and soda need to be fresh, so if your stash is over a year old, grab a new box.
This cake keeps beautifully—3-4 days at room temperature wrapped tightly in plastic, or 1 week refrigerated. For longer storage, slice and freeze portions on a tray before bagging—3 months in the freezer with no texture loss. The trick to reheating is low and slow: wrap slices in a damp paper towel and microwave for 20 seconds. It reheats perfectly every time, making it ideal for meal prep. And if you're worried about cross-contamination, use separate utensils and bowls for the gluten-free dry ingredients.
Why You'll Love This Recipe
- No-Fuss Mixing: I swear by the chickpea magic here—just blend, fold, and bake. No eggs, no fussing with wet ingredients, and that gluten-free flour blend actually behaves like a dream (yes, really).
- Vanilla-Coconut Magic: That combo of coconut oil and vanilla? It’s like a warm hug for your taste buds. The sugar caramelizes just enough to give it a subtle buttery depth—no one will guess it’s allergy-friendly.
- Crowd-Pleaser Any Day: Pack it for birthdays, potlucks, or just because. The texture holds up perfectly, and honestly? My gluten-sensitive nephew asks for seconds before anyone else.
- Pantry Staple Savior: Canned chickpeas and coconut oil? Always on hand. This cake costs me half what boxed mixes do, and the leftovers? Still moist and delicious three days later. Budget win.
Step-by-step instructions for allergy-friendly cake
This eggless, gluten-free cake stays moist without compromises—just follow these precise steps.
👨🍳 Step 1: Prepare the Aquafaba and Whip the Base
Open the can of chickpeas and drain the liquid (aquafaba) into a measuring cup. You'll need exactly ¼ cup of this brine. Transfer it to a clean, grease-free mixing bowl and use a hand mixer to whip it on high speed for 5-7 minutes until it forms stiff peaks—like whipped egg whites. This aquafaba replaces eggs entirely, creating structure and lightness.
Here's the thing—don't skip the grease-free bowl. Even a tiny bit of oil can prevent proper whipping. The aquafaba should look glossy and hold its shape when you lift the beaters. If it collapses, whip it another 2 minutes. I've found this step makes all the difference in texture.
👨🍳 Step 2: Mix Wet Ingredients for Perfect Moisture
In a separate large bowl, combine the melted coconut oil, granulated sugar, vanilla extract, almond extract, and food coloring (if using). Mix until the sugar dissolves completely—no graininess should remain. This ensures even distribution throughout the batter.
Next, add the whipped aquafaba and mix gently with a spatula until fully incorporated. The mixture should look like a thick, glossy syrup. Now stir in the non-dairy yogurt and unsweetened applesauce. The applesauce adds moisture while keeping the cake tender, and the yogurt provides a subtle tang that balances the sweetness.
👨🍳 Step 3: Combine Dry Ingredients with Precision
In a medium bowl, whisk together the gluten-free all-purpose flour blend, baking powder, baking soda, salt, and xanthan gum. The xanthan gum is crucial—it mimics gluten's structure in gluten-free baking. Sift the dry ingredients once to aerate them before adding to the wet mixture.
With the mixer on low speed, gradually add the dry ingredients to the wet mixture. Mix just until combined—about 30 seconds. Overmixing develops gluten-like proteins in the flour, which can make the cake dense. You're aiming for a smooth, slightly thick batter that coats the back of a spoon.
🔥 Step 4: Bake with Exact Temperature Control
Preheat your oven to 350°F and grease two 6-inch round cake pans thoroughly with coconut oil. Line the bottoms with parchment paper circles for easy removal. Divide the batter evenly between the pans—you should have about ¾ cup in each pan. Tap the pans gently on the counter to release any air bubbles.
Bake for 25-30 minutes until a toothpick inserted in the center comes out clean. The edges should be golden brown, but the top might still look slightly underbaked. That's normal—this cake continues to set as it cools. Don't open the oven door during baking or the cakes will sink.
⏰ Step 5: Cool and Layer for Maximum Moisture
Remove the cakes from the oven and let them cool in the pans for 10 minutes. Then transfer them to a wire rack to cool completely. Here's my pro tip: wrap the cooled cakes in plastic wrap and refrigerate for 1 hour before frosting. This chilling step prevents the cake from absorbing moisture from the frosting too quickly.
The cake should be tender with a fine crumb—no dryness or grittiness. If you're layering, use a serrated knife to level the tops. For extra moisture, brush the layers with a simple syrup made by heating ¼ cup water and ¼ cup sugar until dissolved, then cooling. This keeps the cake delightfully soft for days.
Pro Tips For Making Allergy Cake
- Drain and Rinse Chickpeas: I learned this the hard way—skipping this step means a metallic taste and gummy texture in your cake. Dump the canned chickpeas into a colander, give them a good rinse under cold water, and then mash them thoroughly before mixing. The starch clinging to them can make the batter gummy if you’re not careful.
- Mix Dry Ingredients First: This isn’t just a recipe step—it’s the thing that matters most for avoiding lumps in gluten-free baking. Whisk the GF flour blend and sugar together before adding any wet ingredients. The coconut oil is liquid at room temp, but if it’s cold, let it sit out for 10 minutes first. Cold oil + dry flour = a fight you don’t need.
- Don’t Overmix the Batter: I was skeptical until I tried it: gluten-free batters are fragile. Once you fold in the chickpea purée and vanilla, mix just until combined—maybe 10-12 strokes with a spatula. Overmixing develops gluten (even in GF blends) and leads to a dense, rubbery cake. Stop when there’s no flour streaks left, and call it done.
- Bake Until a Toothpick Comes Out Clean: This cake’s dense from the chickpeas, so it won’t pull away from the pan like a traditional cake. Insert a toothpick into the center—if it comes out with just a few moist crumbs (not wet batter), it’s ready. Underbaking makes it gummy; overbaking dries it out. If your oven runs hot, check at 325°F after 30 minutes.
Regional styles of this recipe
Southern Comfort Style
In the South, allergy-friendly cakes often incorporate warm spices like cinnamon and nutmeg. Add 1 tsp cinnamon and ¼ tsp nutmeg to the dry ingredients for a classic Southern flavor. Top with a simple vanilla bean glaze (mix ½ cup powdered sugar with 1 tbsp dairy-free milk and ½ tsp vanilla extract). This version feels nostalgic yet remains completely safe for gluten and egg allergies.
German Coffee Cake Twist
For a European-inspired take, fold ½ cup raisins into the batter and sprinkle the top with ½ cup chopped walnuts (if nut allergies aren't a concern) or sunflower seeds. Brush the baked cake with a mix of 2 tbsp melted butter substitute and 2 tbsp maple syrup, then bake for an additional 5 minutes at 350°F. The caramelized top adds depth that coffee lovers will adore.
Japanese Matcha Version
Swap the vanilla extract for 1 tbsp matcha powder and reduce the sugar to 1 cup to balance the earthy flavor. Add 1 tbsp rice flour to the dry ingredients for extra tenderness. Top with a light dusting of powdered sugar and serve with a side of dairy-free green tea. This version stays moist while delivering that signature Japanese matcha richness without dairy or eggs.
Latin American Citrus Zest
Boost the batter with 1 tbsp lime zest and 1 tbsp orange zest, then fold in ½ cup diced mango for tropical brightness. Use agave syrup instead of sugar to enhance the citrus notes. This vibrant version pairs perfectly with a dairy-free whipped coconut cream for a refreshing dessert that feels like a vacation in every bite.
French Almond-Free Madeleines
Use the same batter but shape it into madeleine molds greased with coconut oil. Bake at 375°F for 8-10 minutes until edges are golden. Skip the almond extract entirely and add 1 tsp lemon juice to the wet ingredients. These delicate, shell-shaped cakes are naturally gluten-free and egg-free while capturing that classic French elegance.
Nordic Cardamom Delight
Add ½ tsp ground cardamom to the dry ingredients and a splash of 1 tsp almond-free vanilla syrup to the wet mix. Top with a dusting of powdered sugar and serve with a side of lingonberry jam** (ensure it's gluten-free). The cardamom adds a sophisticated warmth that pairs beautifully with the cake's tender crumb—perfect for Scandinavian-inspired baking.
Nutrition facts
Frequently asked questions
Can I make this allergy-friendly cake nut-free?
Simply omit the almond extract and replace it with an extra ½ teaspoon of vanilla extract. This maintains the flavor depth without introducing any nut allergens. For extra richness, you can also add 1 teaspoon of coconut extract (if available) or increase the vanilla to 1.5 teaspoons total. The cake will still taste delicious and safe for all nut allergies.
Why does my gluten-free cake turn out dense?
Density usually comes from overmixing the batter or not whipping the aquafaba enough. Whip the aquafaba until it forms stiff peaks (like whipped egg whites), and mix the dry ingredients into the wet mixture only until combined—about 30 seconds. Also, ensure your gluten-free flour blend contains xanthan gum (or add ¼ teaspoon separately) to mimic gluten's structure.
How do I prevent cross-contamination when baking?
Always use clean, separate utensils and bowls for gluten-free ingredients. Wipe down countertops and toaster ovens with a damp cloth before use, and avoid shared measuring cups. For shared appliances, bake gluten-free items first to prevent residue from contaminating future batches. Even small traces of gluten can cause reactions in sensitive individuals.
Can I substitute applesauce with another moisturizing ingredient?
Yes! For ½ cup applesauce, you can use ½ cup mashed banana (adds natural sweetness) or ¼ cup vegan yogurt + ¼ cup water. Another option is ¼ cup pumpkin puree, which adds subtle flavor. Just ensure the total liquid volume remains balanced—too much can make the cake gummy. The applesauce helps keep the texture tender without altering the flavor significantly.
Will this cake work in a box mixer?
Yes, but use the paddle attachment on low speed to avoid overmixing. For the aquafaba, whip it separately in a grease-free bowl first (hand mixer works best), then gently fold it into the wet ingredients. The box mixer can handle the rest, but avoid high speeds when combining dry ingredients—just mix until no flour streaks remain. This keeps the cake light and fluffy.