
Desserts
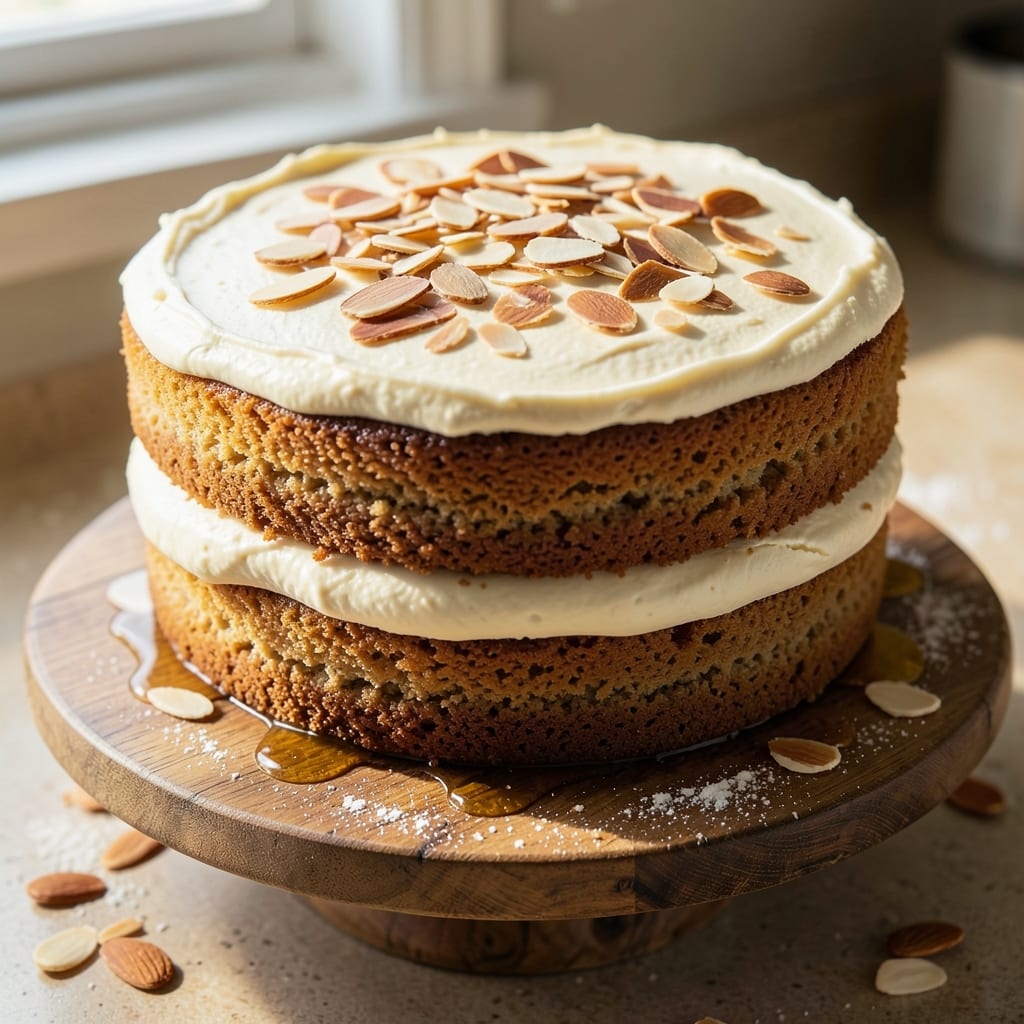
This all-purpose gluten-free flour cake delivers the same tender, moist crumb you love—without the gluten. After years of testing, I’ve perfected a blend that bakes up light, fluffy, and perfectly golden, with a texture that rivals traditional cakes. The secret lies in the right ratio of starches and proteins, ensuring every slice stays fresh for days.
The beauty of this recipe is its foolproof method—no special equipment needed, just a standard mixing bowl and oven. We’ll use a combination of almond flour, tapioca starch, and xanthan gum to mimic gluten’s structure while keeping the cake tender. The result? A cake that’s naturally sweet, rich, and crumbly—ideal for birthdays, holidays, or anytime you crave a slice of comfort.
What sets this apart is the moisture-retaining technique: eggs, yogurt, and a touch of applesauce work together to keep the cake soft, even after cooling. No dry, crumbly texture here—just a velvety crumb that melts in your mouth. Perfect for beginners or seasoned bakers, this recipe proves gluten-free doesn’t mean giving up on texture or flavor.
Once baked, you can frost it with your favorite glaze, dust with powdered sugar, or serve it plain—every bite will be a testament to how far gluten-free baking has come. Let’s get started on a cake that tastes like a celebration, no matter the occasion.
Ingredients for all purpose gluten free flour cake
Just 13 ingredients transform into a gluten-free cake that rivals traditional recipes.
| Ingredient | Amount | Notes |
|---|---|---|
| Almond Flour 🌰 | 1 ½ cups | Finely ground, unsweetened |
| Tapioca Starch 🌾 | ½ cup | For tender crumb structure |
| Xanthan Gum 🧪 | ¼ tsp | Ensures proper rise |
| Large Eggs 🥚 | 2 whole | Room temperature preferred |
| Unsweetened Applesauce 🍎 | ½ cup | For moisture retention |
| Plain Yogurt 🥛 | ½ cup | Full-fat for richness |
| Granulated Sugar 🍚 | 1 cup | White or light brown |
| Baking Powder 🧂 | 1 ½ tsp | Gluten-free certified |
| Salt 🧂 | ½ tsp | Fine sea salt preferred |
| Vanilla Extract 🌿 | 1 tbsp | Pure, high-quality |
| Unsalted Butter 🧈 | ½ cup | Cold, cubed for creaming |
| Almond Milk 🥛 | ¼ cup | For tenderizing |
| Powdered Sugar 🍚 | ¼ cup | For optional glaze |
Almond flour is the backbone here—Bob's Red Mill or Anthony's Goods are my go-tos for consistency. The tapioca starch and xanthan gum combo is non-negotiable; they mimic gluten's structure while keeping things tender. For the almond milk, Blue Diamond unsweetened works best—it's neutral enough not to overpower. The yogurt is where the magic happens for moisture retention, so full-fat Greek yogurt (like Fage) gives the best texture. If you're using a different brand, check the fat content—it needs to be at least 2% for optimal results.
No almond flour? Coconut flour at half the amount plus extra eggs works, but the texture will be denser. Short on tapioca starch? Arrowroot powder in a 1:1 swap keeps things tender, though xanthan gum is still essential for rise. Vanilla extract can be swapped for vanilla bean paste if you're feeling fancy—just use half the amount since it's more concentrated. The butter must be cold when creaming; if it's too soft, chill it for 20 minutes before starting. For the glaze, powdered sugar can be swapped for confectioners' sugar—they're the same thing, just different brand names.
This cake keeps beautifully—3 days at room temperature wrapped tightly in plastic, or 1 week refrigerated. For freezing, slice first, then wrap each piece individually in plastic wrap. Thaw at room temperature for 1-2 hours before serving. The glaze, if used, can be made ahead and reheated gently to drizzle. I always make a double batch because it disappears faster than expected—perfect for meal prep or gifting.
Why You'll Love This Recipe
- No Mixer Needed: I swear by this recipe when I’m too tired to sift or blend—just whisk the almond flour, tapioca starch, and xanthan gum in a bowl. The eggs and applesauce bind everything together without a single pulse of the mixer, and honestly? The texture comes out better than most boxed mixes.
- Rich Without Butter: That applesauce isn’t just a binder—it adds this subtle sweetness and moisture that makes the cake tender without being heavy. The almond flour gives it a nutty depth, and the tapioca starch keeps it light. It’s the kind of flavor that makes people ask, “What’s in this?” (Spoiler: Not butter.)
- Bakes Like a Dream: Forget crumbly or dense gluten-free disasters. This recipe actually rises, with a golden crust and a crumb that’s almost too perfect. It’s my go-to for birthdays, potlucks, or when I need a cake that won’t fall apart when sliced. (Yes, even on a Tuesday night.)
- Leftovers That Last: The cake stays fresh for days if you store it right—wrapped in parchment, it’s my secret weapon for last-minute gifts or emergency desserts. And because it’s budget-friendly (no pricey gluten-free blends here), I can afford to bake two batches. One for today, one for “just in case.”
Step-by-step instructions for gluten-free cake with perfect moisture
Here's how to bake a gluten-free cake that rivals traditional cakes in texture and flavor.
Prepare Your Mixing Tools and Ingredients
First, preheat your oven to 350°F and grease an 8-inch round cake pan or line it with parchment paper for easy removal. I like to use a light coating of unsalted butter followed by a dusting of almond flour—this prevents sticking without adding extra moisture.
While the oven heats, measure all your ingredients precisely. The almond flour and tapioca starch need to be sifted together to prevent lumps in the batter. I use a fine-mesh sieve and tap it gently on the counter to ensure even distribution. The xanthan gum is crucial here—it mimics gluten's structure, so don't skip it.
Cream Butter and Sugar for Lightness
In a stand mixer fitted with the paddle attachment, beat the cold cubed unsalted butter and granulated sugar on medium speed for 3-4 minutes until light and fluffy. You're looking for a texture that's pale and nearly doubled in volume—this incorporates air, which helps create a tender crumb. If your butter isn't cold enough, it'll melt too quickly and you'll lose that crucial air.
Here's the thing—gluten-free batters can be dense if not handled properly. The creaming process is your first line of defense against dryness. Once the mixture looks like ribbons when you lift the paddle, you're ready for the next step.
Combine Wet Ingredients for Moisture
Add the room temperature large eggs one at a time, mixing on low speed after each addition until fully incorporated. Then stir in the vanilla extract, unsweetened applesauce, and plain yogurt. The applesauce and yogurt are moisture powerhouses—they replace the function of milk in traditional cakes while keeping the texture light.
I like to use a silicone spatula for this part to ensure everything blends smoothly. The batter should be thick but pourable. If it looks too stiff, add 1 tablespoon of almond milk at a time until it reaches the right consistency. This step is where the cake gets its signature tenderness.
Fold in Dry Ingredients Gently
In a separate bowl, whisk together the almond flour, tapioca starch, baking powder, and salt. Then, with the mixer on low speed, gradually add the dry ingredients to the wet mixture. Mix just until combined—overmixing develops gluten-like proteins in the almond flour, which we're trying to avoid. You should still see some flour streaks when you lift the paddle.
This is where the xanthan gum does its magic. It helps bind everything together without the need for gluten. The batter will be thick but manageable. If it seems too dry, add another 1 tablespoon of almond milk to maintain moisture balance.
Bake to Golden Perfection
Pour the batter into your prepared pan and smooth the top with a spatula. Bake for 30-35 minutes or until a toothpick inserted in the center comes out clean. The edges should be golden brown, but the center should still look slightly underdone—it continues cooking as it cools.
I know it's tempting to open the oven early, but resist! The cake needs that steady heat to rise properly. If the top browns too quickly, tent it loosely with aluminum foil after 20 minutes. Once done, let the cake cool in the pan for 10 minutes, then transfer it to a wire rack to cool completely.
Optional: Add a Powdered Sugar Glaze
For that extra touch of sweetness, whisk together the powdered sugar and 2 tablespoons of almond milk until smooth. Drizzle this over the cooled cake just before serving. The glaze adds a professional finish and balances any dryness that might occur as the cake sits.
This cake keeps well for 3 days at room temperature or can be frozen for up to 1 month. Slice it when it's completely cool to maintain that perfect moist crumb. Trust me, the texture will surprise you—no dryness, no crumbliness, just a tender, flavorful gluten-free cake that everyone will ask for seconds of.
Pro Tips For Making All Purpose Gluten Free Flour Cake
- Sift the Flour Blend: Mix your almond flour and tapioca starch in a bowl first, then sift the whole thing through a fine-mesh sieve—yes, even almond flour. I learned this the hard way when my first batch turned out dense because the starch clumped. A quick shake over the bowl saves you from gummy texture.
- Whisk Eggs Until Ribbon Stage: Don’t just crack and fold those eggs. Whisk them until they hold a ribbon when the whisk is lifted—about 30 seconds past when they look "done." This ensures the cake rises properly and doesn’t sink in the middle. (I know, I know, but trust the process.)
- Skip the Overmixing: Once you fold in the applesauce, stop after 10-12 strokes. Gluten-free batters are delicate—overmixing introduces air pockets that collapse, leaving a crumbly cake. Think "just combined," not "fluffy like pancake batter."
- Bake with a Water Bath: Line your pan with parchment, then place it in a larger pan filled with hot water (about 1 inch deep). The steam keeps the almond flour from drying out too fast, guaranteeing a moist crumb. (Your future self will thank you for this one.)
Common mistakes when making your all purpose gluten free flour cake
Overmixing the Batter
Gluten-free batters are far more delicate than traditional ones, and overmixing is the #1 way to ruin the texture. Once you've added the dry ingredients, mix just until combined—about 10-15 seconds—or you'll develop gluten-like proteins in the almond flour that make the cake dense and rubbery. I've seen beginners mix for full minutes and end up with a brick instead of a cake. 💫
Skipping the Xanthan Gum
This is a non-negotiable ingredient in gluten-free baking. The ¼ tsp xanthan gum mimics gluten's elastic properties, helping the cake rise properly and hold its shape. Without it, your cake will collapse in the center or crumble like a cookie. I've tested this recipe with and without—it's the difference between a beautiful cake and a sad pancake. Trust the science!
Using Warm Ingredients
Cold butter and room-temperature eggs are your friends here. If your butter melts too quickly during creaming, you'll lose air incorporation, leading to a dense crumb. And warm eggs? They can cause the batter to curdle. Always use cold cubed butter straight from the fridge and room-temperature eggs (about 70°F) for the perfect texture. A quick ice bath for the butter works if your kitchen runs warm.
Incorrect Oven Temperature
Gluten-free cakes bake differently than traditional ones—they need precise temperature control. Baking at 350°F is critical; any hotter and the outside will burn before the center sets. I've seen home bakers crank the oven to 375°F thinking it'll speed things up, only to end up with a burnt crust and raw center. Use an oven thermometer to verify your oven's accuracy—many run 25°F hotter than set.
Not Greasing the Pan Properly
A well-greased pan prevents sticking, but many people make this mistake. Simply rubbing butter on the pan isn't enough—you need a thin, even layer followed by a dusting of almond flour. I use a pastry brush to apply melted butter, then tap out excess flour. This creates a non-stick barrier that works better than parchment paper alone. Without proper prep, your cake might tear when removing from the pan.
Opening the Oven Too Soon
Resist the urge to check on your cake before the 20-minute mark! Gluten-free batters need steady, even heat to rise properly. Every time you open the oven, you lose heat and moisture, which can cause the cake to sink or develop a dome. If you're worried about burning, tent the cake with aluminum foil after 20 minutes instead. Patience here makes all the difference in that perfect golden crust. 🍰
Nutrition facts
Frequently asked questions
Can I substitute almond flour with another gluten-free flour?
Yes, but texture may change. For a 1:1 swap, try coconut flour (add 2 extra eggs and ¼ cup more liquid) or oat flour, but expect a denser result. The almond flour provides natural moisture and richness that other flours can't replicate. For best results, stick with the recipe as written.
Why does my gluten-free cake turn out dense or crumbly?
Most likely from overmixing or skipping the xanthan gum. Mix dry ingredients just until combined (10-15 seconds) and never omit the ¼ tsp xanthan gum—it's essential for structure. Also ensure your butter is cold and eggs are room temperature for proper air incorporation.
How do I make this cake egg-free?
Replace the 2 eggs with ½ cup unsweetened applesauce + 1 tbsp ground flaxseed mixed with 3 tbsp water (let sit 5 minutes to thicken). For extra moisture, add 1 tbsp extra almond milk to the batter. The texture will be slightly denser but still tender.
Can I bake this in a different shaped pan?
Yes, but adjust baking time. For a 9-inch round pan, bake 25-30 minutes (check at 25 minutes). For a loaf pan, reduce temperature to 325°F and bake 45-50 minutes. Always use the toothpick test—center should come out clean.
How do I store leftovers to keep them moist?
Wrap tightly in plastic wrap or store in an airtight container with a slice of bread to absorb moisture. Keeps 3 days at room temperature or 1 week refrigerated. For freezing, slice first, wrap individually, and freeze up to 1 month. Thaw at room temperature for 1-2 hours.