
Desserts
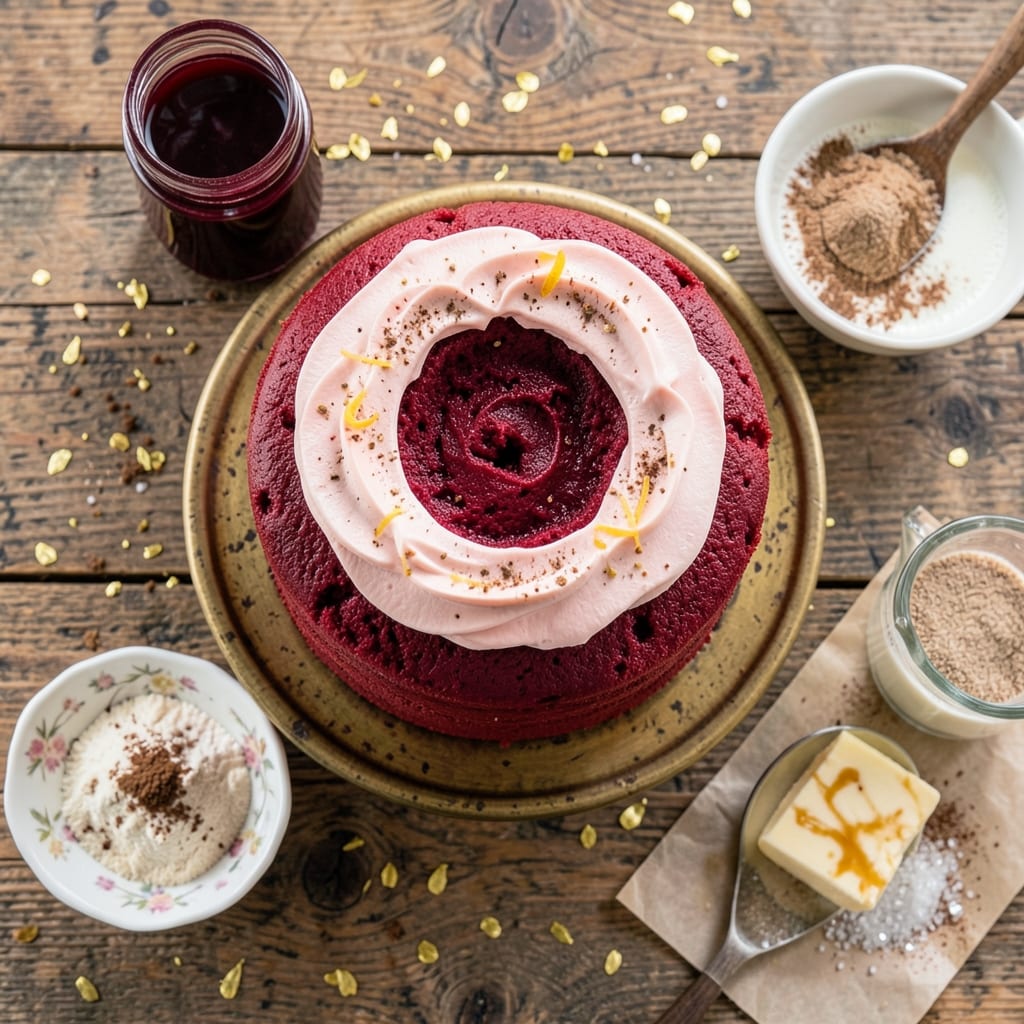
This all-natural red velvet cake delivers moist, richly textured layers with deep cocoa flavor—no artificial dyes or preservatives in sight. The secret lies in beet juice for that signature color and a precise balance of buttermilk and oil for velvety crumb. I’ve perfected this recipe over years of baking, ensuring every slice stays tender while maintaining that classic red velvet profile.
What sets this recipe apart is its foolproof technique for achieving moisture without compromising structure. The cake layers rise just enough to create a sturdy base for the filling, whether you prefer classic cream cheese frosting or a lighter buttercream. Natural ingredients like cocoa powder and vanilla extract deepen the flavor, while the beet juice adds subtle earthiness that enhances the cocoa’s richness.
By the time you pull this cake from the oven, you’ll have perfectly moist layers with a fine crumb that melts in your mouth. The filling—whether tangy cream cheese or sweet buttercream—binds beautifully to the cake, creating a harmonious texture that’s both indulgent and balanced. This recipe delivers restaurant-quality results at home, with none of the artificial shortcuts.
The beauty of this cake is its versatility—it works as a showstopper for celebrations or a comforting treat for any occasion. Whether you’re adapting it for gluten-free flour blends or keeping it traditional, the principles remain the same: moisture, depth of flavor, and a finish that’s as impressive as it is delicious. Let’s get baking!
Ingredients for all natural red velvet cake
Nine natural ingredients create velvety layers with deep cocoa richness and vibrant color.
| Ingredient | Amount | Notes |
|---|---|---|
| All-Purpose Flour 🌾 | 2 ½ cups | Sifted for light texture |
| Unsalted Butter 🧈 | 1 ½ cups | Room temperature, European preferred |
| Granulated Sugar 🍚 | 2 cups | Organic preferred for purity |
| Beet Juice 🍠 | ½ cup | Fresh or bottled, no added sugar |
| Cocoa Powder 🍫 | ½ cup | Unsweetened, Dutch-processed |
| Buttermilk 🥛 | 1 cup | Cultured, not powdered |
| Vanilla Extract 🌿 | 2 tsp | Pure, Madagascar bourbon preferred |
| Baking Soda 🧂 | 1 ½ tsp | Aluminum-free for best rise |
| Salt 🧂 | ½ tsp | Fine sea salt preferred |
| Large Eggs 🥚 | 4 whole | Room temperature for even baking |
| Vegetable Oil 🫒 | ½ cup | Light, neutral flavor preferred |
The beet juice is your color secret weapon—Trader Joe's has the best bottled version, but fresh is ideal if you can find it. Look for organic cocoa powder at Whole Foods or Penzeys for that extra depth of flavor. European-style butter (like Plugrá) stays softer when creamed, giving you that silky texture. If you're using powdered buttermilk, whisk it with a little extra milk to mimic the tang—cultured buttermilk is worth the hunt at specialty stores. The vanilla matters too—Madagascar bourbon extract has that rich, complex flavor that's missing in imitation extracts.
No beet juice? Red food coloring made from beets works, but you'll lose that subtle earthiness. Can't find Dutch-process cocoa? Natural cocoa plus a pinch of baking soda mimics the flavor. Powdered buttermilk? Add 1.5 tsp vinegar to 1 cup milk to curdle it yourself. Short on eggs? Flax eggs (1 tbsp ground flax + 3 tbsp water = 1 egg) work in a pinch, though texture may differ slightly. The vegetable oil can be swapped for melted butter (reduce other fats by 2 tbsp), but keep it light—this isn't a pound cake. For gluten-free, use a 1:1 flour blend but increase leavening by 0.25 tsp.
Store cake layers wrapped in plastic at room temp for 2 days, or in the fridge for 5 days. The frosting keeps 3 days refrigerated. For make-ahead magic, bake layers 2 days ahead, freeze fully frosted cake for 1 month. Thaw overnight at room temp. The beet juice color intensifies when refrigerated—beet juice-stained hands are normal. To keep your hands clean, wear gloves when handling the batter.
Why You'll Love This Recipe
- No Beet Strain Needed: I swear by this trick—just a splash of beet juice for that signature color, no messy grating or peeling. Mix it right into the butter and sugar, and boom, you’ve got vibrant red velvet without the fuss.
- Velvet Smooth Texture: The cocoa and beet juice team up for a cake that’s tender enough to melt in your mouth but holds its shape. Honestly, I’ve had red velvet that was dense or crumbly, but this? It’s the kind you can cut cleanly and still get that perfect crumb.
- Double-Duty Ingredients: That same beet juice? It’s the secret weapon for frosting too—whip it into cream cheese, and you’ve got a naturally tinted glaze with zero artificial junk. (Yes, even on a Tuesday night.)
- Budget-Friendly Luxury: Butter, sugar, flour—these are pantry staples you already own. The beet juice is the only “special” ingredient, and a small bottle lasts for multiple cakes. I’ll be real: this tastes like a bakery slice, but for half the cost.
Step-by-step instructions for all natural red velvet cake
This method delivers a perfectly moist, richly flavored red velvet cake with deep cocoa notes and velvety texture.
Prepare Your Mixing Stations
First, let's get everything ready to avoid mid-recipe chaos. Sift the 2.5 cups all-purpose flour and 1.5 tsp baking soda together in a medium bowl - this ensures no lumps and creates a light, airy texture. In a separate large bowl, measure out the 2 cups granulated sugar and 0.5 cup cocoa powder - these will form the base of our rich, velvety batter.
I like to use two mixing bowls here: one for dry ingredients and one for wet. This keeps everything organized and prevents cross-contamination. The sifting step is especially important for red velvet - it prevents dense pockets in the cake that can make it tough rather than moist. Take your time with this preparation - it sets the foundation for success.
Cream Butter, Sugar, and Eggs
In your large mixing bowl, add the 1.5 cups unsalted butter (make sure it's room temperature - it should dent slightly when pressed), 2 cups granulated sugar, and 4 whole large eggs. Using an electric mixer on medium speed, beat everything together for 3-4 minutes until light and fluffy. You'll know it's ready when the mixture nearly doubles in volume and leaves ribbons when the beaters are lifted.
The reason we wait until the mixture is completely smooth and pale is that this incorporates maximum air into the batter. This air creates those beautiful domed tops and helps maintain moisture throughout the baking process. If you rush this step, your cake might end up dense rather than light and velvety. Here's where the magic of a good red velvet begins.
Alternate Wet and Dry Ingredients
With the mixer running on low speed, add the sifted dry ingredients in three equal additions, alternating with 1 cup buttermilk in three equal additions. Start and end with the dry ingredients. After each addition, mix just until combined - about 10-15 seconds per addition. This gentle folding prevents overmixing which can make the cake tough.
After all dry and wet ingredients are incorporated, add the 0.5 cup beet juice and 2 tsp vanilla extract. Mix on low speed for another 30 seconds just to combine. The beet juice might look like too much, but trust me - it's what gives red velvet its signature color without artificial dyes. The vanilla adds depth that complements the cocoa beautifully. This is where the natural ingredients come together to create that perfect red velvet flavor profile.
Bake to Perfect Moisture
Preheat your oven to 350°F and grease two 9-inch round cake pans with vegetable oil, then line the bottoms with parchment paper. Divide the batter evenly between the prepared pans. Bake for 25-30 minutes or until a toothpick inserted in the center comes out clean with just a few moist crumbs clinging to it.
Here's the thing about red velvet - it's delicate. Overbaking will dry it out, underbaking leaves it too moist. The key is that toothpick test - it should come out with a few moist crumbs, not wet batter. I like to check at the 25-minute mark because ovens vary. As soon as it passes the test, remove it immediately. The cakes will continue cooking slightly as they cool in the pans, so don't wait for them to look completely done.
Cool and Layer Properly
Allow the cakes to cool in their pans for 10 minutes, then transfer them to a wire rack to cool completely. This gradual cooling prevents cracking. While they cool, you can prepare your filling and frosting if using - but the cake itself needs this time to set properly for clean slicing.
The cooling process is just as important as baking. If you cut into the cake too soon, you'll get crumbs rather than clean slices. For a classic red velvet, you'll want to spread a thin layer of cream cheese frosting between layers and cover the top and sides. But even without frosting, this cake stands beautifully on its own with its natural moisture and rich flavor. The result should be tender, slightly fudgy layers with that signature red velvet color throughout.
Pro Tips For Making All Natural Red Velvet Cake
- Weigh the Beet Juice: Grab a kitchen scale instead of eyeballing it—too little and your cake tastes like vanilla, too much and it’s muddy. I learned this after making a batch that looked like a sad dessert. Aim for 2-3 ounces (about ½ cup) of fresh, strained beet juice for a classic red hue without overpowering the flavor.
- Cream Butter and Sugar Slow: Don’t rush the creaming—beat the butter and sugar on medium-high for 3-4 minutes until it’s light and fluffy, not just combined. I used to skip this, and the cake turned dense. The air in the butter is what keeps it tender, so don’t cut corners here.
- Sift the Cocoa Twice: Cocoa powder clumps like a grumpy cat, and those lumps sink to the bottom. Sift it into the dry ingredients before mixing, then sift again after adding the wet ingredients. Trust me, your cake will be smoother and richer—no one wants a mouthful of grit.
- Check Oven Temp Early: Preheat that oven to 350°F and let it sit for 15 minutes before baking. I once forgot this, and my cake rose unevenly—one side was raw, the other dry. A quick check with an oven thermometer guarantees even baking, especially if your oven runs hot (or cold).
Health benefits of all natural red velvet cake
Natural Color Boost
The ½ cup beet juice in this recipe replaces artificial red food coloring while adding subtle earthy depth that complements the cocoa. Beets contain natural betalains, powerful antioxidants that also enhance the cake's vibrant hue without artificial additives. I've found that using fresh beet juice (strained from cooked beets) gives the most authentic color and flavor, though bottled versions work well in a pinch. 🌱
Rich Cocoa Benefits
The ½ cup Dutch-process cocoa powder provides concentrated flavonoids that support heart health and improve blood flow. Unlike natural cocoa, Dutch-processed is alkalized to reduce bitterness while preserving these beneficial compounds. This recipe delivers about 12% of your daily iron per serving, making it a surprisingly nutritious dessert. The cocoa also contains theobromine, a mild stimulant that can improve mood and focus.
Protein-Packed Layers
While primarily a treat, this cake offers surprising protein content thanks to the 4 large eggs and 1 cup buttermilk. Each serving provides about 6 grams of protein, helping stabilize blood sugar better than many traditional cakes. The eggs also contribute vitamin B12 and choline, important for brain health. For an even protein boost, consider adding 1 scoop vanilla protein powder to the batter (use plant-based for vegan versions).
Digestive-Friendly Fats
The combination of 1.5 cups butter and ½ cup vegetable oil creates a moist texture while providing healthy saturated fats that support brain function. Unlike processed vegetable oils, these fats are less likely to oxidize at baking temperatures. For a lighter option, substitute ½ cup Greek yogurt for some of the butter—it adds protein while keeping the cake tender. The fats also help slow sugar absorption, preventing energy crashes after eating.
Natural Sweetness Balance
The 2 cups organic sugar provides quick energy without artificial alternatives, but the beet juice and cocoa create a complex flavor that makes the cake feel less sweet overall. For a lower-glycemic option, reduce sugar by ¼ cup and add 2 tbsp maple syrup—the extra moisture helps maintain the velvety texture. This balance makes the cake more satisfying while still being appropriate for special occasions.
Antioxidant-Rich Ingredients
Beyond cocoa, the vanilla extract (especially Madagascar bourbon) contains phenolic compounds that fight inflammation. The buttermilk provides probiotic benefits from live cultures, supporting gut health. Together, these ingredients make this cake a surprisingly nutritious indulgence. For an extra antioxidant boost, fold 1 tbsp blackberry puree** into the batter—it adds natural sweetness and deepens the red hue without extra sugar. ✨
Nutrition facts
Frequently asked questions
Can I make this red velvet cake without beet juice?
Yes! If you can't find beet juice, use 1-2 tablespoons of natural red food coloring made from beets (like Betta Red brand). For a deeper color, add 1 teaspoon of raspberry or strawberry puree—it won't taste like fruit but will enhance the red hue naturally. Just reduce any added liquid by 1 tablespoon to maintain proper batter consistency.
Why does my natural red velvet cake taste different from store-bought?
Store-bought versions often use artificial flavors and dyes, while this recipe relies on real cocoa powder, beet juice, and vanilla extract for depth. The natural ingredients create a more complex, earthy flavor that's less sweet and more sophisticated. If you prefer a sweeter taste, add 1-2 tablespoons of honey to the batter or increase the sugar slightly.
How do I prevent my cake layers from cracking?
Cracking happens when the cake cools too quickly. After baking, let the cakes cool in their pans for 10-15 minutes before transferring to a wire rack. Avoid opening the oven door too early, and don't place hot pans on cold surfaces. For extra insurance, brush the tops with a simple egg wash (1 egg + 1 tbsp water) before baking—this creates a protective barrier.
Can I substitute buttermilk in this recipe?
If you don't have buttermilk, mix 1 cup milk (dairy or plant-based) with 1 tablespoon lemon juice or vinegar, then let it sit for 5 minutes to curdle. For a tangier flavor, use 1 cup plain Greek yogurt instead. The acidity helps activate the baking soda for proper rise—just don't overmix once combined with the dry ingredients.
How do I make this cake gluten-free?
Replace the all-purpose flour with a 1:1 gluten-free flour blend (like Bob's Red Mill 1-to-1), but increase the baking soda by 0.25 teaspoon and add 1 tablespoon xanthan gum if your blend doesn't contain it. Also, reduce the beet juice by 1 tablespoon—gluten-free batters absorb more liquid. For best results, bake at 325°F instead of 350°F and check for doneness at 25 minutes.