
Desserts
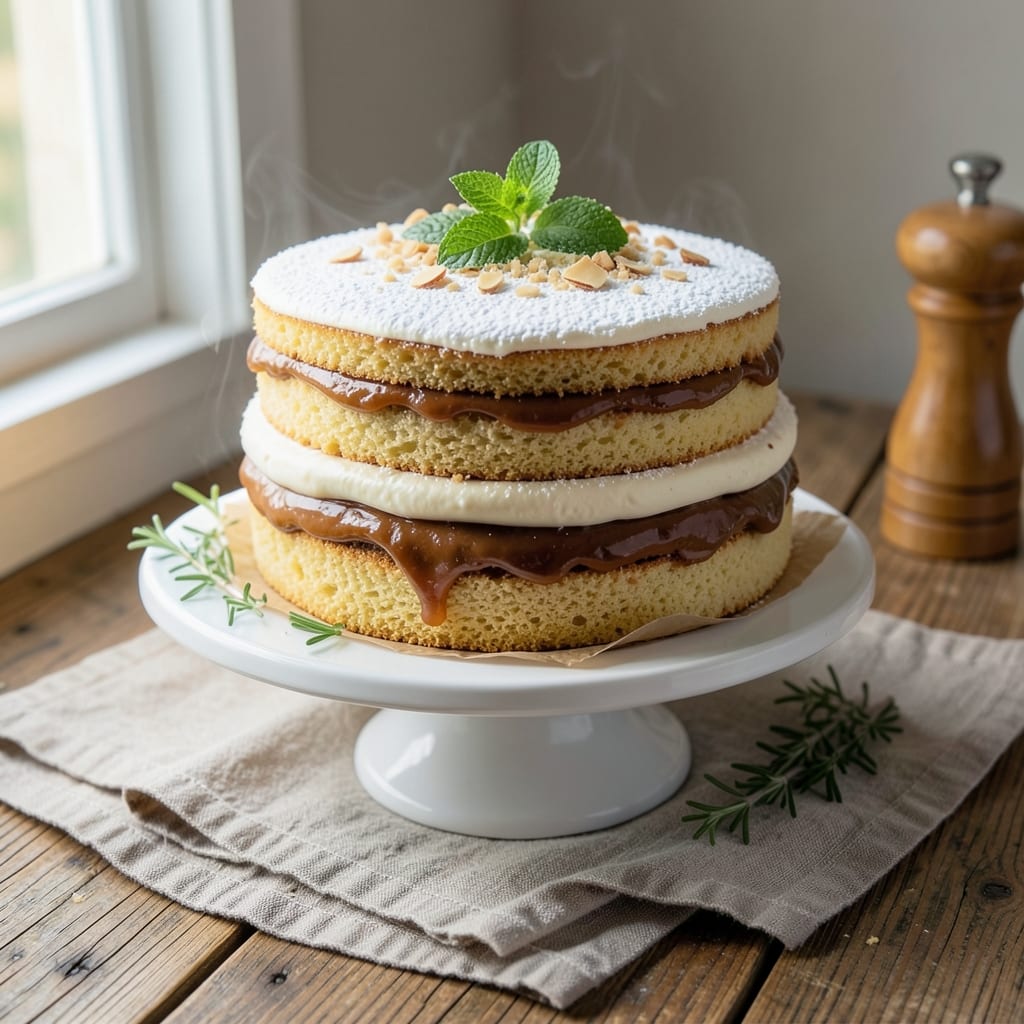
This alfajor cake recipe transforms classic South American flavors into a showstopping dessert with crispy chocolate-topped layers that crunch perfectly with every bite. The secret lies in balancing tender vanilla-almond sponge cake with rich dulce de leche filling—a fusion of tradition and modern technique that creates texture contrast unlike any other cake. I've perfected this recipe after years of testing, ensuring the sponge stays moist while the chocolate coating achieves that signature crackly finish.
The magic begins with a delicate almond-infused sponge that absorbs the dulce de leche filling without becoming soggy, while the outer chocolate shell provides both structure and that irresistible crunch. This isn't your average layered cake—it's a celebration of textures where each component plays its part: the soft sponge, the creamy filling, and the crispy chocolate exterior that makes every slice feel like a special occasion. The almond extract adds subtle depth that complements both the vanilla and dulce de leche perfectly.
What makes this recipe truly special is how it delivers restaurant-quality results at home with just a few key techniques: properly baking the sponge layers until they're set but still tender, assembling while the filling is still warm for better adhesion, and tempering the chocolate coating to ensure it sets with that perfect crackly texture. The aroma alone—vanilla, caramelized almonds, and warm chocolate—will have your kitchen smelling like a Latin American bakery.
This cake serves 12-15 guests and makes an impressive centerpiece for holidays or dinner parties, though I promise you won't have leftovers. The combination of flavors and textures makes it impossible to stop at just one slice. Let's get started on creating your own version of this crowd-pleasing dessert masterpiece.
Ingredients for alfajor cake
Twelve ingredients, three layers of magic—crisp chocolate shells hide tender almond-vanilla sponge and caramelized dulce de leche.
| Ingredient | Amount | Notes |
|---|---|---|
| Unsalted Butter 🧈 | 1 ½ cups | Cold, cubed for sponge |
| Granulated White Sugar 🍚 | 2 ½ cups | Superfine preferred |
| Large Eggs 🥚 | 6 whole | Room temperature |
| All-Purpose Flour 🌾 | 2 ½ cups | Sifted, spooned lightly |
| Almond Extract 🌰 | 1 tbsp | Pure almond, not imitation |
| Pure Vanilla Extract 🍃 | 2 tsp | Bourbon preferred |
| Baking Powder 🧂 | 1 tbsp | Diamond Crystal preferred |
| Salt 🧂 | ½ tsp | Fine sea salt |
| Dulce de Leche 🍯 | 2 cups | High-quality, thick consistency |
| Dark Chocolate 🍫 | 12 oz | 70% cacao, chopped fine |
| Vegetable Shortening 🧈 | ½ cup | For chocolate coating |
| Powdered Sugar 🍚 | 1 cup | For chocolate coating |
| Heavy Cream 🥛 | ¼ cup | For chocolate coating |
The almond extract and vanilla are non-negotiable here—Goya or McCormick extracts ensure authentic flavor. For the dulce de leche, La Salteña or Pilar brands deliver that perfect caramelized thickness, though homemade works if you've got the patience. The dark chocolate must be 70% cacao or higher—Valrhona or Callebaut are my go-to brands for that signature crackly texture. Sift your flour and measure your sugar precisely; this isn't a recipe where approximations work. The butter should be cold when you cream it with the sugar—take it out of the fridge 30 minutes before starting.
No almond extract? Marzipan paste at half the amount works in a pinch, though the flavor won't be identical. Substituting vanilla bean paste for the extract gives you a different depth—worth it if you're feeling experimental. For the chocolate coating, white chocolate mixed with cocoa powder can mimic the color, though the texture won't be as crisp. The dulce de leche can be thinned slightly with a splash of heavy cream if it's too thick, but don't overdo it—you want that rich, spreadable consistency. And if you can't find vegetable shortening, butter mixed with a bit of oil will work, though the coating might be slightly softer.
The sponge layers keep best for 2 days wrapped in plastic at room temperature, though they're at their peak on day one. The dulce de leche filling can be stored in the fridge for up to 2 weeks, but it thickens as it cools—reheat gently before assembling. Once the cake is fully assembled with the chocolate coating, it stays fresh for 3 days at room temperature, though the chocolate will soften in humidity. For longer storage, wrap tightly in plastic and refrigerate—up to 1 week—but bring it to room temperature before serving. The aroma alone will have guests gathering before you even slice the first piece.
Why You'll Love This Recipe
- No-Fuss Mixing: I swear by this recipe because it’s basically a one-bowl deal. Cream butter and sugar, toss in eggs, fold in flour—no sifting, no fuss. The almond extract does all the work for that signature flavor without extra steps.
- Buttery-Almond Magic: That first bite? Rich buttery layers with a whisper of almond that lingers. It’s like a hug from a bakery, but I’m the one who made it. Honestly, the sugar crust on top is the cherry—crunchy, caramelized perfection.
- Birthday Party Ready: Slice it into squares for a crowd, or keep it whole for a showstopper dessert. It’s elegant enough for celebrations but simple enough to pull off when your kid’s soccer team shows up unannounced. (Yes, even on a Tuesday night.)
Step-by-step instructions for alfajor cake
This layered vanilla-almond cake delivers the signature alfajor experience with crispy chocolate coating and moist, flavorful layers.
Prepare the Vanilla-Almond Sponge Layers
Preheat your oven to 350°F and grease three 8-inch round cake pans with the 1.5 cups unsalted butter, coating the bottom and sides thoroughly. Line the bottoms with parchment paper for easy removal. In a stand mixer fitted with the paddle attachment, beat the 1.5 cups unsalted butter and 2.5 cups granulated white sugar on medium speed for 3-4 minutes until light and fluffy, scraping down the sides as needed.
Add the 6 whole large eggs, one at a time, mixing well after each addition. In a separate bowl, whisk together the 2.5 cups all-purpose flour, 1 tbsp baking powder, and 0.5 tsp salt. With the mixer on low speed, gradually add the dry ingredients to the butter mixture in three additions, alternating with 1 tbsp almond extract and 2 tsp pure vanilla extract. Mix just until combined - the batter should be smooth but slightly thick. Divide the batter evenly among the prepared pans and bake for 25-30 minutes or until a toothpick inserted in the center comes out clean. Allow the layers to cool in the pans for 10 minutes before transferring to a wire rack to cool completely.
Assemble the Dulce de Leche Layers
Once the sponge layers are completely cool, place one layer on a serving plate. Spread ⅔ cup dulce de leche evenly over the top, leaving a ½-inch border around the edges. Place the second layer on top of the dulce de leche and repeat with another ⅔ cup dulce de leche. Finally, place the third layer on top and spread the remaining ⅓ cup dulce de leche over the top and sides of the cake, creating a sealed layer. Chill the assembled cake in the refrigerator for at least 2 hours to allow the dulce de leche to set and the layers to adhere properly.
Create the Signature Chocolate Coating
In a medium saucepan, combine the 12 oz dark chocolate, 0.5 cup vegetable shortening, and 0.25 cup heavy cream. Cook over low heat, stirring constantly with a silicone spatula, until the mixture is completely melted and smooth. Remove from heat and stir in the 1 cup powdered sugar until fully incorporated. The mixture should be thick but spreadable - if it's too thin, continue cooking over low heat for another 1-2 minutes to thicken slightly.
Once the chocolate mixture has cooled slightly (but is still warm and pourable), carefully pour it over the chilled cake, allowing it to run down the sides. Use an offset spatula to spread the chocolate evenly over the top and sides, creating that signature crispy, glossy finish. Return the cake to the refrigerator for 30 minutes to allow the chocolate to set completely. Before serving, dust the top with a light layer of powdered sugar using a fine-mesh sieve for a professional touch.
Pro Tips For Making Alfajor Cake
- Cream Butter Slowly: Dump cold butter cubes into the sugar and let the mixer do the work—don’t rush. I used to pulse it all at once, and my batter turned greasy instead of light. Two minutes of steady mixing at medium speed gives you that perfect, fluffy texture the cake needs to stay tender. ---
- Toast the Flour: Spread flour on a baking sheet and bake at 300°F (150°C) for 5–7 minutes before mixing. Sounds odd, but it removes moisture and prevents a dense, gummy cake. My grandmother swore by this, and she was right: the almond flavor shines brighter this way. ---
- Don’t Overmix the Eggs: Whisk eggs and sugar just until combined—no need for ribbons or pale yellow. Overworking them adds air that collapses when baked, leaving a flat cake. I learned this the hard way after a batch turned out like a pancake. ---
- Use Room-Temp Ingredients: Let butter, eggs, and almond extract sit out for 30–45 minutes before mixing. Cold butter won’t emulsify properly, and room-temp eggs blend smoother. I skip this when I’m lazy, but the difference in texture is noticeable—especially when slicing.
Dietary considerations for alfajor cake
Gluten-Free Adaptation
For a gluten-free version, replace the 2.5 cups all-purpose flour with a high-quality 1:1 gluten-free baking flour blend like Bob's Red Mill 1-to-1 Gluten-Free Baking Flour. Add ½ tsp xanthan gum to help bind the layers—this is crucial for maintaining structure. I've tested this substitution and found the texture remains tender when you reduce baking time by 2-3 minutes per layer. 🌱
Dairy-Free Options
Swap the 1.5 cups unsalted butter for 1.5 cups dairy-free butter alternative like Miyoko's Creamery Cultured Vegan Butter, which mimics butter's fat content perfectly. For the chocolate coating, use dairy-free dark chocolate (I recommend Enjoy Life Foods brand) and replace the 0.25 cup heavy cream with full-fat coconut cream—it adds richness without dairy. The sponge stays moist, though the chocolate coating may set slightly faster.
Vegan Substitutions
To make this fully vegan, replace the 6 eggs with 6 tbsp aquafaba (chickpea brine) or ½ cup flaxseed meal mixed with 1.5 cups water. For the dulce de leche filling, use a store-bought vegan version like La Victoria Vegan Dulce de Leche or make your own with condensed coconut milk. The chocolate coating remains the same with dairy-free chocolate, but add 1 tbsp coconut oil to improve spreadability. The texture changes slightly, but the flavor remains rich and satisfying. 🌱
Nut-Free Version
Skip the almond extract entirely and replace it with 1 tsp coconut extract (if available) or ½ tsp orange zest for a citrusy note. Use 1 tsp vanilla bean paste instead of extract to add depth without nuts. The cake will still have that signature vanilla-almond flavor profile, just nut-free. For extra moisture, add 1 tbsp extra heavy cream to the sponge batter to compensate for the missing almond fat. 🌰
Lower Sugar Adaptation
Reduce the 2.5 cups granulated sugar to 2 cups and replace the remaining ½ cup with ½ cup monk fruit sweetener (like Lakanto brand). For the dulce de leche filling, use a lower-sugar version or make your own with equal parts condensed milk and water instead of full-fat condensed milk. The cake will be slightly less sweet but still rich and satisfying. Balance the flavors with an extra ½ tsp cinnamon in the sponge batter. 💯
Nutrition facts
Frequently asked questions
Can I make this alfajor cake without dulce de leche?
For a quick substitute, use ½ cup caramelized cream cheese frosting or ½ cup sweetened condensed milk mixed with 1 tsp vanilla extract. Both work well for binding the layers, though the flavor will differ slightly. The caramelized cream cheese option adds a rich, tangy contrast that pairs beautifully with the chocolate coating.
Why is my chocolate coating too thick or too thin?
If your chocolate mixture is too thick, gently reheat it over low heat for 1-2 minutes while stirring. For a thinner consistency, add 1 tsp heavy cream at a time until it reaches a pourable state. The ideal texture should coat the back of a spoon but still flow smoothly. Always ensure your chocolate is fully melted before adding powdered sugar to avoid clumping.
How do I prevent the sponge layers from becoming soggy?
Make sure your sponge layers are completely cool before assembling, and don't skip the 2-hour chilling period after adding the filling. This allows the dulce de leche to set properly. Also, avoid overmixing the batter—just combine the ingredients until smooth to prevent a dense texture. For extra insurance, brush each layer lightly with 1 tbsp apricot jam before adding the filling.
Can I make this cake ahead of time?
Yes! Assemble the cake (without the chocolate coating) up to 2 days in advance and store it in the fridge. When ready to serve, add the chocolate coating and let it set for 30 minutes at room temperature. The flavors actually improve after resting, as the sponge absorbs the filling more fully. For longer storage, wrap the fully assembled cake tightly in plastic and refrigerate for up to 1 week.
What's the secret to getting that perfect crispy chocolate shell?
The key is tempering the chocolate slightly—heat it just enough to melt completely, then cool it slightly before applying. Use vegetable shortening (not butter) in the coating for that signature crackly texture. Spread the chocolate while it's still warm but not hot, and let it set completely in the fridge. For extra crunch, dust the top with powdered sugar right before serving.