
Desserts
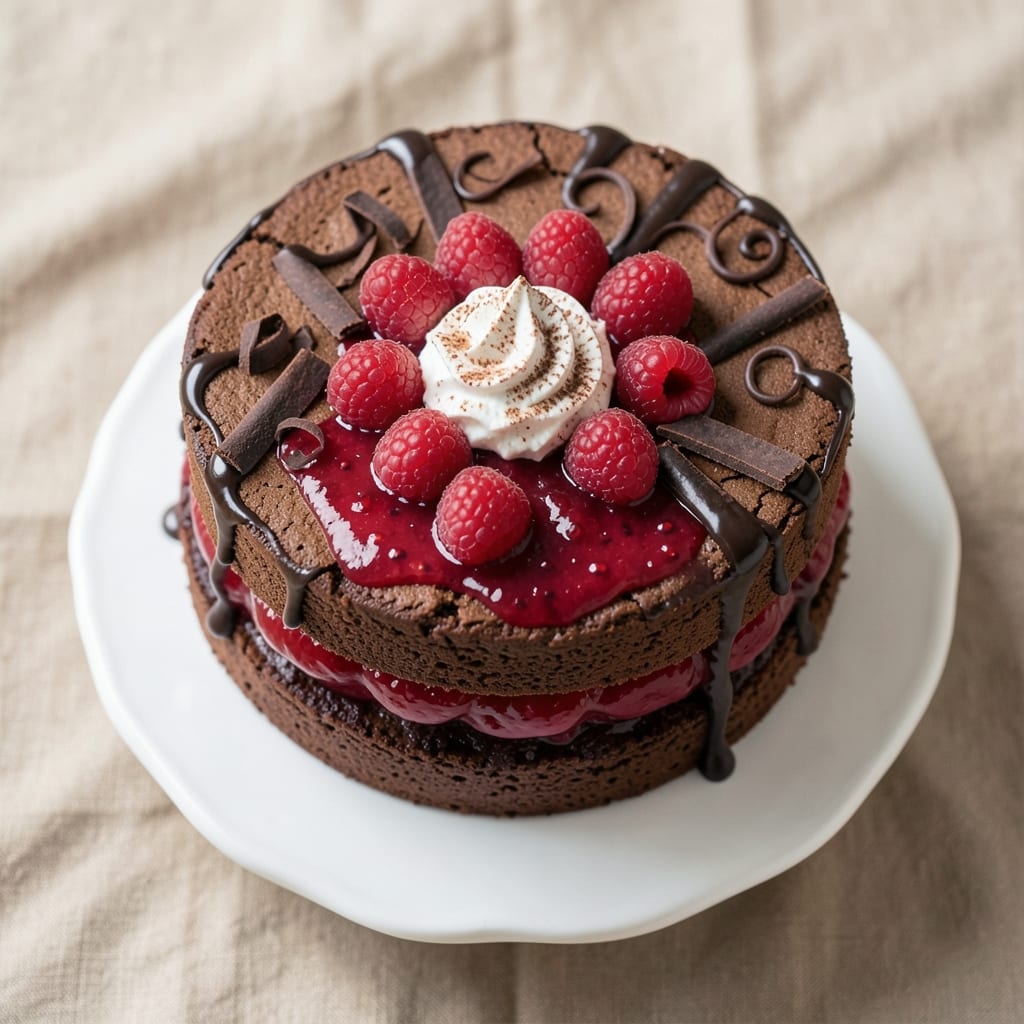
This alcohol-free Black Forest cake delivers all the rich chocolate, juicy cherry, and velvety cream layers you love—without a drop of rum. The secret lies in a moist chocolate sponge baked to perfection, a tangy cherry compote that mimics traditional flavors, and lightly sweetened whipped cream that binds it all together. I developed this version after years of testing substitutions, ensuring every bite tastes indulgent yet stays completely booze-free.
The recipe begins with a single-layer chocolate cake baked at 350°F for 25-30 minutes, yielding a tender crumb that absorbs the cherry filling beautifully. While the cake cools, you’ll prepare a simmered cherry compote using fresh or frozen cherries, sugar, and a splash of lemon juice for brightness—no alcohol needed. The whipped cream, flavored with vanilla extract and a touch of citrus zest, replaces rum’s warmth while keeping the classic Black Forest profile intact.
Assembling the cake requires patience: three layers separated by compote and cream, then chilled for at least 4 hours (overnight is ideal) to develop those signature layers. The result? A decadent yet balanced dessert with moist chocolate, bursting cherries, and cloud-like cream—all without compromising on tradition. The final touch is a dusting of cocoa powder and fresh cherries, because presentation matters just as much as taste.
Perfect for celebrations, family gatherings, or treating yourself—this cake proves you don’t need alcohol to create restaurant-quality dessert. The recipe scales easily for crowds, and leftovers (if there are any) keep well for 3-4 days in the fridge. Let’s get baking!
Ingredients for alcohol free black forest cake
Rich chocolate sponge, tangy cherry compote, and velvety cream—all without alcohol. Here's the indulgent ingredient lineup.
| Ingredient | Amount | Notes |
|---|---|---|
| All-Purpose Flour 🌾 | 2 ½ cups | Sifted for light texture |
| Unsweetened Cocoa Powder 🍫 | ¾ cup | Natural or Dutch-processed |
| Granulated Sugar 🍚 | 2 cups | White or light brown |
| Light Brown Sugar 🍚 | ½ cup | Packed firmly |
| Baking Powder 🧂 | 2 tsp | Aluminum-free preferred |
| Salt 🧂 | ½ tsp | Fine sea salt |
| Vanilla Extract 🍯 | 2 tsp | Pure Madagascar preferred |
| Large Eggs 🥚 | 4 whole | Room temperature |
| Whole Milk 🥛 | 1 cup | Room temperature |
| Vegetable Oil 🫒 | ½ cup | Light or neutral |
| Fresh Cherries 🍒 | 2 ½ cups | Pitted, or frozen |
| Granulated Sugar 🍚 | ½ cup | For compote |
| Lemon Juice 🍋 | 1 tbsp | Freshly squeezed |
| Heavy Whipping Cream 🥛 | 3 cups | Cold, full-fat |
| Powdered Sugar 🍚 | 1 cup | Sifted for smoothness |
| Unsweetened Cocoa Powder 🍫 | 2 tbsp | For dusting |
| Fresh Cherries 🍒 | ¼ cup | For garnish |
The cocoa powder is non-negotiable for that deep chocolate flavor. Valrhona or Guittard are my go-tos for professional results, but any high-quality brand works. For the cherries, fresh pitted is ideal, but frozen works in a pinch—just drain well. The heavy cream needs to be cold for whipping, so pull it from the fridge right before use. Pre-sifted flour saves time, but if you're doing it yourself, sift with the baking powder to avoid lumps. The vanilla extract should be pure Madagascar for that authentic aroma.
No fresh cherries? Frozen works perfectly—just thaw and drain. Running short on vanilla? Almond extract at half the amount mimics the depth. The whipped cream can be made ahead, but fold it in just before assembling to keep it light. For a deeper cherry flavor, simmer the compote with a cinnamon stick or star anise. The cake layers should be evenly sized—trim with a serrated knife if needed for perfect slices. If you're scaling up, increase the cherries by 20% more to account for compote reduction.
Assembled cake needs 4+ hours in the fridge to set properly—overnight is ideal. Store leftovers covered at room temperature for 1 day, then refrigerate for up to 4 days. The whipped cream layer will separate slightly if stored too long, so refresh it with a quick re-whip before serving. For a showstopper presentation, dust with cocoa powder and arrange fresh cherries on top. The cake freezes beautifully too—wrap each layer individually in plastic for up to 3 months.
Why You'll Love This Recipe
- No-Fuss Layers: I swear by this recipe because it’s actually simple—no fussing with multiple batters or tempering eggs. The cocoa powder and brown sugar do all the heavy lifting, so you just mix, bake, and layer. Honestly, my first attempt was almost perfect, and the second time? Spot-on.
- Chocolate-Cherry Magic: That deep, rich cocoa flavor from the unsweetened powder? It’s the star. And when you fold in the cherry compote (store-bought or homemade), it’s like a little burst of sunshine in every bite. Between us, I’ve never met a chocolate cake that didn’t win me over—and this one’s no exception.
- Party or Picnic: This cake is my go-to for birthdays, potlucks, or even a lazy Sunday. The layers hold up well, so you can slice it ahead of time (yes, even on a Tuesday). Plus, it’s the kind of dessert that feels special without requiring a fancy occasion—just add whipped cream and call it a day.
- Budget Wins: Flour, sugar, cocoa—these are pantry staples that won’t break the bank. I’ve made this cake for under $10 and still had leftovers for days. The brown sugar adds just enough depth to make it feel indulgent, but the cost? Pure steal. My wallet thanks me every time.
Step-by-step instructions for alcohol-free Black Forest cake
Here's how to build this decadent chocolate masterpiece layer by layer—rich, moist, and bursting with cherry.
Prepare the Chocolate Cake Layers
Preheat your oven to 350°F and grease three 8-inch round cake pans, then line the bottoms with parchment paper. In a large mixing bowl, whisk together the 2.5 cups all-purpose flour, 0.75 cup unsweetened cocoa powder, 2 tsp baking powder, and 0.5 tsp salt. Sift the dry ingredients directly into the bowl to avoid clumps.
In a separate bowl, beat the 4 whole large eggs until they're pale and slightly frothy. Gradually whisk in the 2 cups granulated sugar, 0.5 cup light brown sugar, 0.5 cup vegetable oil, 1 cup whole milk, and 2 tsp vanilla extract until the batter is smooth and glossy. Gently fold in the dry ingredients just until combined—overmixing develops gluten and makes the cake dense.
Divide the batter evenly among the prepared pans. Bake for 25-30 minutes, or until a toothpick inserted into the center comes out clean. Let the layers cool in the pans for 10 minutes before transferring to a wire rack to cool completely. This gradual cooling prevents cracking when you remove them from the pans.
Create the Cherry Compote
While the cake layers bake, combine the 2.5 cups fresh cherries, 0.5 cup granulated sugar, and 1 tbsp lemon juice in a small saucepan. Cook over medium heat for 8-10 minutes, stirring occasionally, until the cherries soften and the mixture thickens slightly. You want a syrupy consistency that clings to the cake layers.
Mash about half of the cherries lightly with a fork to release their juices, but leave some whole for texture. Strain the mixture through a fine-mesh sieve if you prefer a smoother compote, or leave it slightly chunky for rustic appeal. Let the compote cool completely before assembling the cake—this prevents melting the filling.
Assemble the Cake Layers
Place the first cake layer on a serving plate or cake stand. Spread a thin layer of the cherry compote over the top, leaving a ½-inch border around the edges. This prevents the filling from seeping out and keeps the cake structure intact. Repeat with the second and third layers, alternating with compote between each.
For the filling, whip the 3 cups heavy whipping cream until it forms soft peaks. Gradually add the 1 cup powdered sugar and 2 tbsp unsweetened cocoa powder, whipping until the mixture is smooth and holds firm peaks. Spread the whipped cream evenly over the top layer, creating a smooth surface.
Chill and Garnish
Cover the assembled cake with plastic wrap and refrigerate for at least 4 hours, or overnight. Chilling allows the flavors to meld and the cake to set properly. This step is crucial—rushing it results in a soggy bottom and a filling that slides off the sides.
Before serving, dust the top and sides of the cake with a sifted layer of 2 tbsp unsweetened cocoa powder for an elegant finish. Arrange the 0.25 cup fresh cherries on top for a pop of color and freshness. Slice with a sharp, hot knife for clean cuts and serve each piece with a dollop of extra whipped cream if desired.
Pro Tips For Making Alcohol Free Black Forest Cake
- Sift the Cocoa: I learned this the hard way—lump-free cocoa powder makes a real difference in texture. Use a fine-mesh sieve to sift it directly into your dry ingredients, especially when mixing with flour and baking powder. This keeps the cake light and prevents those dreaded dense pockets. ---
- Measure Brown Sugar Wet: Packing brown sugar is a pain, but skipping it leads to a cake that’s too dry. Instead, spoon it into the measuring cup and level it off—then add 1-2 teaspoons of hot water to dissolve it before mixing. The moisture blends in seamlessly, and your layers stay tender. ---
- Avoid Overmixing the Batter: The moment your cocoa batter turns glossy and tough, stop stirring. Overmixing develops gluten, and this cake needs to stay soft. Fold just until the dry ingredients disappear—about 15 strokes max. Your future self will thank you when the crumbs stay together. ---
- Chill the Layers: Yes, even if you’re impatient like me, let the cake layers cool completely before frosting. I used to rush it, and the buttercream would melt into a sad, greasy mess. Wrap them in plastic and refrigerate for 2 hours—it’s the non-negotiable step for clean slices.
Troubleshooting perfect results
Dense Cake Layers
If your cake layers turn out dense instead of light, you likely overmixed the batter or used old baking powder. Whisk the dry ingredients just until combined—stop when no flour streaks remain. For extra moisture, replace ¼ cup milk with ¼ cup buttermilk or add 1 tbsp instant espresso powder to enhance chocolate flavor. Also, ensure your eggs are room temperature—they incorporate better when warm. 🌟
Runny Cherry Filling
A watery compote usually means too much liquid or insufficient cooking time. Simmer the cherries for 10-12 minutes until they release their juices and thicken. If still too runny, mash more cherries or add 1 tsp cornstarch mixed with 1 tbsp water to thicken. For extra stability, chill the compote for 30 minutes before assembling the cake. This helps it set properly between layers.
Cake Collapsing
Collapsed layers often result from underbaking or opening the oven too soon. Always bake until a toothpick comes out clean, even if it means 2-3 extra minutes. Let layers cool completely in the pans for 10 minutes before removing. If you notice cracks, brush the sides with simple syrup (½ cup sugar + ¼ cup water) before baking to add moisture and structure. Chill the assembled cake for at least 4 hours to prevent layers from sliding.
Whipped Cream Not Holding
If your whipped cream collapses or doesn't hold its shape, it's likely too warm or overwhipped. Use cold cream straight from the fridge and whip just until soft peaks form. Avoid overmixing—stop when the cream thickens but still looks slightly liquid. For extra stability, fold in 1 tsp vanilla bean paste or add 1 tbsp powdered sugar gradually. If it starts to deflate, try again with fresh, colder cream. ✨
Filling Leaking Out
Excessive filling leakage happens when the compote is too thick or the cake layers aren't properly sealed. Spread a thin, even layer of compote—about ¼ inch thick—leaving a ½-inch border around the edges. For extra insurance, brush the sides of each layer with 1 tbsp apricot jam before adding the next layer. This creates a natural seal that prevents filling from oozing out during chilling.
Cocoa Dust Not Sticking
If your cocoa powder dusting keeps falling off, the cake isn't dry enough or the surface is too smooth. Let the cake sit at room temperature for 10-15 minutes before dusting to allow moisture to evaporate slightly. For better adhesion, sift the cocoa powder through a fine-mesh sieve while holding it 2-3 inches above the cake. A light mist of water from a spray bottle can also help the dust stick—just let it dry for 1 minute before serving. 💫
Nutrition facts
Frequently asked questions
Can I substitute fresh cherries with something else?
Use 2.5 cups frozen cherries (thawed and drained) or 1 cup cherry jam mixed with 1 cup water to create a similar compote. For a non-fruit option, try raspberry puree or even strawberry sauce—just adjust sweetness to taste. The key is maintaining that tangy-sweet balance.
How do I make this cake gluten-free?
Replace the 2.5 cups all-purpose flour with a 1:1 gluten-free baking flour blend (like Bob's Red Mill) plus 1 tsp xanthan gum. For the whipped cream, use gluten-free powdered sugar and ensure your cocoa powder is certified gluten-free. The cake texture will be slightly denser but still delicious. Test with a small batch first!
Can I bake this cake in advance?
Yes! Bake the layers 1 day ahead and store them wrapped at room temperature. Assemble the cake up to 24 hours before serving, then refrigerate. For best texture, let it sit at room temperature for 30 minutes before slicing. The flavors actually improve with time!
Why does my cake need to chill so long?
The 4+ hour chill is crucial—it lets the whipped cream set properly and prevents the layers from sliding. Think of it like making ice cream: the longer it chills, the creamier the texture. If you're short on time, chill for at least 2 hours, but expect slightly softer layers. Patience pays off with perfect slices!
What's the best way to store leftovers?
Keep the cake covered in the fridge for up to 4 days. For longer storage, wrap each layer individually in plastic and freeze for up to 3 months. Thaw overnight in the fridge before serving. The whipped cream layer may separate slightly—just give it a quick re-whip before serving.