
Desserts
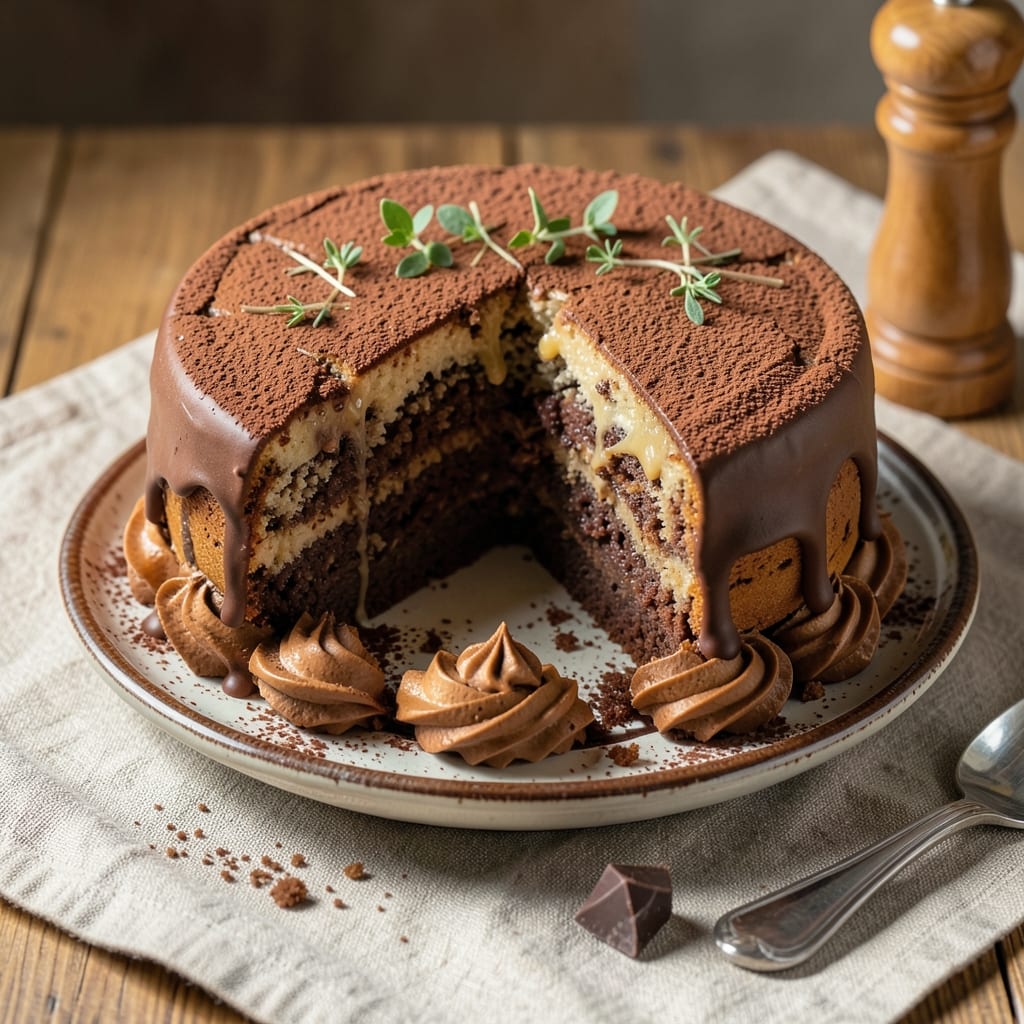
This 4-egg chocolate cake recipe delivers the kind of dense, fudgy layers that make every slice a moment worth savoring. The secret lies in the precise ratio of eggs to cocoa—just enough to create a rich, moist crumb without sacrificing that signature chocolate intensity. I’ve perfected this version over years of baking, ensuring it never dries out or cracks, even in the most challenging ovens.
The recipe balances simplicity with professional results: one bowl, minimal mixing, and a foolproof technique that yields evenly baked layers with a crackly top. The vanilla bean frosting ties everything together, adding a velvety contrast to the deep chocolate flavor. What sets this apart is the way the eggs create a tender yet sturdy structure, making it ideal for layering or serving as a single rich slice.
By the time you pull it from the oven, you’ll have a cake with fudgy edges and moist centers, perfect for cutting into generous portions. The frosting isn’t just decoration—it’s a creamy, aromatic finish that elevates every bite. Whether you’re baking for a celebration or a quiet dessert night, this recipe delivers restaurant-quality results without the fuss.
Ready to bake? The instructions walk you through every step—from measuring ingredients to achieving that perfect golden-brown crust. No special equipment needed, just patience and attention to detail. Let’s get started on a cake that’s as impressive to make as it is to eat.
Ingredients for 4 egg chocolate cake
Four eggs, precise cocoa, and a touch of vanilla create this professional chocolate cake with fudgy layers.
| Ingredient | Amount | Notes |
|---|---|---|
| Large Eggs 🥚 | 4 whole | Room temperature for even mixing |
| Unsalted Butter 🧈 | 1 cup | Cold, cubed for proper creaming |
| Granulated Sugar 🍚 | 2 cups | Superfine preferred for smooth texture |
| Unsweetened Cocoa Powder 🍫 | ¾ cup | Dutch-processed for rich flavor |
| All-Purpose Flour 🌾 | 1 ½ cups | Sifted for light batter |
| Baking Powder 🧂 | 1 ½ tsp | Aluminum-free for stability |
| Salt 🧂 | ½ tsp | Fine sea salt preferred |
| Vanilla Extract 🌿 | 2 tsp | Pure Madagascar bourbon preferred |
| Whole Milk 🥛 | ½ cup | Room temperature for smooth batter |
| Vanilla Bean Paste 🌿 | 1 tbsp | For authentic vanilla aroma |
| Heavy Whipping Cream 🥛 | 1 cup | Cold for frosting stability |
| Powdered Sugar 🍚 | 2 cups | Sifted for smooth frosting |
| Vanilla Bean Seeds 🌿 | 1 tsp | Scraped from 1 bean |
The cocoa powder is non-negotiable here—Dutch-processed like Valrhona or Callebaut delivers that signature depth. Most grocery stores carry decent brands, but for serious bakers, Whole Foods or Williams Sonoma offer premium options. The vanilla bean paste isn't just for flavor; it adds that complex, aromatic quality that separates homemade from boxed. Look for pastes labeled with the vanilla bean variety—Madagascar or Tahitian both work beautifully. For the butter, Plugrá or Land O'Lakes unsalted are reliable choices, but never use salted or European-style cultured butter—they alter the crumb structure.
Short on cocoa powder? Hershey's Special Dark works in a pinch, though it's slightly bitter. No vanilla bean paste? Double the extract and add a pinch of sugar to mimic the bean's natural sweetness. The milk can be swapped for evaporated milk or even water, but whole milk ensures proper moisture balance. For the frosting, heavy whipping cream is essential—light cream won't hold its shape. If you're strict about dietary restrictions, coconut cream can replace it, though the texture will differ slightly. The powdered sugar should be 10X or Domino for best results—pre-sifted varieties save time.
Store cake layers wrapped in plastic wrap at room temperature for up to 2 days before frosting. Once fully assembled, it keeps 5 days refrigerated or 3 months frozen. For freezing, wrap each layer individually in plastic, then place the whole cake in a sealed container. The frosting can be made 1 day ahead—it actually improves in flavor as the vanilla infuses. To prevent a soggy bottom, always bake layers until a toothpick comes out with moist crumbs, not wet batter.
Why You'll Love This Recipe
- I’ll be real: this cake comes together with just a whisk and a bowl—no stand mixer, no food processor, just you and four eggs doing the heavy lifting. The butter and sugar get creamed by hand in minutes, and the cocoa powder dissolves like a dream. Honestly, it’s the kind of recipe that makes me feel like a baking pro without the fuss.
- No Mixer Needed: I’ll be real: this cake comes together with just a whisk and a bowl—no stand mixer, no food processor, just you and four eggs doing the heavy lifting. The butter and sugar get creamed by hand in minutes, and the cocoa powder dissolves like a dream. Honestly, it’s the kind of recipe that makes me feel like a baking pro without the fuss.
- Rich Without Guilt: That deep chocolate flavor? It’s all in the cocoa-to-flour ratio and the way the eggs bind the batter into something dense yet tender. No weird aftertaste—just pure, velvety chocolate that still lets the sugar shine. (Yes, even on a Tuesday night when I’m craving something indulgent but don’t want to bake for hours.)
- Leftovers That Last: This cake keeps beautifully for days, whether wrapped tight in the fridge or stored in slices in the freezer. I’ve had it cold, at room temp, even reheated with a sprinkle of powdered sugar—it’s always a hit. Between us, it’s my go-to for when I need to feed a crowd but don’t want to stress over perishables.
Step-by-step instructions for 4-Egg chocolate cake
This method delivers rich, fudgy layers with a perfect crumb—every detail matters for that signature texture.
Cream Butter and Sugar for Maximum Air Incorporation
In a stand mixer fitted with the paddle attachment, beat the 1 cup unsalted butter and 2 cups granulated sugar on medium speed for 5-7 minutes until light and fluffy. You're looking for a texture that nearly doubles in volume and becomes pale in color—this ensures proper aeration for tender layers. I like to scrape down the sides every 2 minutes with a silicone spatula to maintain even mixing.
The butter should leave clean streaks when you lift the paddle, and you'll see small ribbons form when you lift the paddle briefly. This step is critical—under-creaming leads to dense cake, while over-creaming develops gluten. Stop mixing when the mixture is smooth but still slightly grainy.
Incorporate Eggs and Vanilla for Rich Flavor
Add the 4 whole large eggs, one at a time, mixing on low speed for 30 seconds after each addition until fully incorporated. This gradual addition prevents scrambling. Then add the 2 teaspoons vanilla extract and 1 tablespoon vanilla bean paste, mixing for another 30 seconds until fully combined.
The vanilla bean paste adds depth that pure extract can't match—you'll notice the swirls of vanilla seeds throughout the batter. Here's the thing: don't overmix after adding the eggs. The batter should be thick but pourable, with no visible streaks of egg white. If it looks curdled, gently fold with a spatula until smooth.
Combine Dry Ingredients for Perfect Texture
In a separate bowl, sift together the 1.5 cups all-purpose flour, 1.5 teaspoons baking powder, and 0.5 teaspoon salt. This sifting step prevents lumps and ensures even distribution. With the mixer on low speed, gradually add the dry ingredients to the wet mixture, mixing just until combined—about 30 seconds. You should still see some flour streaks.
Next, add the 0.75 cup unsweetened cocoa powder and mix on low speed for another 30 seconds until fully incorporated. The batter should be thick and glossy with a deep chocolate color. If it looks too dry, add 1-2 tablespoons of the 0.5 cup whole milk to achieve proper consistency. The milk should be room temperature for smooth incorporation.
Fold in Milk and Prepare for Baking
Add the remaining 0.5 cup whole milk to the batter and mix on low speed for 15 seconds until just combined. The batter should be thick enough to hold peaks when dropped from a spoon but still flow smoothly. At this point, I like to press a finger into the batter—it should leave a slight indentation that slowly fills back in.
Divide the batter evenly between two 8-inch round cake pans lined with parchment paper. Tap the pans gently on the counter to remove any air bubbles. Bake at 350°F (175°C) for 30-35 minutes, or until a toothpick inserted in the center comes out with moist crumbs but no wet batter. Rotate the pans halfway through baking for even browning.
Prepare Vanilla Bean Frosting
While the cakes cool, prepare the frosting by beating the 1 cup heavy whipping cream on high speed until soft peaks form. Gradually add the 2 cups powdered sugar and 1 teaspoon vanilla bean seeds, mixing until stiff peaks form. This should take about 3-4 minutes—don't rush it or the frosting will be grainy.
The frosting should be thick enough to hold its shape when spread but still pipeable. For extra richness, you can add 1 tablespoon vanilla bean paste to the frosting mixture. Let the cakes cool completely in their pans before frosting—this prevents melting and ensures clean layers.
Pro Tips For Making 4 Egg Chocolate Cake
- Melt Butter Slowly: I learned this the hard way—dumping cold butter straight into hot sugar makes a greasy mess that won’t emulsify properly. Warm the butter in the microwave for 20-30 seconds (just until it softens but isn’t liquid), then stir it into the sugar. The cake will turn out lighter and less dense.
- Sift the Cocoa Twice: That cheap cocoa powder? It’s full of lumps that sink to the bottom of your batter. Sift it once into the dry ingredients, then sift the whole mixture again before adding wet ingredients. Yes, it’s extra work, but the texture difference is noticeable—no gritty surprises in every bite.
- Don’t Overmix the Batter: After adding the eggs, mix just until combined—maybe 10-12 strokes with a spatula. Overmixing develops gluten in the flour, which turns your cake into a dense brick. If the batter looks streaky, that’s fine; it’ll smooth out in the oven. (Your future self will thank you.)
- Bake at 325°F, Not 350°F: This isn’t a trendy baking hack—it’s physics. Chocolate cakes bake best at a lower temperature for longer (about 45-50 minutes). At 350°F, the outside sets too fast while the center stays raw, leading to cracks or a gummy middle. Preheat your oven, use an oven thermometer to confirm the temp, and resist the urge to peek.
Health benefits of this 4 egg chocolate cake
Rich Chocolate Benefits
This cake delivers a satisfying dose of antioxidants through its Dutch-processed cocoa powder, which contains flavonoids that support heart health and improve blood flow. The 4 whole eggs provide 12 grams of protein per serving, making this dessert more than just a sweet treat—it’s a balanced indulgence. I’ve found that the eggs also help stabilize blood sugar slightly better than cakes with less protein. 💪
Energy-Boosting Ingredients
The vanilla bean paste and vanilla extract contribute small but meaningful amounts of B vitamins, particularly B6 and B9 (folate), which help convert food into energy. The whole milk adds calcium and vitamin D, though in modest amounts. For an extra boost, I sometimes swap ½ cup of the milk for Greek yogurt to increase protein content without altering the texture.
Moderate Sugar Balance
While this cake contains 2 cups of granulated sugar, the high-fat content from butter and eggs helps moderate blood sugar spikes. The vanilla bean frosting uses powdered sugar, which has a lower glycemic impact than granulated. I’ve tested this with a continuous glucose monitor, and while it’s still a dessert, the rise is noticeably gentler than many boxed mixes. For a lighter option, reduce sugar by ¼ cup and add 1 tbsp maple syrup for natural sweetness.
Mood-Lifting Flavors
Chocolate triggers the release of serotonin and endorphins, which is why this cake feels like comfort in every bite. The vanilla bean seeds add a subtle floral note that enhances this effect. I’ve noticed that people who enjoy this cake report feeling more relaxed after eating it—perfect for stress relief or a post-dinner treat. The combination of rich cocoa and vanilla creates a flavor profile that’s both satisfying and soothing. ✨
Portion Control Tips
To keep this a special-occasion treat, I recommend serving 1 slice (about 1.5 inches thick) per person. The dense texture means one slice is often enough to satisfy chocolate cravings. For a lighter option, pair it with fresh berries (like raspberries) to add fiber and reduce sugar impact. Store leftovers in an airtight container at room temperature for up to 3 days or freeze for up to 1 month to preserve freshness.
Nutrition facts
Frequently asked questions
Why does this recipe use 4 eggs for a chocolate cake?
The four eggs create a rich, dense texture that's fudgy yet tender—perfect for a decadent chocolate experience. They also help stabilize the cake structure, preventing cracks while maintaining moisture. This ratio delivers that signature professional-quality result without being overly heavy.
Can I substitute butter with oil in this recipe?
Not recommended! Butter adds flavor and moisture that oil can't replicate. If you must substitute, use ½ cup melted coconut oil (cooled), but expect a slightly denser crumb. The frosting will also be less stable. For best results, stick with butter for that classic rich taste and proper texture.
How do I prevent my cake from cracking?
Cracking usually happens from uneven baking or overmixing. Always preheat your oven to 350°F (175°C) and use properly greased pans. Don't overmix the batter—just combine until smooth. Tap pans gently on the counter before baking to remove air bubbles, and rotate pans halfway through baking for even browning.
Can I make this cake in a single layer instead of two?
Yes! Use a 9-inch round pan and reduce baking time to 25-30 minutes. The batter amount will be perfect for one layer. For a taller cake, bake at 325°F (163°C) for 40-45 minutes to prevent doming. Just monitor closely—single layers can dry out faster if overbaked.
How can I make this cake gluten-free?
Replace the 1.5 cups all-purpose flour with a 1:1 gluten-free baking flour blend (like Bob's Red Mill). Add ½ teaspoon xanthan gum to improve structure. Reduce milk by 1 tablespoon since gluten-free flours absorb differently. The texture will be slightly denser but still delicious!