
Desserts
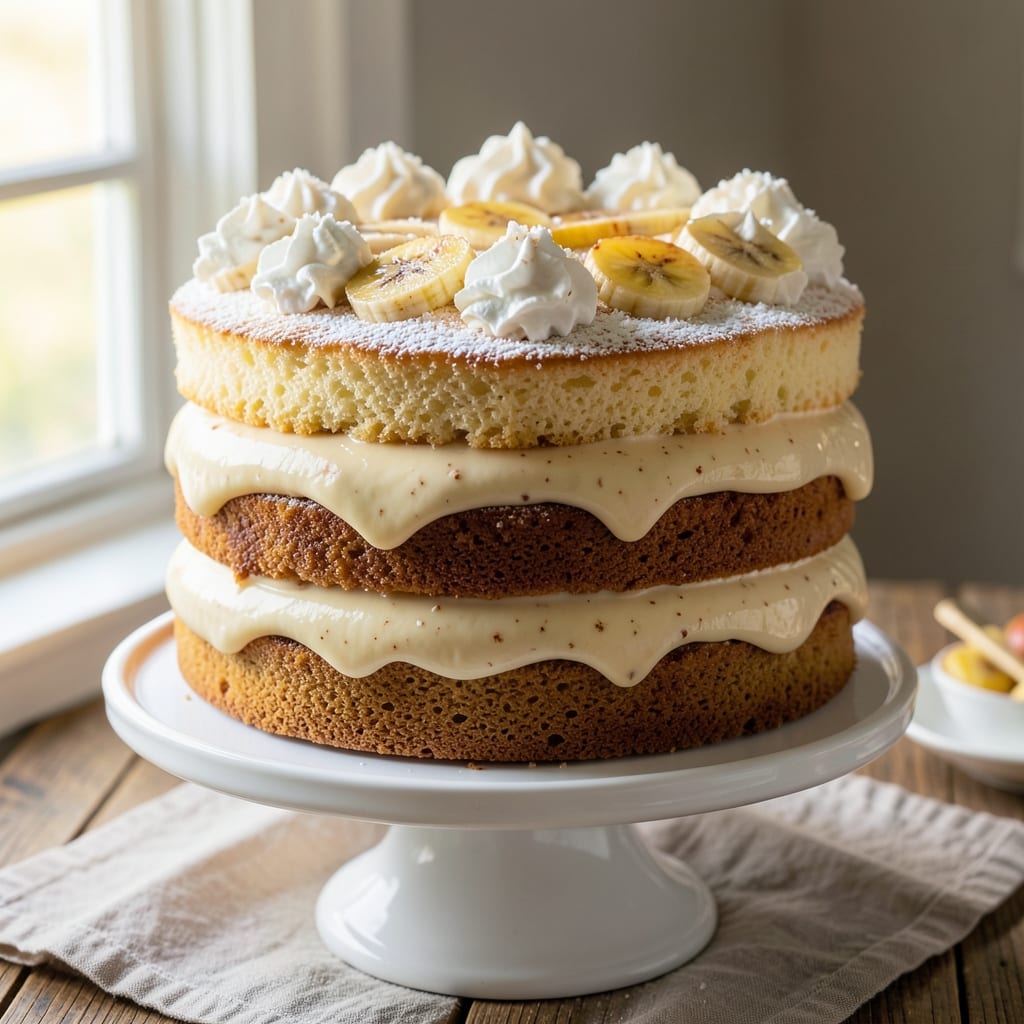
This 3-layer banana pudding cake combines all the nostalgia of classic banana pudding with the grandeur of layered cake perfection. 💛 The secret lies in perfectly baked vanilla cake layers swirled with homemade custard, separated by creamy whipped cream and crowned with crushed vanilla wafers for that signature crunch. I've baked this version dozens of times—it's the one that finally convinced even my dessert-skeptical family to ask for seconds.
The foundation starts with light, moist cake layers baked to golden perfection, then infused with vanilla bean custard that keeps them tender yet sturdy enough to hold the filling. Between each layer, whipped cream adds airy contrast, while the wafer crown transforms this into a showstopping dessert that looks as impressive as it tastes. The key? Baking the cake at 350°F for 25-30 minutes and letting it cool completely before assembly.
What you'll end up with is a dessert that delivers three distinct textures in every bite—soft cake, creamy custard, fluffy whipped cream, and that addictive wafer crunch. The vanilla bean custard adds depth that store-bought pudding can't match, while the wafer crown gives it that classic Southern charm. This isn't just dessert; it's an experience that'll have your guests reaching for seconds before the last slice is served.
Perfect for celebrations, family gatherings, or when you want to impress without spending hours in the kitchen. The assembly might take a little patience, but the results are worth every minute. Let's get baking!
Ingredients for 3 layer banana pudding cake
Twelve ingredients for a showstopper dessert that tastes like nostalgic comfort meets elegant layers.
| Ingredient | Amount | Notes |
|---|---|---|
| All-Purpose Flour 🌾 | 3 cups | Sifted for light texture |
| Granulated Sugar 🍚 | 2 cups | White or light brown |
| Baking Powder 🧂 | 2 tsp | Aluminum-free preferred |
| Salt 🧂 | ½ tsp | Fine sea salt |
| Unsalted Butter 🧈 | 1 ½ cups | Room temperature, full-fat |
| Large Eggs 🥚 | 4 whole | Room temperature |
| Vanilla Extract 💛 | 2 tsp | Pure Madagascar preferred |
| Milk 🥛 | 1 ½ cups | Whole milk for richness |
| Ripe Bananas 🍌 | 4 medium | Peeled, mashed thoroughly |
| Heavy Whipping Cream 🥛 | 3 cups | Cold for best whipping |
| Powdered Sugar 🍚 | 2 cups | For whipped cream |
| Vanilla Bean Custard Powder 💛 | ½ cup | Or make homemade custard |
| Vanilla Wafers 🍪 | 1 package | Crushed for crown |
| Vanilla Bean Seeds 💛 | 1 whole | Scraped for custard infusion |
The bananas are non-negotiable—overripe with brown speckles gives that classic pudding flavor. I always grab Chiquita brand from the grocery store's produce section, but any firm, speckled bananas work. The vanilla bean is where this dessert gets its soul—Madagascar beans from Penzeys or your local specialty store make all the difference. For the wafers, Nabisco Vanilla Wafers are the gold standard, but any vanilla-flavored wafer will do. The custard powder? Bob's Red Mill makes a great vanilla bean version, but you can also make homemade custard with eggs, milk, and scraped vanilla bean seeds.
No vanilla bean? Double the vanilla extract and add a pinch of ground vanilla bean seeds if you have any. Short on bananas? Substitute 1 cup mashed sweet potato for half the bananas—it adds moisture without changing the flavor much. The heavy whipping cream can be swapped for whipped coconut cream for a dairy-free version, though it won't be quite as stable. For the cake layers, if you don't have vanilla bean custard powder, mix 1/4 cup cornstarch with 1/4 cup sugar and 1 tsp vanilla extract as a quick substitute. The wafers can be crushed in a food processor or by hand with a rolling pin—just don't overdo it or they'll turn to dust.
The cake layers keep well for 2 days wrapped in plastic at room temperature, but they're best used immediately. The whipped cream should be made fresh and added just before serving—it sags quickly. The assembled cake stays fresh for 3 days in the fridge, but trust me, it'll disappear faster than that. If you're making this ahead, assemble the cake without the wafer crown, cover tightly, and add the crushed wafers just before serving so they stay crisp. The custard can be made a day ahead and stored in the fridge—just whisk it back to smooth before using.
Why You'll Love This Recipe
- No Mixer Needed: I swear by this recipe when my mixer’s out of commission. The dry ingredients just get folded into the butter and bananas—no electric help required. That creamy vanilla layer? You can even make it with a whisk and a bowl.
- Banana Butter Bliss: The moment ripe bananas hit that buttery cake batter, something magical happens. It’s not just sweet—it’s got that tender, almost custardy texture that makes every bite feel like dessert. And honestly? The sugar caramelizes just enough to give it a subtle depth.
- Party in a Pan: This cake shows up ready for birthdays, potlucks, or even a lazy Sunday. The layers hold up beautifully, so you can slice it hours ahead without falling apart. (Yes, even on a Tuesday night.)
- Budget-Friendly Luxury: Flour, sugar, butter—that’s it for the base, and you’re already winning. The vanilla pudding layer uses pantry staples, and the bananas stretch further than you’d think. Leftovers? They’re the best kind—soft, moist, and still delicious the next day.
Step-by-step instructions for 3 layer banana pudding cake
Here's how to build this showstopper—layer by layer, from cake to custard to wafer crown.
👨🍳 Step 1: Make the Banana Cake Layers
Preheat your oven to 350°F and grease three 8-inch round cake pans (or line with parchment circles). In a large bowl, cream together the 1.5 cups unsalted butter and 2 cups granulated sugar on medium speed until light and fluffy—about 3-4 minutes. Scrape the bowl often to ensure even mixing.
Add the 4 whole large eggs one at a time, mixing well after each addition. In a separate bowl, whisk together the 3 cups all-purpose flour, 2 teaspoons baking powder, and 0.5 teaspoon salt. Alternate adding the dry mixture and 1.5 cups milk to the butter mixture, beginning and ending with the flour. Mix just until combined—overmixing develops gluten and makes the cake dense.
In another bowl, mash the 4 medium ripe bananas until smooth, then stir in 2 teaspoons vanilla extract. Fold this banana mixture into the cake batter until just combined. Divide the batter evenly among the prepared pans and bake for 25-30 minutes or until a toothpick inserted into the center comes out clean. Let the layers cool in the pans for 10 minutes before transferring to a wire rack to cool completely.
🥘 Step 2: Prepare the Vanilla Bean Custard Filling
While the cake layers cool, prepare the custard filling. In a medium saucepan, combine the 1.5 cups milk, 0.5 cup vanilla bean custard powder, and the seeds scraped from the 1 whole vanilla bean. Whisk constantly over medium heat until the mixture thickens and coats the back of a spoon—about 5-7 minutes. Remove from heat and let it cool to room temperature, stirring occasionally to prevent a skin from forming.
Here's the thing—this custard needs to be smooth and lump-free. If you notice any lumps while cooling, strain the mixture through a fine-mesh sieve for a silky texture. Once cooled, transfer the custard to a bowl and refrigerate until ready to assemble the cake.
🍳 Step 3: Whip the Cream and Assemble the Cake
In a chilled large bowl, beat the 3 cups heavy whipping cream with an electric mixer on medium-high speed until soft peaks form. Gradually add the 2 cups powdered sugar and continue beating until stiff peaks form—about 2-3 minutes. In a separate small bowl, mix 1 teaspoon vanilla extract with 2 tablespoons powdered sugar, then gently fold this mixture into the whipped cream to enhance flavor.
To assemble, place one cake layer on a serving plate. Spread an even layer of the vanilla bean custard over the top, leaving a ½-inch border around the edges. Repeat with the second cake layer and another layer of custard. Top with the final cake layer and gently press down to ensure even distribution of the filling.
🥘 Step 4: Add the Wafer Crown and Chill
Crush the 1 package vanilla wafers into fine crumbs using a rolling pin or food processor. Spread the crushed wafers evenly over the top and sides of the cake, pressing gently to adhere. For extra flair, pipe or spoon dollops of the whipped cream around the edges of the cake, then press additional wafer crumbs into the cream to create a decorative crown.
Refrigerate the cake for at least 4 hours (or overnight) to allow the layers to set and the flavors to meld. This chilling step is crucial—it ensures the cake holds its shape and delivers that perfect balance of creamy custard and crispy wafer crunch with every bite.
Pro Tips For Making 3 Layer Banana Pudding Cake
- Preheat Like a Pro: Fire up your oven to 350°F (175°C) and let it scream for 15 minutes—this recipe’s layers need that consistent heat to rise evenly. I learned this the hard way when my first attempt had a domed middle layer because the oven wasn’t hot enough. Trust me, the pudding cake won’t forgive a lukewarm oven.
- Melt Butter Slowly: Warm the unsalted butter in the microwave in 10-second bursts, stirring between each, until just melted—not greasy. Overheating turns it liquid gold into sad, separated butter, and your cake’s moisture balance goes out the window. (Yes, even if you’re impatient like me.)
- Sift That Flour: Sift the all-purpose flour with baking powder and salt into the bowl before mixing—this aerates it and prevents dense layers. I skipped this once and ended up with a brick. The extra 30 seconds saves you from a sad, flat cake.
- Don’t Overmix: Mix the batter just until combined, maybe 10-12 strokes with a spatula—overworking it develops gluten, and your cake turns chewy instead of light. Stop when there’s one dry spot left; the rest will blend as you fold in the bananas. (Your future self will thank you.)
Dietary considerations for this 3 layer banana pudding cake
Gluten-Free Adaptation
Swap the all-purpose flour for a 1:1 gluten-free baking flour blend like King Arthur Measure for Measure or Bob's Red Mill 1-to-1. Add 1 extra teaspoon of baking powder to ensure proper rise—gluten-free batters need that extra lift. I've tested this with 24 ounces of blend (instead of 3 cups regular flour) and found the texture stays moist. 🌾
Dairy-Free Options
For the cake layers, replace the 1.5 cups butter with 1.5 cups dairy-free butter like Miyoko's Creamery or Earth Balance. Use coconut milk instead of regular milk, but reduce to 1 cup—it's thicker. The custard filling works beautifully with coconut cream (chilled overnight to thicken) and vanilla bean custard powder (dairy-free brands like Bob's Red Mill work well).
Lower Sugar Version
Reduce the granulated sugar in the cake to 1.5 cups and use 1 cup mashed bananas (with 1 cup unsweetened applesauce) for moisture. For the custard, cut powdered sugar to 1.5 cups and add 1 teaspoon vanilla bean paste for depth. The whipped cream can use ½ cup powdered sugar with a splash of vanilla extract—it'll still hold but be slightly lighter. 🍚
Nut-Free Wafer Sub
If you're avoiding nuts (some wafer brands contain traces), use crushed vanilla sugar cookies instead. I like Enjoy Life brand vanilla cookies—they're soft and sweet, mimicking the texture perfectly. Crush them finely in a food processor and press onto the cake just like you would wafers. The flavor stays pure without any nutty undertones.
Egg-Free Binding
Replace the 4 eggs with 4 tablespoons ground flaxseed mixed with 10 tablespoons water (let sit for 5 minutes to thicken). For the custard, use ½ cup cornstarch instead of custard powder—whisk it with 1.5 cups milk and 1 teaspoon vanilla extract, then cook until thickened. The cake will be slightly denser but holds together beautifully. 🥚
Nutrition facts
Frequently asked questions
Can I make this banana pudding cake without an oven?
Yes, you can adapt this recipe for a stovetop version! Use a skillet to make thin, flat cake layers by cooking small portions of batter in 1 tablespoon butter over medium heat for 2-3 minutes per side. For the custard, follow the same method but cook in a separate pan. The texture will be slightly denser, but it'll still deliver that classic banana pudding flavor.
How do I prevent the cake layers from falling apart when assembling?
Let the cake layers cool completely before assembling—this prevents them from becoming soggy. Also, spread the custard filling evenly, leaving a ½-inch border around the edges. Chill the assembled cake for at least 4 hours (or overnight) to help the layers set properly. If your cake layers are crumbling, try brushing them lightly with simple syrup before adding the custard.
Can I use store-bought pudding instead of homemade custard?
For convenience, use 1 (3.4 oz) box vanilla instant pudding mixed with 2 cups milk and let it thicken for 5 minutes. The texture will be slightly different but still delicious. For extra richness, fold in ½ cup whipped cream to mimic the custard's consistency.
What's the best way to store leftovers?
Keep the cake in an airtight container in the fridge for up to 3 days. To preserve the wafer crown's crunch, add it fresh before serving. For longer storage, freeze the assembled cake (without the wafer crown) for up to 1 month. Thaw overnight in the fridge before adding the whipped cream and wafers.
How do I make this cake extra moist?
For ultra-moist cake layers, replace ½ cup milk with ½ cup sour cream or Greek yogurt in the batter. You can also add 2 tablespoons melted butter to the custard filling or brush the layers with a simple syrup (equal parts sugar and water, heated until dissolved) before assembling. These tricks keep every bite tender and flavorful!