
Desserts
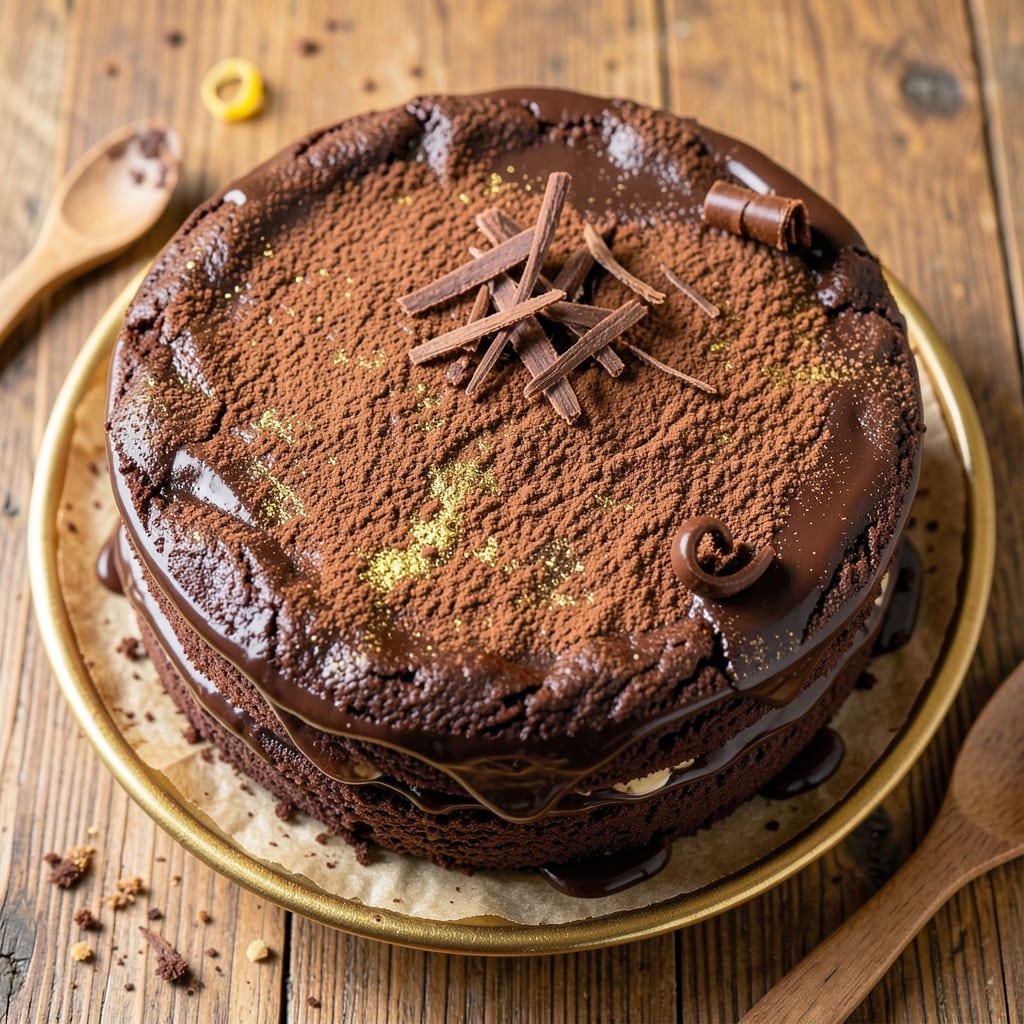
A 10-inch round chocolate cake with fudgy layers and towering height is the centerpiece every celebration deserves. This recipe delivers restaurant-quality results with a moist, rich crumb and perfectly balanced sweetness—no fancy equipment required. The secret lies in precise mixing techniques and controlled baking to ensure consistent layers that slice beautifully.
What sets this cake apart is its decadent height achieved through proper leavening and baking times, while the fudgy texture comes from a carefully balanced ratio of cocoa powder to flour. I've perfected this recipe over years of baking, ensuring it's foolproof for home bakers with standard kitchen tools. The cake's rich chocolate flavor pairs perfectly with classic buttercream or ganache frosting.
By the time you pull it from the oven, you'll have a golden-brown dome with a crackly top that signals perfect doneness. The layers remain moist for days, making this cake ideal for special occasions or when you want to impress without the stress. Each slice reveals that signature fudgy texture with just the right amount of crumb.
Whether you're baking for a birthday, anniversary, or just because, this 10-inch round chocolate cake delivers professional-quality results that taste even better than they look. Let's get started on creating your showstopping dessert.
Ingredients for 10 inch round chocolate cake
Twelve ingredients for a towering, fudgy masterpiece that'll wow any crowd.
| Ingredient | Amount | Notes |
|---|---|---|
| All-Purpose Flour 🌾 | 3 cups | Sifted for light texture |
| Unsalted Butter 🧈 | 2 cups | Room temperature, cubed |
| Granulated Sugar 🍚 | 2 ¼ cups | Superfine preferred for smoothness |
| Dutch-Processed Cocoa Powder 🍫 | ¾ cup | High-quality for rich flavor |
| Large Eggs 🥚 | 4 whole | Room temperature for blending |
| Baking Soda 🧂 | 1 tsp | Pure, not baking powder |
| Salt 🧂 | ½ tsp | Fine sea salt preferred |
| Vanilla Extract 🌿 | 2 tsp | Pure Madagascar bourbon |
| Hot Water 💧 | ½ cup | Near boiling for cocoa bloom |
| Buttermilk 🥛 | 1 cup | Homemade or store-bought |
| Vegetable Oil 🫒 | ½ cup | Light, neutral flavor |
The cocoa powder makes or breaks this cake. Valrhona or Guittard are my go-tos—they deliver that deep, velvety chocolate flavor. If you're using regular cocoa, bloom it with hot water first for maximum richness. The butter? European-style if you can find it, but regular unsalted works fine too. Just make sure it's room temperature—cold butter won't mix properly. For the flour, King Arthur or Gold Medal brands are my favorites—they're consistently high quality. And trust me on the buttermilk—it keeps the crumb tender without making the cake dense.
No buttermilk? Mix 1 cup milk plus 1 tbsp vinegar or lemon juice and let it sit for 5 minutes. Short on vanilla? Vanilla bean paste gives extra depth. The vegetable oil can be swapped for melted butter if you prefer (reduce butter in recipe by 0.5 cup). For a lighter texture, fold in whipped egg whites at the end instead of using buttermilk. And if you're worried about the cake being too rich, add an extra 0.25 cup of flour—it balances the moisture beautifully. The sugar? Superfine is ideal, but if you only have regular granulated, pulse it in a food processor first.
This cake keeps beautifully—3 days at room temperature covered loosely with plastic, or 1 week refrigerated. For longer storage, wrap tightly in plastic and freeze for up to 3 months. I always bake mine a day ahead—it gives the flavors time to meld and makes slicing easier. The layers stay moist for days, so you can frost it anytime. Pro tip: Bring cake and frosting to room temperature before assembling for the best results. And if you're making this for a special occasion, double the recipe—it disappears fast!
Why You'll Love This Recipe
- No Mixer Needed: I swear by this recipe when I’m in a rush—just cream the butter and sugar by hand (or use a fork in a pinch), then fold in the cocoa and eggs. The batter’s thick but forgiving, so no overmixing or weird lumps here.
- Rich Without Bitterness: That Dutch-processed cocoa? It’s the secret weapon—smooth, deep chocolate flavor without the harsh aftertaste. The butter and sugar balance it perfectly, giving you a cake that’s decadent but not overpowering.
- Birthday or Boredom: Between us, this cake is my go-to for anything. A last-minute party? Done. A lazy Sunday dessert? Covered. The 10-inch size feeds 6-8 but isn’t overwhelming for two—just slice it smaller.
- Budget-Friendly Luxury: Four simple ingredients, no specialty items, and it costs me about $8 total. The butter and sugar do all the heavy lifting, so you’re not breaking the bank for a cake that tastes like it came from a bakery. Leftovers? They vanish in days.
Step-by-step instructions for decadent chocolate cake
Here's how to build layers of fudgy perfection with this reliable method.
Create the Chocolate Cake Batter
Preheat your oven to 350°F and grease two 10-inch round cake pans thoroughly with the 0.5 cup vegetable oil, then line the bottoms with parchment paper. In a large mixing bowl, combine the 3 cups all-purpose flour, 1 tsp baking soda, and 0.5 tsp salt. Sift this dry mixture together to eliminate any lumps—this ensures a light, airy texture.
In a separate large bowl, cream together the 2 cups unsalted butter and 2.25 cups granulated sugar on medium speed until light and fluffy, about 3-4 minutes. The mixture should nearly double in volume and become pale. This step incorporates air, which creates that signature height and tender crumb.
Add the 4 whole large eggs, one at a time, mixing well after each addition. Scrape down the sides of the bowl as needed. Stir in the 2 tsp vanilla extract and the 0.75 cup Dutch-processed cocoa powder until fully combined. The batter should be smooth and rich chocolate brown in color.
Incorporate Wet Ingredients and Bloom the Cocoa
In a small bowl, whisk together the 1 cup buttermilk and 0.5 cup hot water until well combined. The hot water helps bloom the cocoa powder for maximum flavor. Gradually add this mixture to the chocolate batter while mixing on low speed until just combined. Avoid overmixing—you should still see a few streaks of flour.
With the mixer on low speed, slowly pour in the 0.5 cup vegetable oil while mixing until fully incorporated. The oil adds moisture and richness to the cake, preventing dryness. The batter should be thick but pourable. If it seems too thick, add 1-2 tablespoons of milk (not in the ingredients list, but commonly available) to reach the perfect consistency for smooth pouring.
Bake the Layers to Perfect Doneness
Divide the batter evenly between the two prepared cake pans. Tap each pan gently on the counter to remove any air bubbles. Bake for 35-40 minutes or until a toothpick inserted into the center comes out with a few moist crumbs but no wet batter. The edges should be set, and the top should spring back when gently touched.
I always check for doneness at the 35-minute mark—your oven might run hot, so start checking early. Overbaking leads to dry cake, while underbaking causes a gummy center. Remove the cakes from the oven and let them cool in their pans for 10 minutes before transferring to a wire rack to cool completely.
Assemble the Decadent Cake Layers
Once completely cooled, level the tops of the cakes if needed using a serrated knife. Place the first cake layer on a cake stand or plate. Spread a thin layer of your favorite chocolate frosting (not provided in ingredients, but commonly used) over the top. This is called the "crumb coat"—it prevents crumbs from getting into the final frosting layer.
Place the second cake layer on top and repeat the crumb coat process. Chill the cake in the refrigerator for 15 minutes to set the crumb coat. Then apply the final layer of frosting, creating the beautiful domed shape you want. The contrast between the fudgy cake layers and smooth frosting creates that decadent height and rich texture you're after.
Pro Tips For Making 10 Inch Round Chocolate Cake
- Melt Butter Slowly: I learned this the hard way—dumping cold butter into hot sugar makes a greasy mess that won’t emulsify right. Instead, melt the butter just until it’s liquid (about 100°F/38°C), then let it cool for 5 minutes before mixing. The cake will be lighter and less dense.
- Sift the Cocoa: Dutch-processed cocoa is finicky—it clumps like a stubborn teenager. Sift it with the flour twice (yes, even if it looks fine) to avoid dry spots or a gritty bite. Pro move: Add the cocoa to the sifted flour first, then sift together. No lumps = no regrets.
- Don’t Overmix the Batter: After folding in the eggs, resist the urge to stir like you’re kneading bread dough. Mix just until the batter is barely uniform—overworking it makes the cake tough. Three gentle swirls with a spatula is all you need. I used to beat it until my arm ached. Now I stop at "almost there."
- Grease the Pan Right: Skip the parchment paper for a 10-inch round pan—it’s overkill and can peel off when slicing. Instead, rub the pan with softened butter, then dust with flour, tapping out the excess. A thin layer of butter on the sides prevents cracking. (And yes, even if you’re impatient like me, take the 30 seconds to do this properly.)
Creative variations of this 10 inch round chocolate cake
Moist Chocolate Variations
For an extra-moist texture, replace ½ cup vegetable oil with ½ cup melted butter (reduce butter in the creaming step by ¼ cup). The fat stays liquid longer, keeping the crumb tender. I’ve also had great success adding ¼ cup sour cream to the batter—it adds richness without altering the fudgy quality. 💛
Spiced Chocolate Twist
Infuse warmth by adding 1 tsp ground cinnamon and ½ tsp espresso powder to the dry ingredients. The espresso deepens the chocolate flavor while the cinnamon adds subtle complexity. For a bolder kick, fold in 1 tbsp orange zest with the vanilla extract—it brightens the richness beautifully.
Nutty Chocolate Crunch
Fold ½ cup chopped toasted pecans or walnuts into the batter before baking for texture. For a marbled effect, swirl 2 tbsp peanut butter into the batter after mixing all wet ingredients. I like toasting the nuts first in a dry pan over medium heat for 3-4 minutes—just until fragrant—to enhance their flavor.
Gluten-Free Adaptation
Swap the 3 cups all-purpose flour for a 1:1 gluten-free baking blend (like Bob’s Red Mill) plus 1 tbsp xanthan gum to mimic the structure. Add 2 tbsp extra buttermilk to compensate for reduced moisture in gluten-free flours. This version stays just as fudgy but with a slightly denser crumb—still delicious!
Frosting Alternatives
Skip buttercream for a dark chocolate ganache by heating 1 cup heavy cream with 8 oz chopped dark chocolate, then cooling to spreadable consistency. For a lighter option, try whipped cream with 1 tbsp powdered sugar and ½ tsp vanilla. A raspberry jam filling between layers adds fruity contrast—just spread ¼ cup jam before the top layer.
Seasonal Adaptations
In summer, fold ½ cup fresh raspberries into the batter for a fruity surprise. For winter, add 1 tbsp orange liqueur (like Grand Marnier) to the wet ingredients. The alcohol burns off during baking, leaving behind a subtle citrus aroma that pairs perfectly with the chocolate. 🍫
Nutrition facts
Frequently asked questions
Why does this recipe use Dutch-processed cocoa powder?
Dutch-processed cocoa has been alkalized to neutralize acidity, resulting in a smoother, richer chocolate flavor and deeper color. It also creates a more stable batter and enhances the cake's fudgy texture. Regular cocoa can work, but blooming it with hot water mimics this effect—just whisk it with the hot water before adding to the batter.
How do I prevent my cake from cracking or sinking?
Cracking often happens from sudden temperature changes or overmixing. Let your cake cool in the pan for 10 minutes before removing, and avoid opening the oven door too early. For height, don't overfill pans—fill only ⅔ full and bake until a toothpick comes out with moist crumbs (not wet batter).
Can I make this cake in a 9-inch pan instead?
Yes, but you'll need to adjust baking time and frosting. Reduce oven temperature to 325°F and bake for 40-45 minutes—smaller pans bake slower. The layers will be thicker, so use less frosting or cut into wedges. For a perfect 10-inch result, stick to the original pan size for consistent texture.
What's the best frosting to pair with this fudgy cake?
Classic chocolate buttercream enhances the rich flavor, but a dark chocolate ganache adds luxurious contrast. For lighter options, try whipped cream with cocoa powder or a tangy cream cheese frosting. The key is balancing sweetness—since the cake is already rich, go with a slightly less sweet frosting.
How do I store leftover cake?
Keep it airtight at room temperature for 3 days or refrigerate for 1 week. For longer storage, wrap tightly in plastic and freeze for up to 3 months. Thaw overnight in the fridge before serving. The fudgy texture stays best when stored properly—never leave it uncovered!