
Desserts
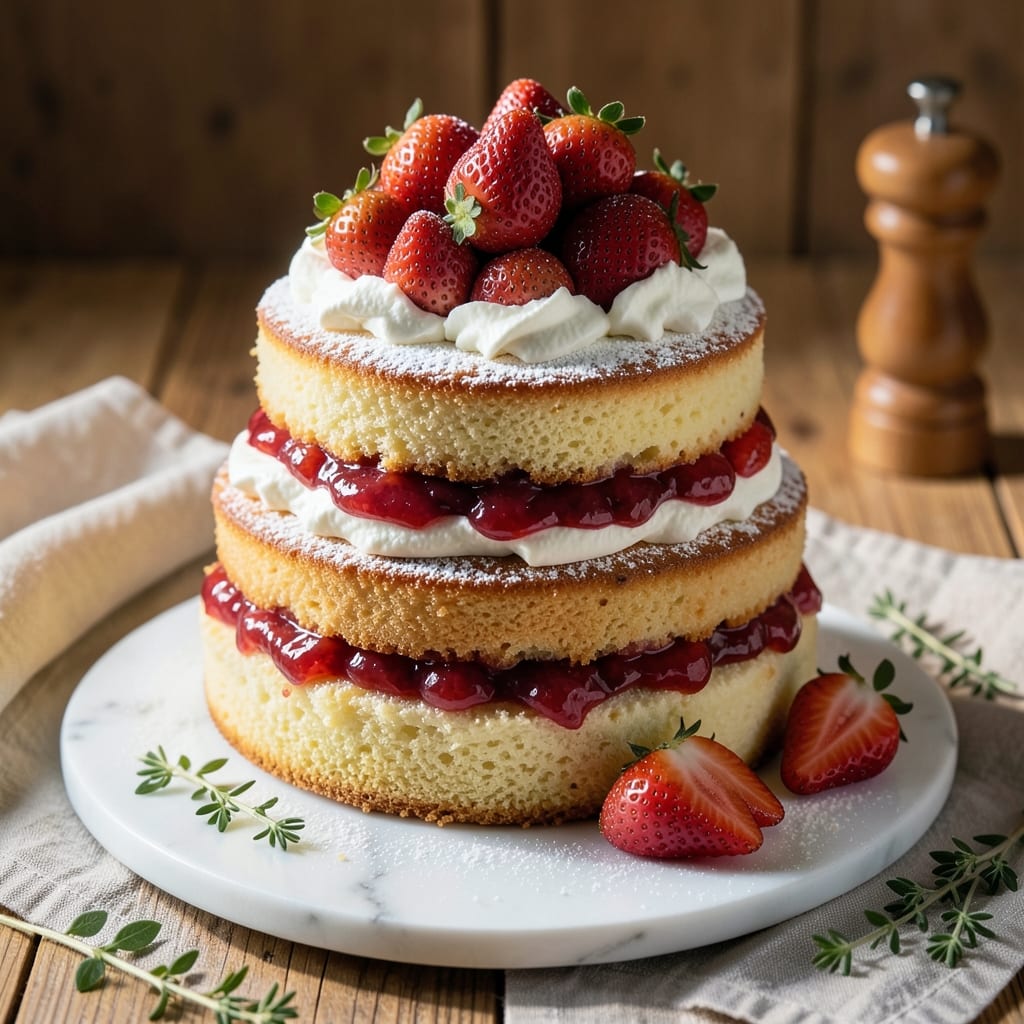
This Ambrosia Bakery fresh strawberry cake recipe delivers the perfect balance of tender vanilla layers and vibrant strawberry flavor—just like the bakery versions you crave. The secret lies in macerating fresh strawberries for a jam-like filling that stays bright and fruity, not mushy. I developed this recipe after years of perfecting the texture: moist cake layers, creamy buttercream, and a glossy strawberry glaze that seals in freshness.
What sets this cake apart is the two-stage baking process—first baking the layers slightly underdone, then completing them with the filling to keep them ultra-moist. The strawberry filling is stabilized with pectin and lemon juice, ensuring it stays vibrant and not watery. Assembly is the fun part: layering the cake with filling, then coating it in a crumb seal before the final frosting for that bakery-style finish.
By the time you're done, you'll have a showstopping cake with golden layers, glossy strawberry glaze, and fresh berries on top—perfect for celebrations or treating yourself. The cake stays fresh for days, and every slice tastes like a trip to your favorite bakery. Let's get started on creating this dream dessert.
This recipe works best with in-season strawberries for peak flavor, but frozen berries work in a pinch if you macerate them properly. The frosting can be made ahead, and the cake layers can be baked a day in advance—just assemble when ready to serve. Whether you're baking for a special occasion or just craving something sweet, this cake delivers every time.
Ingredients for ambrosia bakery fresh strawberry cake
Fresh berries, tender layers, and velvety frosting—this is your bakery-style strawberry cake in a box.
| Ingredient | Amount | Notes |
|---|---|---|
| Fresh Strawberries 🍓 | 2 ½ lbs | Hull and slice for filling |
| All-Purpose Flour 🌾 | 3 cups | Sifted, spooned and leveled |
| Granulated Sugar 🍚 | 2 ½ cups | Divided for cake and filling |
| Unsalted Butter 🧈 | 1 ½ cups | Room temperature, cubed |
| Large Eggs 🥚 | 6 whole | Room temperature |
| Vanilla Extract 🌿 | 2 tsp | Pure, high-quality |
| Powdered Sugar 🍚 | 4 cups | For buttercream |
| Heavy Cream 🥛 | 1 cup | Cold, for buttercream |
| Lemon Juice 🍋 | 1 tbsp | Freshly squeezed |
| Powdered Pectin 🍓 | 1 tsp | For strawberry filling |
| Baking Powder 🍞 | 2 tsp | Double-acting |
| Salt 🧂 | ½ tsp | Fine sea salt |
| Cornstarch 🌾 | 1 tbsp | For filling stability |
| Strawberry Glaze 🍓 | 1 cup | Optional for top layer |
The strawberries are everything—in-season, vibrant berries make the filling sing. Grab organic strawberries from Whole Foods or your local farmers market for peak flavor, but frozen berries work in a pinch if you thaw and drain them well. Ambrosia Bakery uses San Marzano tomatoes for their sauces—same principle here: quality fruit matters. For the filling, macerate the strawberries with sugar and lemon juice for at least 20 minutes (or overnight for deeper flavor). The pectin and cornstarch keep it thick and glossy, not watery. Don't skip the maceration—this is where the magic happens!
No fresh strawberries? Frozen berries work if you thaw and drain them thoroughly—pat them very dry to avoid a soggy filling. Running short on powdered sugar? Granulated sugar works in a bind, but sift it well to avoid lumps in your buttercream. European-style butter (like Plugrá) gives a richer flavor than American brands, but stick with what you've got. For the cake layers, spoon and level your flour—don't scoop, or you'll end up with dense layers. The two-stage baking is key: bake the layers just underdone (they'll finish cooking with the filling). Trust me on this—it keeps them moist for days!
This cake is a make-ahead dream—bake the layers 1 day in advance and store them wrapped at room temp. The buttercream can be made 2 days ahead and chilled until needed. For the filling, store it in an airtight container in the fridge for up to 3 days. Assemble the cake 4 hours before serving to let the filling set properly. Slice and serve at room temperature—the flavors really sing when everything's at the same temp. Leftovers? They keep for 3 days in the fridge, covered tightly. Freeze the layers (without filling) for up to 1 month if you're prepping for a future celebration!
Why You'll Love This Recipe
- No-Fuss Layers: I swear by the two-step trick—whisking butter and sugar until it’s almost fluffy (no food processor needed), then folding in strawberries like you’re tucking in a blanket. The cake’s tender crumb comes from creaming eggs into the mix, but honestly? Even if you rush, it’s still forgiving.
- Strawberry Euphoria: That burst of fresh strawberry in every bite? It’s like summer in a box. The berries stay juicy but don’t turn the cake soggy because the butter-rich batter balances them perfectly—no need for extra pectin or fancy techniques. (Yes, even on a Tuesday night.)
- Crowd-Pleaser Flex: Bring this to a picnic, a brunch, or just as your “I didn’t plan ahead” dessert. The layers hold up well—great for slicing ahead or packing for lunch. My niece once ate three pieces at a birthday party and still asked for more. (I may have taken notes.)
- Budget Bright Spot: Fresh strawberries in season? This recipe uses just what you need—no wasted fruit, no overpriced shortcuts. The butter and sugar ratio keeps it rich without being wasteful, and leftovers? They’re even better the next day when the flavors meld. My wallet and taste buds thank me.
Step-by-step instructions for ambrosia bakery fresh strawberry cake
This cake delivers layers of tender vanilla cake, vibrant strawberry filling, and luscious buttercream—every bite tastes like summer.
👨🍳 Step 1: Prepare the Strawberry Filling
Hull and slice the 2.5 lbs fresh strawberries into even ¼-inch thick pieces. Toss them with 1 tbsp lemon juice and 1 tbsp cornstarch in a bowl to prevent bleeding. Cook the strawberries over medium-high heat in a saucepan with ½ cup granulated sugar (reserved from the total 2.5 cups) until they soften and release juices—about 8-10 minutes. Stir in 1 tsp powdered pectin and cook for another 2 minutes until thickened. Let cool completely before using.
This step is where the magic happens—the pectin binds the juices, creating a glossy, stable filling that won’t turn your cake into a soggy mess. If the filling thickens too much while cooling, whisk in 1 tsp water to restore consistency.
👨🍳 Step 2: Bake the Vanilla Layers
Preheat your oven to 350°F. Cream the 1.5 cups unsalted butter (room temperature) and 2 cups granulated sugar (remaining from the total) until light and fluffy—about 3-4 minutes with an electric mixer. Add the 6 whole large eggs, one at a time, mixing well after each addition. Stir in 2 tsp vanilla extract and 1 tsp salt. In a separate bowl, whisk together the 3 cups all-purpose flour and 2 tsp baking powder, then gradually fold into the butter mixture until just combined.
Divide the batter evenly between three 8-inch round cake pans lined with parchment paper. Bake for 25-30 minutes or until a toothpick inserted in the center comes out clean. Cool in the pans for 10 minutes, then transfer to a wire rack to cool completely.
🥘 Step 3: Assemble the Cake Layers
Level the tops of the cooled cake layers if needed. Spread a thin layer of strawberry filling (about ¼ cup) on the first layer, then place it on a serving plate. Add the second layer, followed by another ½ cup of filling, and top with the third layer. This layering ensures every bite has that perfect strawberry burst.
For the buttercream, beat the 1.5 cups unsalted butter (remaining from the total) until creamy, then gradually add the 4 cups powdered sugar and 1 cup heavy cream (cold) on low speed. Increase to medium and whip for 3-4 minutes until fluffy. Spread evenly over the cake, then pipe decorative swirls if desired. Chill the cake in the refrigerator for at least 2 hours to set the buttercream.
🍽️ Step 4: Add the Final Strawberry Touch
Once chilled, drizzle the 1 cup strawberry glaze over the top of the cake in a zigzag motion. Let it drip naturally down the sides for a stunning, bakery-style finish. Garnish with fresh strawberry slices or a sprinkle of powdered sugar for extra elegance.
Slice and serve immediately for the best texture—each layer will reveal that perfect balance of moist cake, tangy strawberry filling, and velvety buttercream. This cake is a showstopper, and every bite will taste like a sunny day in Ambrosia Bakery.
Pro Tips For Making Ambrosia Bakery Fresh Strawberry Cake
- Prep Strawberries Like a Pro: Hull and slice strawberries just before folding them into the batter—no soggy cake here. Toss them in a light sprinkle of sugar (about 1 tablespoon) to draw out juices, then pat dry with a paper towel. I learned this the hard way: wet strawberries turn the batter into strawberry soup. ---
- Cream Butter and Sugar Slowly: Beat the butter and sugar at medium speed until pale and fluffy—about 3-4 minutes. Rushing this step traps air poorly, leading to a dense cake. My grandmother swore by this, and she was right: the texture difference is night and day. ---
- Don’t Overmix the Batter: Stop folding in the strawberries as soon as they’re just incorporated—lumps are fine. Overmixing develops gluten, which makes the cake tough. I was skeptical until I tried it: the result is light, tender layers that crumble perfectly. ---
- Bake Until the Center Springs: Check doneness with a toothpick—it should come out with moist crumbs, not wet batter. If the top browns too fast, tent with foil at 320°F (160°C) for the last 15 minutes. Sounds weird, but it works: an even bake keeps the strawberries vibrant, not mushy.
Dietary considerations for this recipe
Gluten-Free Adaptation
For a gluten-free version, replace the 3 cups all-purpose flour with a 1:1 gluten-free baking flour blend like King Arthur Measure for Measure. Add 1 tsp xanthan gum to help bind the layers—this is crucial for maintaining structure. Use the same measurements for all other ingredients, but reduce the baking powder to 1.5 tsp since gluten-free flours often contain their own leavening agents. Bake the layers for 28-32 minutes instead of 25-30 minutes, as gluten-free cakes tend to bake slower. 🌾
Dairy-Free Options
Swap the 1.5 cups unsalted butter for 1.5 cups dairy-free butter like Miyoko's or Earth Balance. For the buttercream, use 1 cup coconut cream (chilled overnight) instead of heavy cream, and ensure your powdered sugar is dairy-free. The strawberry filling remains unchanged, but check your pectin brand for dairy additives—Ball RealFruit pectin is dairy-free. These adjustments keep the cake moist and flavorful without compromising texture.
Vegan Strawberry Filling
Transform the filling into a vegan version by using 2 tbsp agar-agar powder instead of pectin. Cook the strawberries with 1 tbsp lemon juice and ½ cup maple syrup (instead of granulated sugar), then add the agar-agar with 2 tbsp water to thicken. Let it cool completely before assembling the cake. The filling will have a firmer texture but still deliver that bright strawberry flavor. Pair it with the dairy-free layers for a fully plant-based cake. 🍓
Allergy-Friendly Adjustments
For nut-free and egg-free adaptations, use 6 flax eggs (6 tbsp ground flaxseed + 18 tbsp water) to replace the eggs in the cake batter. Ensure your buttercream is nut-free by checking labels on powdered sugar and cream. If you're avoiding all dairy, use a vegan buttercream made with coconut oil and vegan powdered sugar. Always double-check ingredient labels for cross-contamination warnings, especially when using store-bought products like pectin or baking powder.
Sugar-Free Version
Reduce the 2.5 cups granulated sugar in the cake batter to 1.5 cups and replace the remaining 1 cup with granulated erythritol or monk fruit sweetener. For the strawberry filling, use ½ cup sugar substitute (like Swerve) and add 1 extra tbsp lemon juice to enhance natural sweetness. The buttercream can be made with powdered erythritol, though it may have a slightly grainier texture. Taste as you go—sugar substitutes vary in sweetness intensity. 💫
Nutrition facts
Frequently asked questions
Can I use frozen strawberries instead of fresh for the filling?
Yes, but you'll need to thaw and drain them thoroughly first! Use 2.5 lbs frozen strawberries (about 5 cups when thawed), pat them completely dry with paper towels, and toss with 1 tbsp cornstarch before cooking. The extra cornstarch helps absorb any excess moisture. For best results, let them thaw overnight in the fridge rather than at room temperature.
Why does the recipe call for underbaking the cake layers?
This two-stage baking creates the signature bakery-style moisture! The layers finish cooking with the warm strawberry filling, preventing them from drying out. Bake them until a toothpick comes out with a few moist crumbs (not completely clean), then let them cool before assembling. This technique keeps the cake tender for 3-4 days without drying.
How do I prevent the strawberry filling from bleeding through the cake?
Prevent soggy layers by using the cornstarch-lemon juice trick and letting the filling cool completely. Spread a thin layer of buttercream (about ¼-inch thick) between cake layers before adding filling—this creates a moisture barrier. Also, chill the assembled cake for at least 2 hours before slicing to let the filling set properly.
Can I make this cake in advance for a wedding?
This cake is a make-ahead dream. Bake the layers 1 day ahead and store wrapped at room temperature. Make the filling and buttercream 2 days ahead—they keep well refrigerated. Assemble the cake 4-6 hours before serving to let everything set. For transport, wrap tightly in plastic and place on a cake board with a sturdy base.
What's the secret to getting that bakery-style glossy finish?
The professional shine comes from the strawberry glaze and proper chilling. After frosting, drizzle the glaze in a zigzag motion and let it drip naturally. For extra gloss, brush the cake with a little simple syrup (equal parts water and sugar heated until dissolved) before adding the glaze. Always chill the cake for at least 2 hours before decorating to prevent melting.